6
ROUTER FEED DIRECTION
Therouterspindleturnsinananticlockwisedirectionwhenviewed
fromabovethetable.Forbestcontrolandqualityofcut,feedthework
intoņtheņbitņinņtheņdirectionņthatņtheņbitņwillņtendņtoņpullņtheņworkņtoņtheņ
fence.Feedtheworkpiecefromrighttoleftasshown.
SeeFigure6
Feeddirectionisextremelyimportantwhenusingapilotbitfreehand
onņtheņedgeņofņaņworkpieceņasņwellņasņwhenņusingņtheņfenceņwithņallņ
bits.
SeeFigure7a:Feed Direction without Fence
SeeFigure7b:Feed Direction with Fence
FeedDirectionArrowA
Tips Table:
WrongņDirectionņĶņHardņtoņcontrol1.ņ
Feedingtoofast-Overloadsmotor2.ņ
DullņbitņĶņOverloadsņmotor3.ņ
CuttingņtooņlargeņorņdeepņinņoneņpassņĶņOverloadsņmotor4.ņ
Feedingtooslow-Leavesfrictionburnsonwork.5.ņ
ROUTING USING THE FENCE
Unplugņtheņrotaryņtoolņbeforeņmakingņanyņfenceņadjustmentsņorņbitņ1.ņ
changes.Feedtheworkagainsttherotationofthebitasshown.
Mostņfenceņcuttingņisņdoneņwithņtheņsupportņwedgeņadjustedņtoņ
theņrightņwhereņitņisņinņlineņwithņtheņfence.
SeeFigure8:Fence
ClampņScrewņNutA
FeedDirectionB
SupportņWedgeC
Centerņcylinderņofņtheņguardņcanņbeņadjustedņupņwhenņmakingņ2.ņ
cutsņusingņtheņfence.ņLoosenņthumbņnut,ņliftņtheņcylinderņupņandņ
secureņbyņtighteningņthumbņnut.
Whenņshapingņsmallņpiecesņorņwhenņfinishingņtheņcutņonņnarrow,ņ3.ņ
longņpieces,ņuseņaņpushņstick.ņUseņ5ņxņ50ņxņ200ņmmņ(metrics)ņ
pieceņofņlumberņnotchedņasņshownņtoņmakeņthisņpushņstick.ņItņwillņ
enableņyouņtoņkeepņyourņhandsņawayņfromņtheņcuttingņarea.
SeeFigure9:Feed Direction for Straight Cuts with Fence
LargeņKnobA
CenterņCylinderB
ThumbNutC
PushņStickD
Tocutastraightgroove,installthebitandsetthedepthofcut4.ņ
usingthedepthadjustmentknobasshowninFig.4.Loosenlarge
knobņonņleftņendņofņfenceņassemblyņtoņproperņdistanceņfromņbitņtoņ
givedesiredgroovelocation.Retightenlargeknob.Takeatrialcut
onņscrapņlumberņtoņcheckņdepthņandņlocationņofņgroove.
Whenņtrimmingņtheņentireņedgeņofņaņworkpiece,ņadjustņtheņsupportņ5.ņ
wedgeforsupportoftheworkpieceontheleftsideofthecutter.First,
adjustthefencetocontroltheamountofcut.Takeatrialcutofabout
50mmlongandchecktheamountofcut.Turnrotarytooloff.Loosen
wedgeņclampņnutņandņslideņwedgeņtoņleftņuntilņwedgeņcontactsņ
workpiece.ņRetightenņclampņnutņtoņsecureņwedgeņtoņfence.ņWorkpieceņ
willnothavesupportonbothsidesofthecutter.(SeeFig.8)
!
WARNING
Place material between router bit or
accessory and fence while routing or
sanding edge.
ROUTING USING PILOT BITS
Whenņbitsņwithņpilotsņareņtoņbeņused,ņmoveņtheņfenceņbackņonlyņ1.ņ
enoughņtoņallowņtheņamountņofņcutņtoņbeņmade.ņKeepingņtheņfenceņ
closeņtoņtheņbitsņallowsņtheņfenceņtoņserveņasņaņrearņguard.ņInņ
specialņcasesņwhenņtheņfenceņmustņbeņremovedņfromņtheņtable,ņ
adjustņtheņcentreņcylinderņofņtheņguardņdownņtoņprovideņprotectionņ
fromņrevolvingņcutter.
Onlypilotedbitscanbeusedwithoutthefence.Theworkpiece2.ņ
shouldņbeņkeptņbetweenņtheņcutterņandņtheņoperator,ņandņfedņfromņ
rightņtoņleft.ņ
Feedtheworkpiecepastthecutterwithoutstoppingandwith3.ņ
aņconsistentņspeed,ņAņchangeņinņfeedņorņaņdwellņwillņcauseņanņ
irregularņcut.
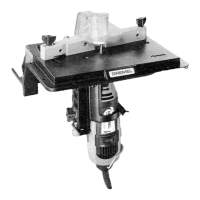
EXPANDED TABLE WORK SURFACE
TheShaper/Routertableisdesignedtomakeiteasytoexpandthe
sizeņofņtheņworkingņsurface.ņUseņ10ņmmņthickņsolidņcoreņplywood.ņ
Cutņaņrectangularņholeņinņtheņplywoodņtoņfitņoverņtheņtableņandņsecureņ
usingņ(8)ņ#10ņwoodņscrews,ņ12ņmmņinņlength.ņSupportņtheņtableņatņ
bothņendsņbyņsecuringņ40ņmmņhighņlumberņsupportsņtoņtheņplywoodņ
base.ņ(SeeņFig.10)ņ(Hardwareņnotņincluded)
SeeFigure10:
40ņmmņA SlotņtoņClearņGuard
RectangularHoletofitoverTableB
40ņmmņHighņSupportsņonņBothņEndsņwillņrestņonņBenchC
10ņmmņPlywoodD
SERVICE AND WARRANTY
ThisDREMELproductisguaranteedinaccordancewithstatutory/
countryĶspecificņregulations;ņdamageņdueņtoņnormalņwearņandņtear,ņ
overloadņorņimproperņhandlingņwillņbeņexcludedņfromņtheņguarantee.
Inņcaseņofņaņcomplaint,ņsendņtheņtoolņundismantledņtogetherņwithņproofņ
ofņpurchaseņtoņyourņdealer.
CONTACT DREMEL
FormoreinformationontheDremelassortment,supportandhotline,
goņtoņwww.dremel.com
DremelEurope,P.O.Box3267,4800DGBreda,TheNetherlands
ALLGEMEINE SICHERHEITSHINWEISE
!
WARNUNG
SÄMTLICHE ANWEISUNGEN SIND
ZU LESEN.
Fehler bei der Einhaltung der nachstehend aufgeführten Anweisungen
können elektrischen Schlag, Brand und/ oder schwere Verletzungen
verursachen. Der nachfolgend verwendete Begriff “Elektrowerkzeug”
bezieht sich auf netzbetriebene Elektrowerkzeuge (mit Netzkabel).
BEWAHREN SIE DIESE ANWEISUNGEN GUT
AUF
ARBEITSPLATZ
a.ņ ņHaltenņSieņIhrenņArbeitsbereichņsauberņundņaufgeräumt.ņUnordnung
und unbeleuchtete Arbeitsbereiche können zu Unfällen führen.
b.ņ ņArbeitenņSieņmitņdemņGerätņnichtņinņexplosionsgefährdeterņ
Umgebung,indersichbrennbareFlüssigkeiten,GaseoderStäube
befinden.ņElektrowerkzeuge erzeugen Funken, die den Staub oder
die Dämpfe entzünden können.
c.ņ ņHaltenņSieņKinderņundņandereņPersonenņwährendņderņBenutzungņ
desņElektrowerkzeugsņfern.ņBei Ablenkung können Sie die Kontrolle
über das Gerät verlieren.
D
 Loading...