Congratulations!
You are now ready to build. Build On.
2610038113 11/16
Step 8: Test the Machine
1
. Level the printer before moving forward – Navigate to the
leveling screen by pressing level on the home screen, and
following the instructions on screen.
2
. Navigate to “Filament” and follow the on screen instruc-
tions to load filament.
3. Build the “Test Print” file on the machine to ensure the
3
D40 printer is working correctly.
4
. If prints are not adhering to the build plate, the z-axis offset
may need to be adjusted. If so, continue to step 9.
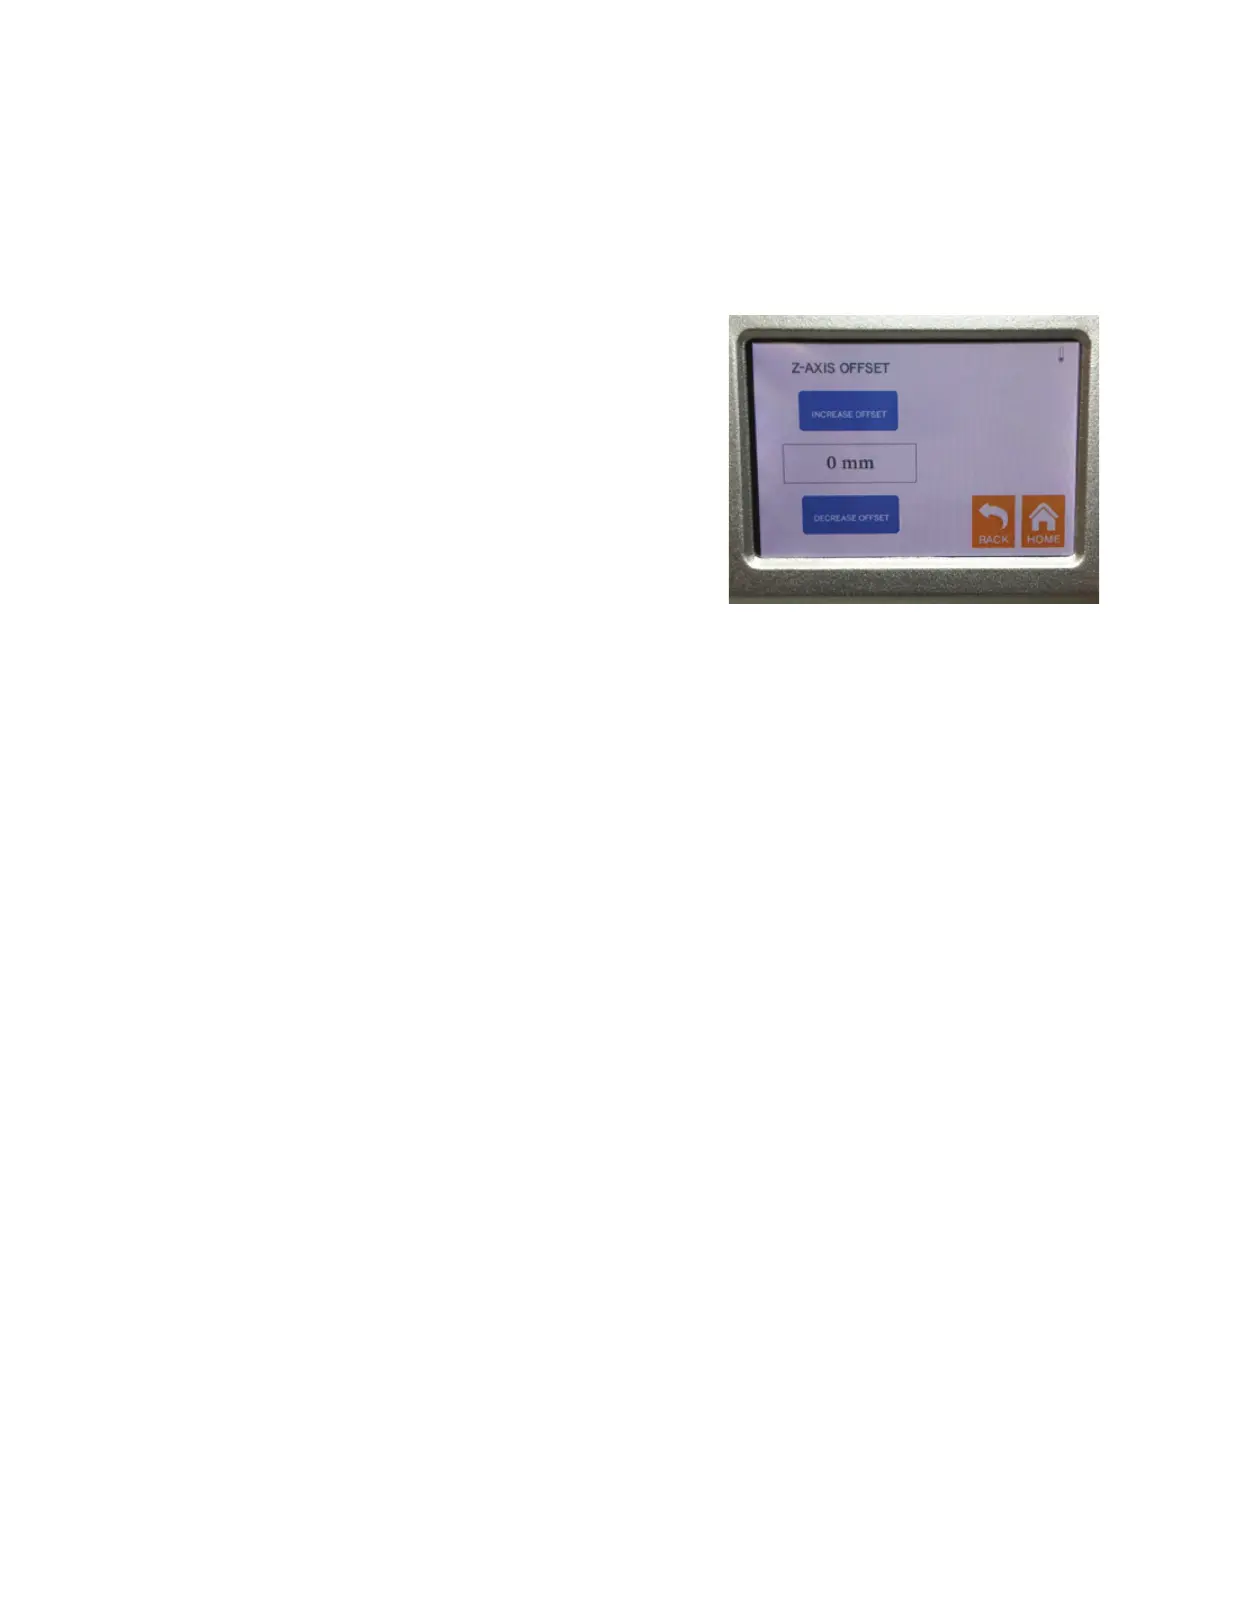
Step 9: Adjusting the Z-axis Offset
1
. Navigate to the z-axis offset screen, following: Tools→Set-
tings→Z-Axis Offset.
2. Follow the on-screen instructions to either increase or
d
ecrease the offset.
3
. Always adjust the z axis offset once (0.1mm increments/
decrements) and test by repeating Step 8 above, before
m
aking any further z axis offset adjustments.
Figure 17: Z-Axis Offset screen