15
shot setup
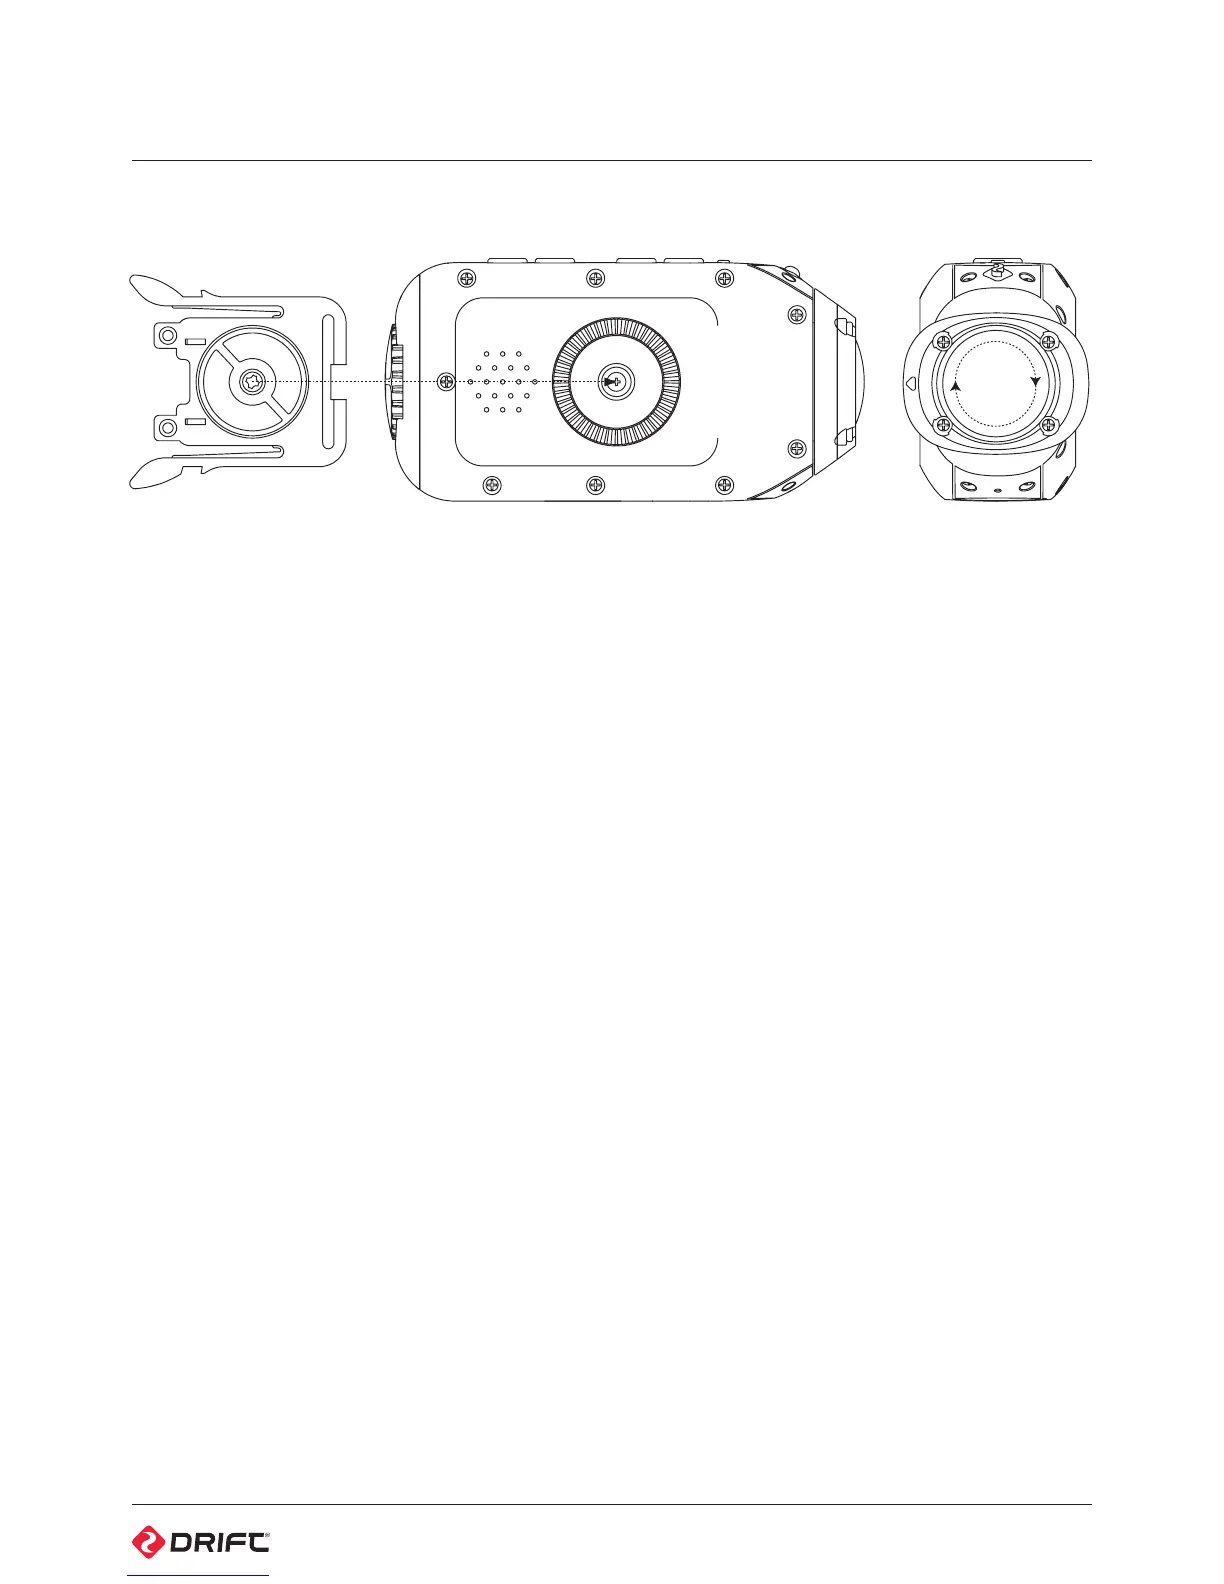
Fixing the camera to the Universal Clip
1. Align the screw of the universal clip with the thread on the underside of the
camera body
2. Twist the screw thread in a clockwise direction
3. As the universal clip tightens against the body of the camera, rotate the
camera to provide the desired angle of attachment, holding the clip in place
4. Tighten the screw on the universal clip until it fits firmly against the camera
body
Closing the rear hatch
1. Ensure the directional arrow “up” indicator is pointing up towards the buttons
2. Use the notch in the universal clip to tighten the screw on the rear hatch
! Failure to completely seal the rear hatch for water-based applications will result
in permanent damage to the camera (see p3).
Mounting the camera to a Drift mount
Included with the camera are several Drift mounts which will help you find the
shot you want.
Mounting the camera on goggles
1. Attach the Goggle Mount to the strap of your goggles
2. Slide the camera (with universal clip attached) into the mount until the two
arms on the clip click into place
Mounting the camera on a helmet
1. Position the Curved Surface Mount against your helmet to find the optimum
mounting position
2. Ensure the mounting surface is clean, dry and free of oil and dust
3. Remove the cover of the mount’s 3M adhesive and fix the mount to the
helmet—allow 24 hours to cure
4. Slide the camera (with universal clip attached) into the mount until the two
arms on the clip click into place
Fixing the camera to the standard ¼” thread
Thread the camera onto a tripod, or any other mount with a standard camera
thread, turning the camera body on the thread clockwise to secure.
! However you choose to mount your camera, ensure that the camera is fitted
firmly to reduce the risk of losing it. Give it a tug before you set out.
Lens Rotation
In order to maximise your mounting
options, the camera lens is rotatable
through 300°, allowing for the perfect
shot from even the most awkward of
positions.
Whilst holding the camera body in
one hand, use the index finger and
thumb of the other hand to hold the
camera lens firmly, then twist the
lens to the desired angle. The arrow
indicator above the lens indicates ‘up’
and corresponds with the top of the
display in Live Preview.
! Be sure to rotate the lens back to
the 0° position (so the ‘up’ indicator
on the lens is aligned with the
LED indicator on the camera, and
the edge of the lens is flush with
the body of the camera) before
mounting, or removing the camera
from a mount to reduce the risk of
damage to the lens.
Zoom
The Drift HD Ghost includes a digital
zoom function that allows you to take
close-up photo and video.
While in Live Preview, or while
recording video, press and hold the
RIGHT button to zoom in, and the
LEFT button to zoom out.