EasyManua.ls Logo

DriSteem 250 - User Manual

DriSteem 250
108 pages
Print Icon
To Next Page IconTo Next Page
Loading...
High-Pressure System
with Water Treatment System
Installation, Operation,
and Maintenance Manual
EVAPORATIVE COOLING
AND HUMIDIFICATION
READ AND SAVE THESE INSTRUCTIONS

Table of Contents

Questions and Answers

  • T
    thomas73Aug 19, 2025
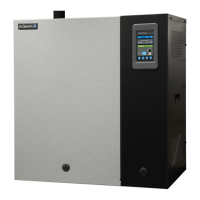
    Why DriSteem 250 Humidifier display no display?
    • M
      mlaraAug 19, 2025
      A 'No display' issue on your DriSteem Humidifier can stem from several causes. First, ensure the electric outlet has power; if not, repair it or try a working outlet. Check that the control valve power adapter is correctly plugged into the outlet and connected to the PC board. Verify the proper voltage is supplied to the PC board. Inspect the POD connector for any loose connections or broken wires, and clean the PC board pins. If these steps don't resolve the issue, the power adapter or PC board might be defective and require replacement.
  • L
    Laura BrownAug 21, 2025
    What to do if DriSteem 250 control valve does not regenerate automatically but does when the REGEN button is depressed and held?
    • R
      Robert NguyenAug 21, 2025
      If your DriSteem Humidifier's control valve doesn't regenerate automatically (but does when you press and hold the REGEN button), several factors could be at play. Start by checking if the bypass/isolation valves are in the bypass position and ensure they are turned to the service position. Verify that the meter is correctly connected to the meter connection on the PC board. Inspect the meter turbine for any restrictions or stalling. Also, confirm that the meter wire is securely installed into the three-pin connector labeled FLOW. If these steps don't resolve the issue, consider checking for programming errors or the meter itself might be defective. As a last resort, the PC board could be defective and may need replacement.
  • C
    Cameron DavisAug 25, 2025
    Why DriSteem 250 Humidifier display does not indicate that water is flowing?
    • B
      bullockshaunAug 25, 2025
      If the display on your DriSteem Humidifier doesn't show water flowing, it could be due to several reasons. Check that the bypass/isolation valve is not in the bypass position and turn it to the service position. Ensure the meter is connected to the 'FLOW' connection on the PC board. Inspect the meter turbine for any restrictions. Verify the meter wire is securely installed in the three-pin connector labeled FLOW. If the issue persists, the meter might be defective and need replacement, or the PC board could be defective.
  • S
    sjacksonAug 26, 2025
    What to do if DriSteem Humidifier control valve fails to draw in regenerant?
    • K
      Krista SandovalAug 26, 2025
      If the control valve on your DriSteem Humidifier isn't drawing in regenerant, start by checking if the injector is plugged and clean or replace it. Then, inspect the regenerant piston and replace if faulty. Look for any leaks in the regenerant line connections. Also, inspect the drain line for restrictions or debris causing excess back pressure and clean it. Ensure the drain line isn't too long or high. Check the incoming water pressure, which must be at least 25 psi. Finally, inspect the seal stack assembly for damage and replace if necessary.
  • G
    gfordAug 28, 2025
    How to fix DriSteem Humidifier Err – 1002 = Control valve motor ran too short and was unable to find the next cycle position and stalled?
    • J
      Jay RamosAug 28, 2025
      To address the 'Err – 1002' error on your DriSteem Humidifier (control valve motor ran too short and was unable to find the next cycle position and stalled), start by inspecting the control valve for any foreign material. Open the control valve and examine the piston assembly and seal/stack assembly. Press NEXT and REGEN buttons for about 3 seconds to resynchronize software with piston position. Check for mechanical binding in the piston, seal/stack assembly, reduction gears, drive bracket, and main drive gear interface. Ensure the main drive gear is not too tight. Also, verify that the correct voltage is being supplied to the PC board. Press NEXT and REGEN buttons for about 3 seconds to resynchronize software with piston position.
  • D
    Daniel TurnerAug 30, 2025
    Why DriSteem 250 control valve regenerates at wrong time of day?
    • B
      Brianna ManningAug 30, 2025
      If your DriSteem Humidifier's control valve regenerates at the wrong time, it could be due to a power outage, requiring you to reset the time of day. Alternatively, the time of day might not be set correctly, so reset it to the correct time. Another possibility is that the regeneration time is set incorrectly, requiring you to reset the regeneration time. Also, check if the control valve is set at 'on 0' (immediate regeneration) and reset it to 'dEL' for a delayed regeneration time.
  • T
    tina09Sep 1, 2025
    How to fix DriSteem 250 Humidifier Err – 1001 = Control unable to sense motor movement?
    • D
      Dr. Jeremy WestSep 1, 2025
      To resolve the 'Err – 1001' error on your DriSteem Humidifier (Control unable to sense motor movement), first, disconnect power and ensure the motor is fully engaged. Check for broken wires and ensure the two-pin connector on the motor is connected to the two-pin connection on the PC Board labeled REGEN. Press NEXT and REGEN buttons for about 3 seconds to resynchronize software with piston position. Make sure the PC Board is properly snapped into the drive bracket. Replace any missing reduction gears. Clean or replace damaged or dirty reduction gear reflectors. Finally, clean or replace the PC board if the optics on the back are faulty or dirty.
  • M
    michael86Sep 3, 2025
    Why DriSteem Humidifier time of day flashes on and off?
    • E
      emilycantuSep 3, 2025
      The flashing time of day on your DriSteem Humidifier typically indicates a power outage. To resolve this, reset the time of day.
  • D
    David CoxSep 5, 2025
    What causes excessive water in regenerant tank of DriSteem 250 Humidifier?
    • J
      Jessica HaydenSep 5, 2025
      Excessive water in the regenerant tank of your DriSteem Humidifier can be caused by the tank being overfilled due to the fill cycle, improper program settings, or a missing refill flow controller. Verify the program settings and perform a visual inspection to measure the volume output into a container.
  • A
    Ana AndersonSep 7, 2025
    Why DriSteem 250 does not display correct time of day?
    • J
      jamiearnoldSep 8, 2025
      If your DriSteem Humidifier isn't displaying the correct time, it might be because the power adapter is plugged into an outlet controlled by a light switch; use an uninterrupted outlet instead. It could also be due to a tripped breaker switch or GFI, so reset those. A power outage can also cause this, requiring you to reset the time of day. In some cases, a defective PC board may be the cause, requiring replacement.

Summary

Warnings and Cautions

Attention Installer

Critical installation instructions for qualified personnel, emphasizing safety and compliance.

Electrical Hazard

Details electrical safety precautions, lockout procedures, and risks of shock or fire.

Tipping Hazard

Warning to secure the unit to the floor or structure to prevent serious injury or death.

Leak;Drip Monitoring

Advises monitoring for leaks to prevent slip hazards and property damage.

Overview

System Dimensions

Provides detailed physical dimensions and specifications for system components.

Water Quality and Component Overview

Explains necessary water quality standards and the function of pretreatment components.

System Overview

Illustrates the overall system layout and key component connections.

Components Overview

Lists and briefly describes the various components that may be included in the system.

Dechlorinator Specifications

Details technical specifications, dimensions, and performance data for dechlorinator models.

Single Water Softener Specifications

Technical data for single water softener models, including capacity and dimensions.

Duplex Water Softener Specifications

Technical data for duplex water softener models, including capacity and dimensions.

Optional Pretreatment Skid Mounting

Information on pre-assembled pretreatment components for easier installation.

Skidded Single Water Softener and Dechlorinator Specifications

Specifications for single water softener and dechlorinator units mounted on a skid.

Skidded Duplex Water Softener and Dechlorinator Specifications

Specifications for duplex water softener and dechlorinator units mounted on a skid.

Skidded Duplex Water Softener Specifications

Specifications for duplex water softener units mounted on a skid.

Reverse Osmosis Specifications

Technical data for the 400 series RO station, including flow rates and electrical requirements.

System Operation Temperature

Explains how water temperature affects RO system performance and provides correction factors.

Installation

Components and Tools Needed

Lists necessary tools, supplies, and field-supplied components for installation.

Placing Components

Guidelines for selecting installation locations considering access, clearances, and environmental factors.

System Piping

Illustrates generic piping and electrical diagrams for system connections.

Piping and Instrumentation Arrangement

Provides detailed P&ID diagrams for system connections and instrumentation.

Site Requirements

Outlines essential site conditions, utility requirements, and plumbing considerations.

Plumbing and Wiring for Dual Softener

Specific instructions for plumbing and wiring dual softener units, including valve connections.

Interconnecting Tubing Requirements

Details on tubing specifications for connecting the pump station to the RO holding tank.

Pre-treatment System Piping

Instructions for connecting the dechlorinator and water softener piping.

RO System Piping

Guidance on plumbing connections for the RO station, including feed water and product water lines.

High-pressure System Piping

Instructions for installing high-pressure piping, including tube fitting and handling best practices.

Electrical Installation

Covers electrical wiring, grounding, circuit protection, and service disconnect requirements.

Connecting Communication Components

Details on wiring control input devices, sensors, and network connections.

Start-up Checklist: Pre-treatment

A step-by-step checklist to verify pre-treatment system setup before operation.

Start-up Checklist: RO 400 Water Treatment System

A checklist to ensure the RO system is correctly installed and ready for initial operation.

Start-up Checklist: High-pressure System

A checklist for verifying the proper installation and readiness of the high-pressure system.

Operation

System Startup: Softener and Dechlorinator

Step-by-step procedures for initiating operation of the softener and dechlorinator.

System Startup: RO 400 Water Treatment System

Comprehensive guide for the initial start-up of the RO 400 system, including flushing.

Vapor-logic Keypad;Display: RO Water Treatment System

Explains the functions and interface of the Vapor-logic keypad for RO system control.

High-pressure System Keypad;Display

Details the keypad/display interface for controlling the high-pressure system.

Keypad;Display Home Screens, Test Outputs, Test Run

Describes the main display screens and operational testing procedures for the keypad/display.

Vapor-logic Keypad;Display: High-pressure System

Information on network connectivity and web interface usage for the high-pressure system.

Maintenance

Water Treatment System Components

Maintenance procedures for dechlorinator, water softener, and RO holding tank components.

High-pressure System Components

Maintenance tasks for the high-pressure pump, piping system, sediment filter, and nozzles.

Water Treatment Maintenance Information

Guidance on filter changes, membrane cleaning, and water quality testing procedures.

Sediment Pre-filter Cartridge

Instructions on when and how to change sediment pre-filter cartridges to maintain system performance.

Water Quality Test Strips

Information on using water quality test strips to monitor chlorine, hardness, and alkalinity.

Inlet Water Quality Test Log

A log template for recording periodic inlet water quality test results.

RO System Operating Log

A log for recording daily operational data, crucial for system monitoring and maintenance.

High-pressure System Operating Log

A log for tracking operating parameters and maintenance for the high-pressure system.

Troubleshooting

Pre-treatment System Troubleshooting

Identifies common issues with pre-treatment components and provides solutions.

RO Water Treatment System Troubleshooting

Addresses common problems encountered with the RO water treatment system and their resolutions.

High-pressure System Troubleshooting

Provides solutions for issues related to the high-pressure system operation and components.

Replacement Parts

Water Treatment System

Lists part numbers and descriptions for water softener and dechlorinator replacement components.

RO System

Details replacement parts for the RO 400 system, including pumps, gauges, and membranes.

RO System Subpanel

Identifies specific replacement parts for the RO system's control cabinet.

High-pressure System

Lists replacement parts for the high-pressure system, including motors and variable frequency drives.

High-pressure Dispersion System

Lists replacement parts for the high-pressure dispersion system, such as nozzles and manifolds.

Warranty

Warranty Information

Outlines the terms and conditions of the DriSteem Limited Warranty and extended warranty options.

DriSteem 250 Specifications

General IconGeneral
Steam OutputUp to 250 lbs/hr (113 kg/hr)
Water Connection1/2" NPT
Voltage208V, 3-phase
CapacityUp to 250 lbs/hr (113 kg/hr)
Humidification CapacityUp to 250 lbs/hr (113 kg/hr)

Related product manuals