Drobo Mini Getting Started Guide 16
1.
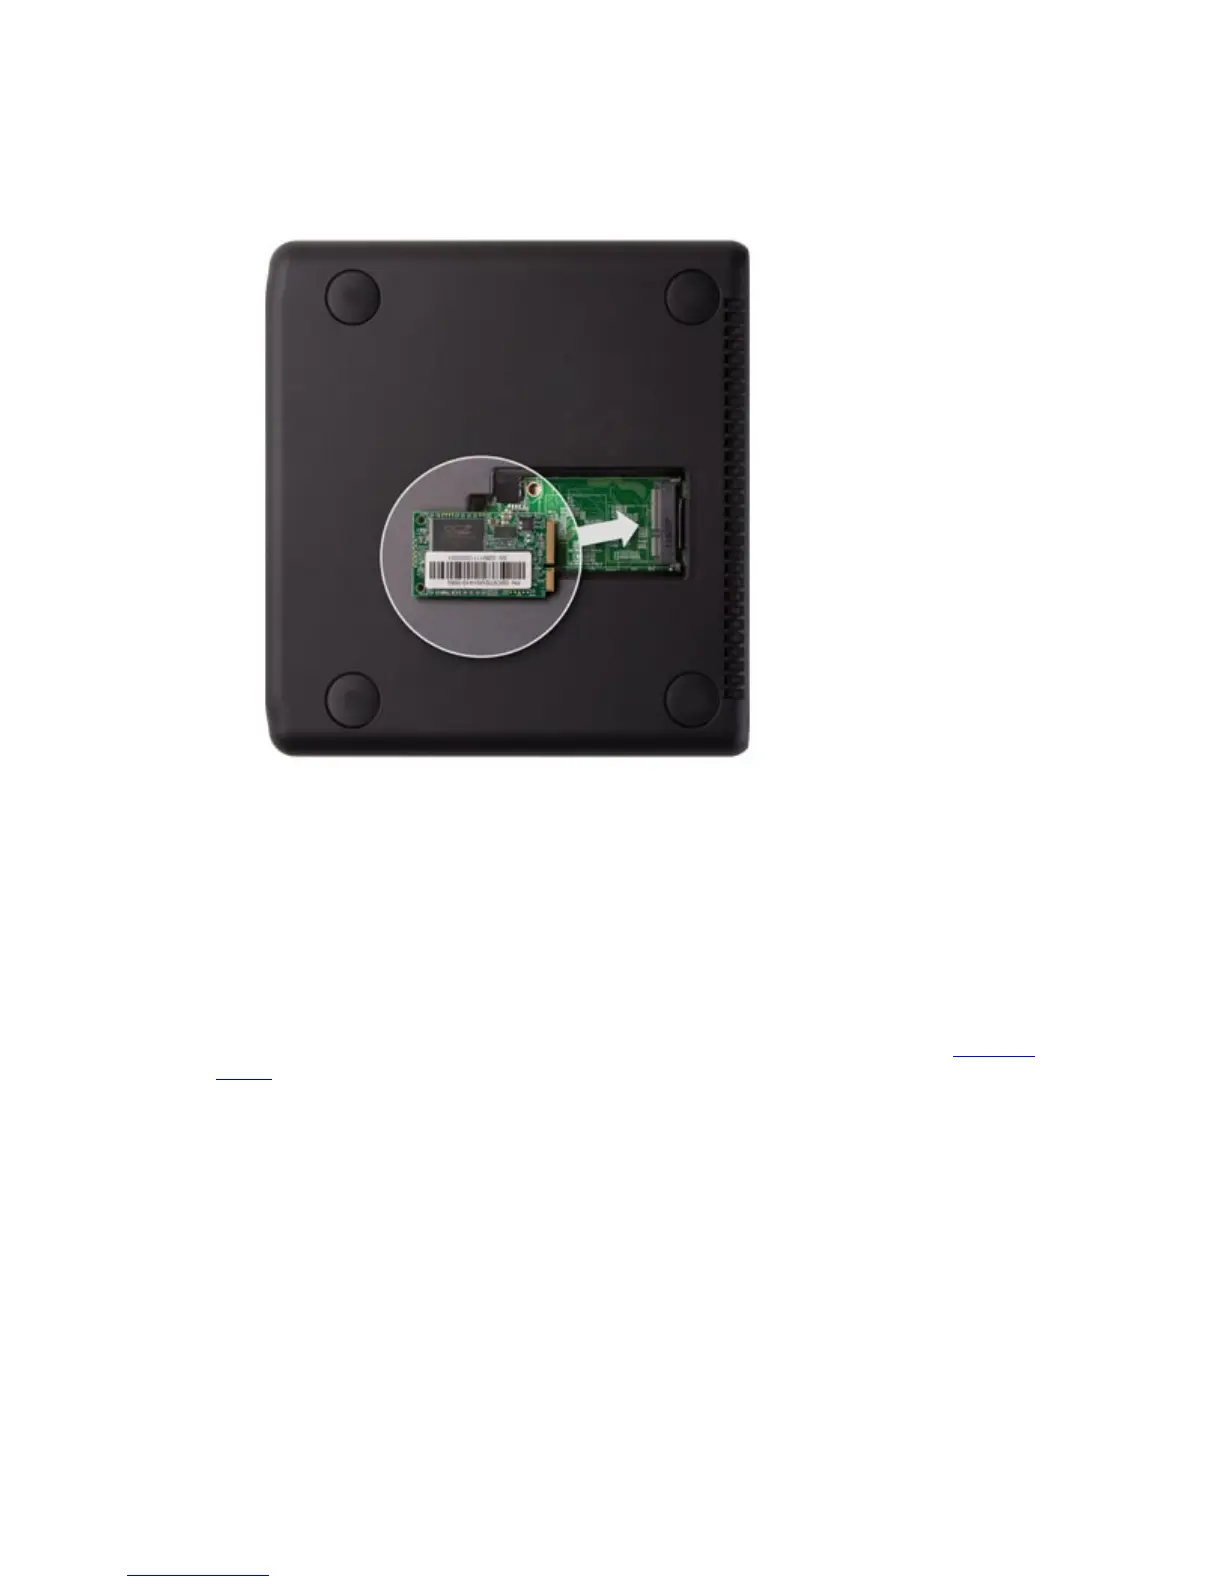
Gently turn the Drobo Mini on to its side to access the bottom of the Drobo Mini, and open the
Drobo Accelerator Bay door by turning the latch from lock to unlock using a coin.
2. Slide the mSATA SSD into the slot as depicted in the image below.
3. Make sure the mSATA SSD is aligned properly with its connector, and then close the Drobo
Accelerator Bay door, turn the latch back to the lock icon, and return the Drobo Mini to its
normal position.
Inserting the Drives
After installing Drobo Dashboard and, if needed, installing an mSATA SSD, you are ready to
insert drives into your Drobo Mini. For more information on drive requirements, see
Selecting
Drives.
Warning! Any pre-existing data on the drives will be erased, as the drives will be formatted. If you
wish to keep the data, copy it to another drive or medium before using with your Drobo device.
Note: Once you insert the drives into your Drobo device, they function as a unit or “pack.” To
access the data on them, you will need the entire pack.
1.
Remove the bezel (faceplate) from the front of your Drobo device by pulling it off from the
bottom. (It is magnetically attached.)
2. If you haven't done so already, remove the "READ FIRST" card from Drobo Mini.
3.
With one hand, hold the drive so that its connectors are positioned as in the image below.