DRUCKER DIAGNOSTICS SM006
MODEL 642E SERVICE MANUAL REV: A 8
h) The motor is held in place with 4 #8 Nylok nuts. Remove them with an 11/32” nut
driver.
i) Slide the motor and motor gasket out of the guard bowl’s motor well.
6.12 Replacing the motor
a) Make certain that new rubber washers are used on the motor mounting studs when
installing a motor.
b) Locate the seam on the inside of the guard bowl wall.
c) Position the motor so its wires exit approx 180 deg away from the guard bowl seam.
d) Install the motor and gasket into the guard bowl with the wire harness positioned as
described above.
e) Drive 4 #8 Nylok nuts onto the motor studs with an 11/32” nut driver.
f) Turn the guard bowl assembly upside down with the guard bowl seam facing you.
g) Place the base assembly (with line cord facing away from you) onto the guard bowl.
h) IMPORTANT: Make certain that no wires are pinched between the guard bowl and
base!
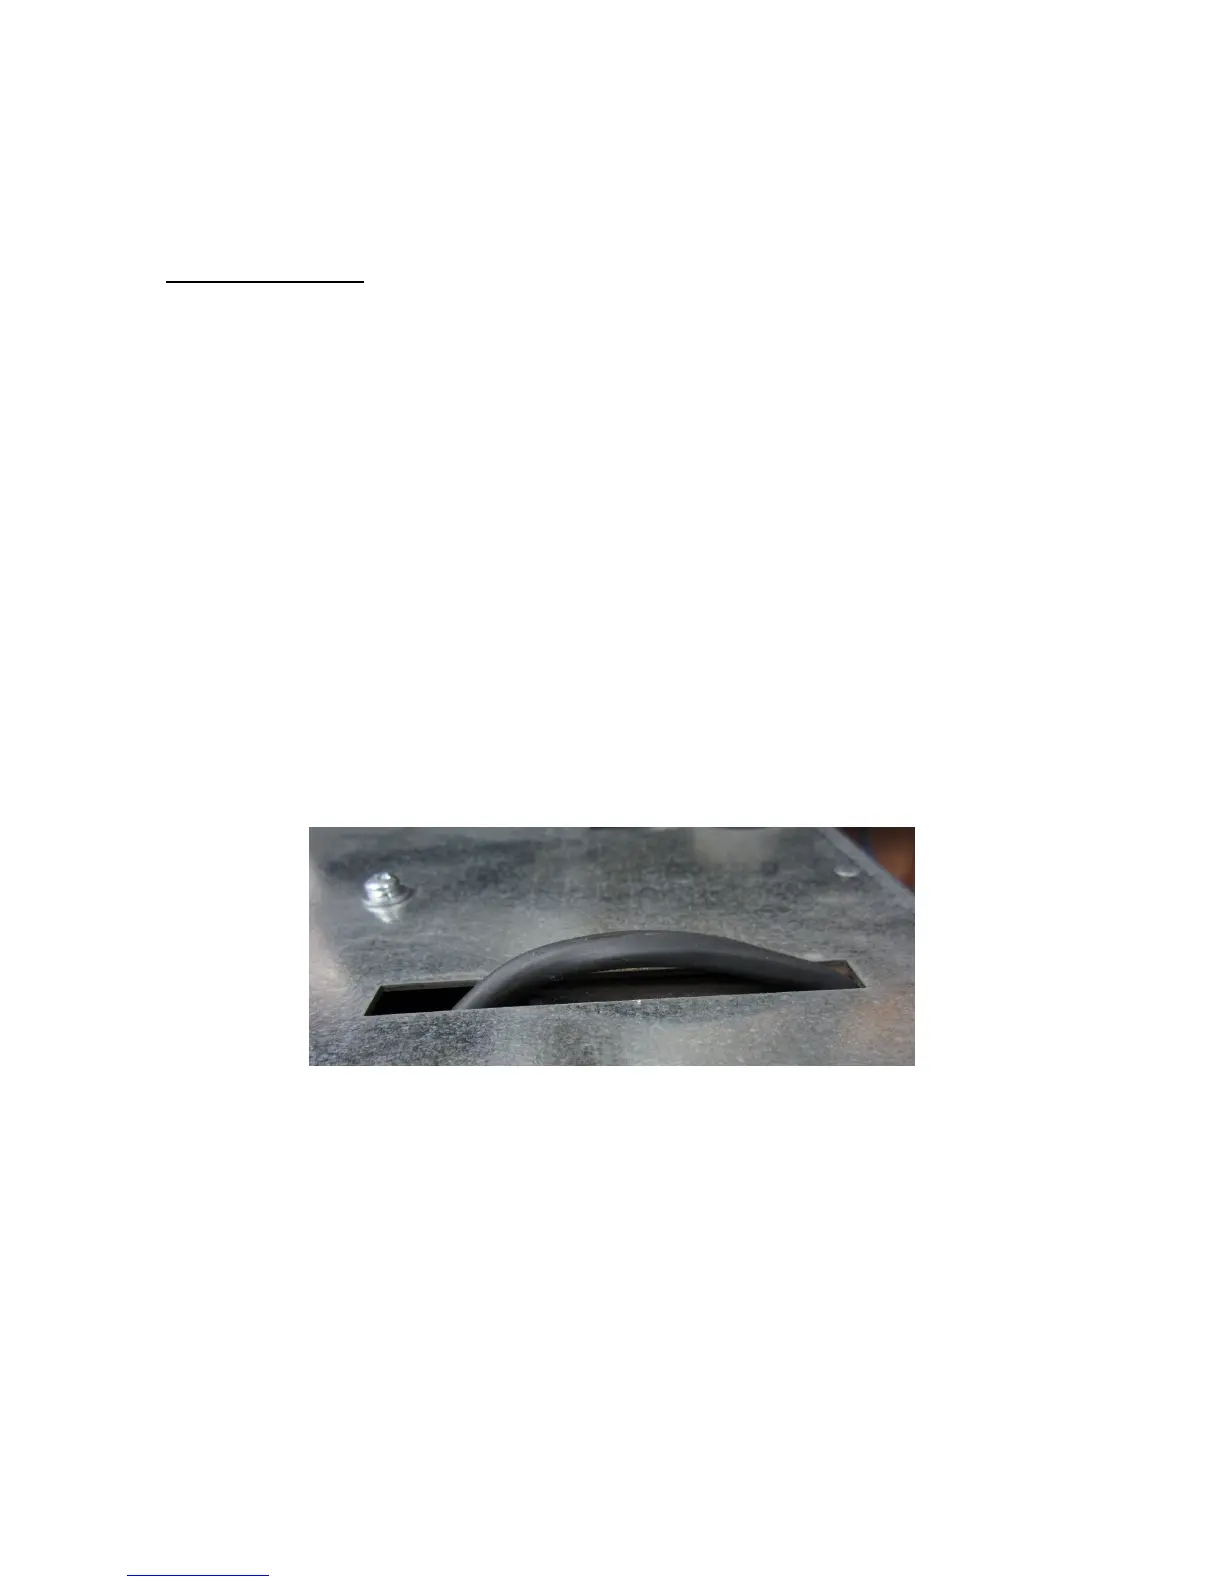
i) IMPORTANT: Tuck a portion of the motor wire harness into the rectangular cutout in
the base. See fig 1.
Figure 1