11
NOTE: User 40 for the master code cannot be deleted; an attempt to delete this user code will delete the
prox tag only. The prox tag must be re-enrolled before it can be used again.
Proximity Tag Operation
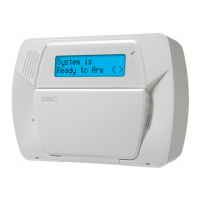
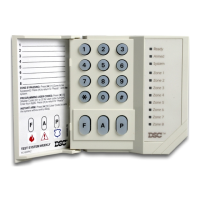
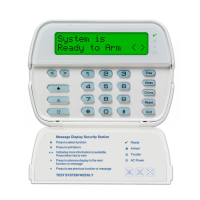
6. Place the prox tag near the tag reader () at the left side of the display to arm/disarm (set/unset)
your system. When arming/setting the system, the following message will be displayed:
7. When disarming/unsetting the system, the following message will be displayed:
8. If there is an attempt to swipe a prox tag that has not been enrolled, an error tone will sound and
the following message will be displayed:
Return to Step 1 for instructions on how to enroll the prox tag.
WARNING: KEEP THE PROXIMITY TAG OUT OF REACH OF SMALL CHILDREN.
THE MATERIALS ASSOCIATED WITH THIS PRODUCT (LITHIUM BATTERIES, ETC.) MUST BE RECYCLED
ACCORDING TO LOCAL RULES AND REGULATIONS.
17. User Function Commands
Disarm the system then enter [,][6][Master Code]. The [,][6] command is used to gain access to the
following list of Master functions of the system:
[1] Time and Date - Enter 4 digits for 24hr System Time (HH-MM). Valid entries are 00-23 for the
hour and 00-59 for minutes. Enter 6 digits for the Month, Day and Year (MM-DD-YY).
[2]-[3] For Future Use.
[4] System Test - The system tests siren output: on-board siren – 4 seconds (2 seconds medium vol-
ume, 2 seconds high volume), indoor/outdoor siren – 2 seconds. Keypad lights, back-up battery pack
and communicator are tested.
[5] Enable DLS / Allow Remote System Service - If enabled, the installer can to access Installer
Programming remotely using DLS (Downloading Software). This function provides a window for
telephone ring detection by the alarm system. The DLS window will remain open for 6 hours, during
which time the installer will be able to enter DLS an unlimited number of times. After the 6-hr win-
dow has expired, access to programming via DLS will be unavailable until the window is re-opened.
[6] User Call-up - If enabled by the installer, the panel will make 1 attempt to call the downloading
computer. The downloading computer must be waiting for the panel to call before downloading can
be performed.
[7] For future use.
[8] User Walk Test - Allows the user to enter the Walk Test mode. See Walk Test on page 16.
[9] Late to Open Enable/Disable - This function enables or disables the Late to Open time pro-
grammed in [0].
[0] Late to Open Time of Day - This function is used to program the time setting enabled in [9].
NOTE: Refer to “Late to Open” section for details.
17.1 Changing Brightness/Contrast
When this option is selected, the keypad will allow you to scroll through 4 brightness levels and 10
contrast levels.
1. Press [,][6] [Master Code].
2. Use the [<][>] buttons to scroll to either Brightness Control or Contrast Control.
3. Press [
,] to select the setting you want to adjust.
4. a) Brightness Control: There are 4 backlighting levels. Use the [<][>] buttons to scroll to the
desired level.
b) Contrast Control: There are 10 different display contrast levels. Use the [<][>] buttons to scroll
to the desired contrast level.
5. To exit, press [#].
Exit Delay in
Progress
System Disarmed
Invalid Tag