5
Zone Input Terminals “Z1” to “Z8”
Zone inputs “Z1” to “Z8” are supervised end of line (E.O.L.)
resistor circuits. Each input must be terminated with a 1K
ohm E.O.L. resistor. An alarm condition will be created if a
normally open contact is used to short across the E.O.L.
resistor. An alarm is also created if normally closed
contacts, wired in series with the E.O.L. resistor, are
opened. See the wiring diagram for normally open and
normally closed contact connection. The type of circuit or
zone definition (delay, instant, 24 hour etc.) is programmed
from the keypad using the [✱][8] Installer’s Programming
commands ("Programming Guide" section [14]).
Telephone Terminals “TIP”, “RNG”, “T-1” and “R-1”
The wires from the RJ31-X telephone jack are connected to
these terminals in the following way.
TIP Green wire
Incoming line from
RNG Red wire
telephone company
T-1 Brown wire
Outgoing line to
R-1 Grey wire
house telephone(s)
Note: For proper operation there must be no other
telephone equipment connected between the control
panel and the telephone company's facilities.
Battery Connections
Do not connect the battery or the transformer until the wiring
is complete. Connect the red battery lead to the positive
battery terminal and the black lead to the negative battery
terminal. If the connection is made in the reverse the battery
fuse will fail.
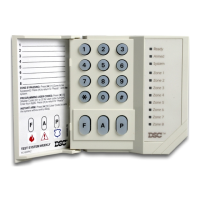
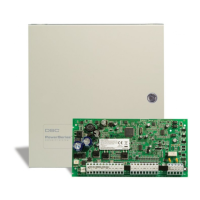
Keypad Installation
Mount the keypads near the exit-entry doors. The
PC2550RK keypad has a red, a black, a green and a yellow
wire on the back. Connect these four wires to the four
keypad terminals on the control panel using four conductor
(quad) telephone wire. Up to three keypads may be
connected to one PC2550. Connect all green wires from the
keypads to the “GRN” terminal on the panel. Connect all
yellow wires from the keypads to the “YEL” terminal on the
panel. Connect all red wires from the keypads to the “RED”
terminal. Connect all black wires from the keypads to the
“BLK” terminal.
Power-up Procedure
If the keypads are located a distance from the panel, install
an extra keypad temporarily at the panel during power up
testing. An extra keypad with a short length of cable and
alligator clips attached is helpful for testing and
programming PC2550 systems.
Connect the transformer, wait approx. 5 seconds.
Enter a few keypad commands and open a zone to be sure
that the panel and keypad are responding to signals. If the
keypad does not respond and there are no indicators on,
check for AC voltage at the “AC” terminals. If there is 16
VAC present, check that the keypad wiring is correct and
check the keypad/auxiliary supply fuse. If the keypad/
auxiliary supply fuse is blown check for a short between the
keypad red and black wires before replacing the fuse.
If the keypad is responding normally, connect the battery.
The red battery lead attaches to the positive battery post
and the black battery lead attaches to the negative battery
post.
Note: The PC2550 will not start up if “AC” is off and
the battery is low.
Testing The System
See Installer’s test - [✱] [6] [Master Code] [0] (page 9), or
do the following. Contact the monitoring station to request a
transmission test. Plug the telephone cord into the RJ31-X
jack. If a DTS-1 is being used to monitor communicator
transmissions, connect as described in “Bench Testing”
section and place the DTS-1 in the line mode by pressing
the red “LINE/LOCAL” button. Arm the panel, wait for the
exit delay to expire and trip a detector on an instant circuit.
Wait for the communication to complete. Disarm panel and
check with the monitoring station to confirm the
transmission. Perform additional transmissions required by
the monitoring station.
Check the “Trouble” light on the keypad. If it is on, press [✱]
then [2] to determine if there is a system trouble. The
“Trouble Display” section in “Keypad Commands” gives a
description of the different trouble conditions.
Instructing End-User
Fill out the system reference guide in the PC2550 Instruction
Manual. Check off sections in the manual which apply to the
user’s system and make additional notes if necessary.
Describe the system to an authorized user. Describe arming
and disarming procedures. Describe the basic keypad
functions. Assist the user in working through examples of
each type of command.
Provide user(s) with the Instruction Manual and instruct
them to read the manual to become familiar with the system
operation.
Instruct the user to test the system on a regular basis as
described in the Instruction Manual. The Master Code
should be changed from the default setting and recorded in
the Instruction Manual.
 Loading...