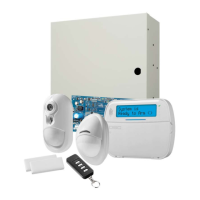
Enrolling the Keypad
The WT5500 must be configured in tandem with your panel in order for the
system to function as desired.
1. Apply power to the control panel. Keypad enrollment is active during the
first two minutes of system power up. Note that the panel’s Ready and
AC LEDs will be flashing for this two-minute period.
2. A WT5500 must be turned on during this two-minute period for it to be
assigned to the panel.
3. Simultaneously press and hold [
] and [1]; by doing so you force the
keypad to broadcast its ESN (Electronic Serial Number).
4. When the keypad has been successfully enrolled - this should take less
than 5 seconds - on the system, the message ‘Enrollment Successful’
will be displayed on the keypad LCD for five seconds. The Ready and AC
LEDs will return to their previous state.
5. Repeat steps 3 & 4 on each additional keypad to be enrolled (PC9155 only).
NOTE: Only one WT5500 can be enrolled with the SCW9055/9057.
Programming Labels
1. Use this section to assign a meaningful name (e.g., Front Door, Hall-
way, etc.) to each zone.
2. Enter keypad programming by pressing
[][8][Installer Code][].
3. Enter the 3-digit section number for the label to be programmed.
4. Use the arrow keys (<>) to move the cursor underneath the letter to
be changed.
5. Press number key 1 through 9, corresponding to the letter you require.
For example, pressing number key 2 once will display the letter D;
pressing it again will display the letter E; pressing it a third time will
display the letter F, and so on.
6. When the required letter or number is displayed, use the arrow keys
(<>) to scroll to the next letter.
7. When you are finished programming the Zone Label, press [
]. Scroll
to ‘Save’ and press [
] again.
8. Repeat Steps 3 through 7 until all Labels are programmed.
ASCII Characters
Broadcasting LCD Labels
LCD programming is done using Keypad 1 or, if using the SCW9055/
SCW9057, from the main control panel. Labels are broadcast to all other
WT5500 keypads enrolled on the system. Perform the following in order to
broadcast labels:
1. Program Keypad 1 or the SCW9055/9057 control panel completely.
2. Enter keypad programming by pressing [
][8][Installer Code][] at the
keypad that was programmed.
3. Enter Section [998] and press []. The label information is then broadcast.
NOTE: This operation may take several minutes.
4. When the label broadcast is complete press the [#] key to exit.
NOTE: Label broadcast from Keypad 1 is only compatible with other
WT5500 keypads (PC9155 only).
Changing Brightness/Contrast
1. Press [][6] [Master Code].
2. Use the arrow keys (<>) to scroll to Brightness or Contrast Control.
3. Press [
] to select the setting you want to adjust.
4. Brightness Control: There are multiple backlight levels. Use the arrow
keys (<>) to scroll to the desired level. Press [] to select.
5. Contrast Control: There are four different display contrast levels. Use the arrow
keys (<>) to scroll to the desired contrast level. Press [
] to select.
6. To exit, press [#].
NOTE: During battery operation, the keypad uses the ambient light
sensor to automatically adjust the backlighting brightness levels in
order to conserve battery life.
Changing the Buzzer Level
1. Press [][6] [Master Code].
2. Use the arrow keys (<>) to scroll to Buzzer Control. Press [] to select.
3. Use the arrow keys (<>) to scroll to the desired buzzer level among
the 21 available selections.
4. To exit, press [#].
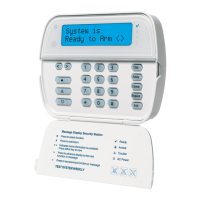
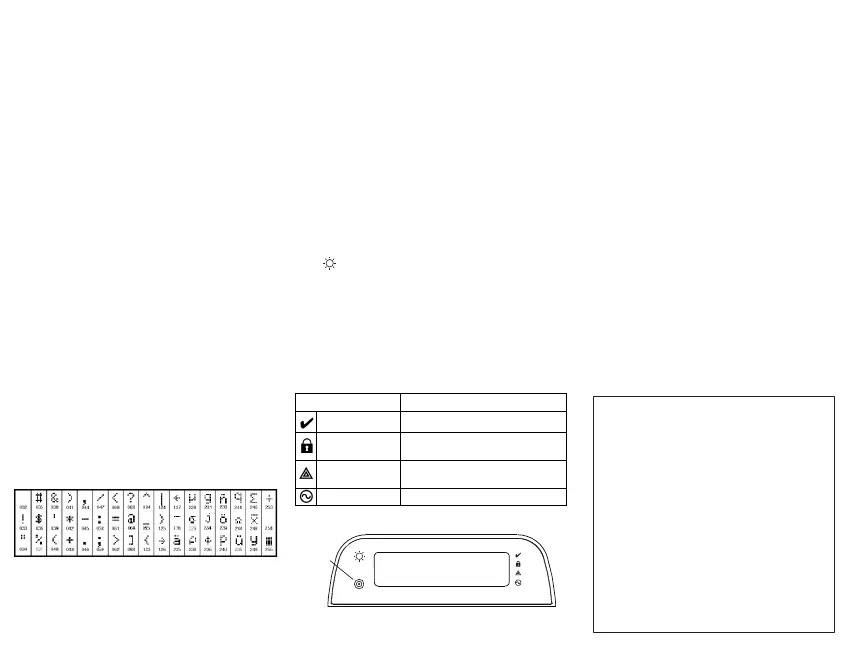
Keypad LED Symbols
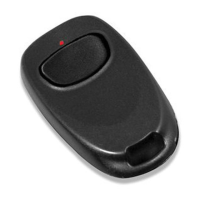
Proximity Tags (WT5500P only)
You can use the proximity tag to perform any keypad function that would nor-
mally require a user access code. Simply present the tag to the target icon or
to the left of the keypad LCD.
Enrolling Proximity Tags
Enrolling a tag on one keypad will enroll it automatically to all WT5500P
keypads enrolled on the system.
1. Enter [
][5][Master Code]. You will enter the User Code Edit Select
menu.
2. Enter a two-digit User Code slot (01-16, 40) to be associated with the
proximity tag. Alternatively, scroll to the two-digit user number and
press the [
] key. You will enter the New Code Edit menu.
3. Enter the four- or six-digit New Code. The LCD will prompt you to swipe
your proximity tag. Otherwise, press the [#] key to exit.
4. Present your proximity tag to the keypad. If enrollment is successful,
acknowledgement beeps will sound and the keypad LCD will read ‘Tag
Enrolled Successfully’. If the proximity tag has been enrolled previously,
an error tone will sound. The LCD will read ‘Duplicate Tag/User Code’.
5. The keypad will return to the User Code Edit Select menu.
Deleting Proximity Tags
Delete the prox tags from the system when they are lost or no longer needed.
1. Enter [][5] [Master Code] on the keypad.
2. The keypad will display the user number and include the letter ‘T’ if a
prox tag is programmed.
3. Enter or select the User Code slot you wish to delete.
4. Press [
] to delete both the user code and the proximity tag.
NOTE: User codes can only be deleted individually.
NOTE: User 40 - Master Code cannot be deleted; a deletion attempt on
this user code will delete the proximity tag only.
NOTE: A user code, once deleted, must be re-enrolled before it can be
used again.
[1] - A, B, C, 1 [3] - G, H, I, 3 [5] - M, N, O, 5 [7] - S, T, U, 7 [9] - Y, Z, 9,0
[2] - D, E, F, 2 [4] - J, K, L, 4 [6] - P, Q, R, 6 [8] - V, W, X, 8 [0] - Space
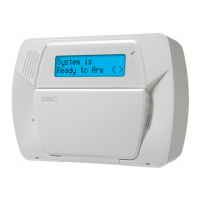
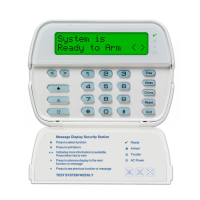
Symbol Description
Ready Light (green) If Ready light is ON, the system is ready to arm.
Armed Light (red)
If Armed light is ON / Flashing, the system has
been armed successfully.
System Trouble (yellow)
ON -Indicates that a system trouble is active.
Flashing - Keypad low battery.
AC (green) ON -Indicates that AC is present at the keypad.
System is
Ready to Arm
<>
DG009153
Prox Tag
Reader
+HUHE\ '6& GHFODUHV WKDW WKLV GHYLFH LV LQ FRPSOLDQFH ZLWK WKH HVVHQWLDO
UHTXLUHPHQWVDQGRWKHUUHOHYDQWSURYLVLRQVRI'LUHFWLYH(&
7KH FRPSOHWH 577( 'HFODUDWLRQ RI &RQIRUPLW\ FDQ EH IRXQG DW
KWWSZZZGVFFRPOLVWLQJVBLQGH[DVS[
&=( '6& MDNR Y¿UREFH SURKODģXMH ŀH WHQWR Y¿UREHN MH Y VRXODGX VH YģHPL
UHOHYDQWQ¯PLSRŀDGDYN\VPÝUQLFH(&
'$1'6&HUNO¨UHUKHUYHGDWGHQQHNRPSRQHQWHQRYHUKROGHUDOOHYLNWLJHNUDYVDPW
DQGUHEHVWHPPHOVHUJLWWLGLUHNWLY(&
'87 +LHUELM YHUNODDUW '6& GDW GLW WRHVWHO LQ RYHUHHQVWHPPLQJLV PHWGH HLVHQHQ
EHSDOLQJHQYDQULFKWOLMQ(&
),1'6&YDNXXWWDDODLWWHHQW¦\WW¦Y¦QGLUHNWLLYLQ(&ROHQQDLVHWYDDWLPXNVHW
)5( 3DU OD SU«VHQWH '6& G«FODUH TXH FH GLVSRVLWLI HVW FRQIRUPH DX[ H[LJHQFHV
HVVHQWLHOOHVHWDXWUHVVWLSXODWLRQVSHUWLQHQWHVGHOD'LUHFWLYH(&
*(5+LHUGXUFKHUNO¦UW'6&GD¡GLHVHV*HU¦WGHQHUIRUGHUOLFKHQ%HGLQJXQJHQXQG
9RUUDXVHW]XQJHQGHU5LFKWOLQLH(&HQWVSULFKW
*5(˂˜˞˱ˬ˲˭˞ˮ˹˪˱ˬ˯ˤ'6&ˡˤ˨˻˪ˢ˦˹˱˦ ˞˲˱˛ ˤ ˰˲˰˧ˢ˲˛ ˢ˜˪˞˦ ˰˺˩˳˶˪ˤ ˩ˢ ˱˦˯
ˬ˲˰˦˻ˡˤ˯˞˭˞˦˱˛˰ˢ˦˯˧˞˦˩ˢ˹˨ˢ˯˱˦˯˙˨˨ˢ˯˰˴ˢ˱˦˧˚˯˞˪˞˳ˬˮ˚˯˱ˤ˯ˍˡˤˠ˜˞˯(&
,7$ &RQ OD SUHVHQWH OD 'LJLWDO 6HFXULW\ &RQWUROV GLFKLDUD FKH TXHVWR SURGRWWR ª
FRQIRUPH DL UHTXLVLWL HVVHQ]LDOL HG DOWUH GLVSRVL]LRQL ULOHYDQWL UHODWLYH DOOD 'LUHWWLYD
&(
125'6&HUNO¨UHUDWGHQQHHQKHWHQHULVDPVYDUPHGGHJUXQQOHJJHQGHNUDYRJ
ºYULJHUHOHYDQWHNUDYLGLUHNWLY()
32/'6&RĝZLDGF]DľHXU]ÇG]HQLHMHVWZ]JRGQRĝFL]]DVDGQLF]\PLZ\PDJDQLDPL
RUD]SR]RVWDĄ\PLVWRVRZQ\PLSRVWDQRZLHQLDPL'\UHNW\Z\:(
3253RU HVWHPHLRD'6&GHFODUD TXHHVWHHTXLSDPHQWRHVW£HP FRQIRUPLGDGH
FRP RV UHTXLVLWRV HVVHQFLDLV H RXWUDV GHWHUPLQD©·HV UHOHYDQWHV GD 'LUHFWLYD
(&
63$3RU OD SUHVHQWH '6& GHFODUD TXH HVWHHTXLSR HVW£ HQFRQIRUPLGDG FRQ ORV
UHTXLVLWRVHVHQFLDOHV\RWURVUHTXLVLWRVUHOHYDQWHVGHOD'LUHFWLYD(&
6:('6&EHNU¦IWDU K¦UPHG DWW GHQQD DSSDUDWXSSI\OOHUGH Y¦VHQWOLJD NUDYHQ RFK
DQGUDUHOHYDQWDEHVW¦PPHOVHUL'LUHNWLYHW(&
 Loading...