-tri- -i"?t'
\l/
\l/
\l/
:f):
-f-\:
,'C\:
,\-/. ,\-/.
-,\-/.
Speaker
volume
and
tone controls
The desired
volume is
set
for both
chan-
nels
by means
of the
volume
control.
This
control
is
tone compensated
and boos
s
bass
and treble
at low
volume
settings
in
accordance
with the
characteristics
of the
human ear.
lndividual
adjustment
of repro-
duction
can be set by
the bass
and
treble
contro
l.
Fig. 13
The bass
control and
treble control
are
operative over a
wide frequency
range.
When tone controls
are in their
center
posi-
tions, the
frequency response
is linear.
For best sound,
we suggest that
the tone
controls
always
be
adjusted
from their
norm,al
center
positions
to obtain
the de-
sired
bass and treble emphasis.
Stereo-mono switch
The
stereo-mono
switch is combined
with
the volume control and
places
both chan-
nels in
parallel.
This
permits
playing
a
monaural record
and
facilitates centering
adjustments of
set-ups.
Place the switch
in
"MONO"
by
pulling
out the
stereo-mono
switch for
listening
to monaural recordings;
use
the
"STEREO"
position
for all dual-
channel
phonograph
records
(press
in
stereo-mono switch).
BALANCE
This
control serves to adjust the sound to
room
geometry.
Turning
the control from
its
center
position
increases the volume
of
one channel while reducing
the
volumd
of the
other.
Centering stereo-set-up
Place
the
stereo-mono
switch in
"MONO"
position.
Adjust
to medium volume. Adjust
the
balance
control so that, when
directly
in front
of the loudspeakers
set-up, the
sound
source appears.to
be exactly in
the
center between
the two
speakers. When
the
stereo-mono.
knob is
placed
in
"STEREO",
the
system is
correctly
set
for
stereophonic
listening.
Just as
at an actual
concert
performance,
there
are
good
and not-so-good
seats
for
stereo
listening.
When
playing
monaural
records,
it is
also advisable
to follow
the
same
principle
to
obtain the
best
possible
room
arrangement.
Stereo
brin'g's the
real
atmosphere
of the
concert hall into
your
home. You
experience
muöic
spatia,lly with every instrument
appearing
in its natural
position
in the
orchestra.
Cartridge
(pick-up)
The
following instructions apply
only if
you
wish to replace the cartridge
supplied with
one of
your
own choosing.
The turntable will accept any cartridge
that
weights from
'l
to I
grams
and'
has standard
1/2" mounting centers.
The technical datas of the
pick-u'p
cartridge
are to be found on a separate
information
sheet enclosed
to this instruction.
Fig.
'14
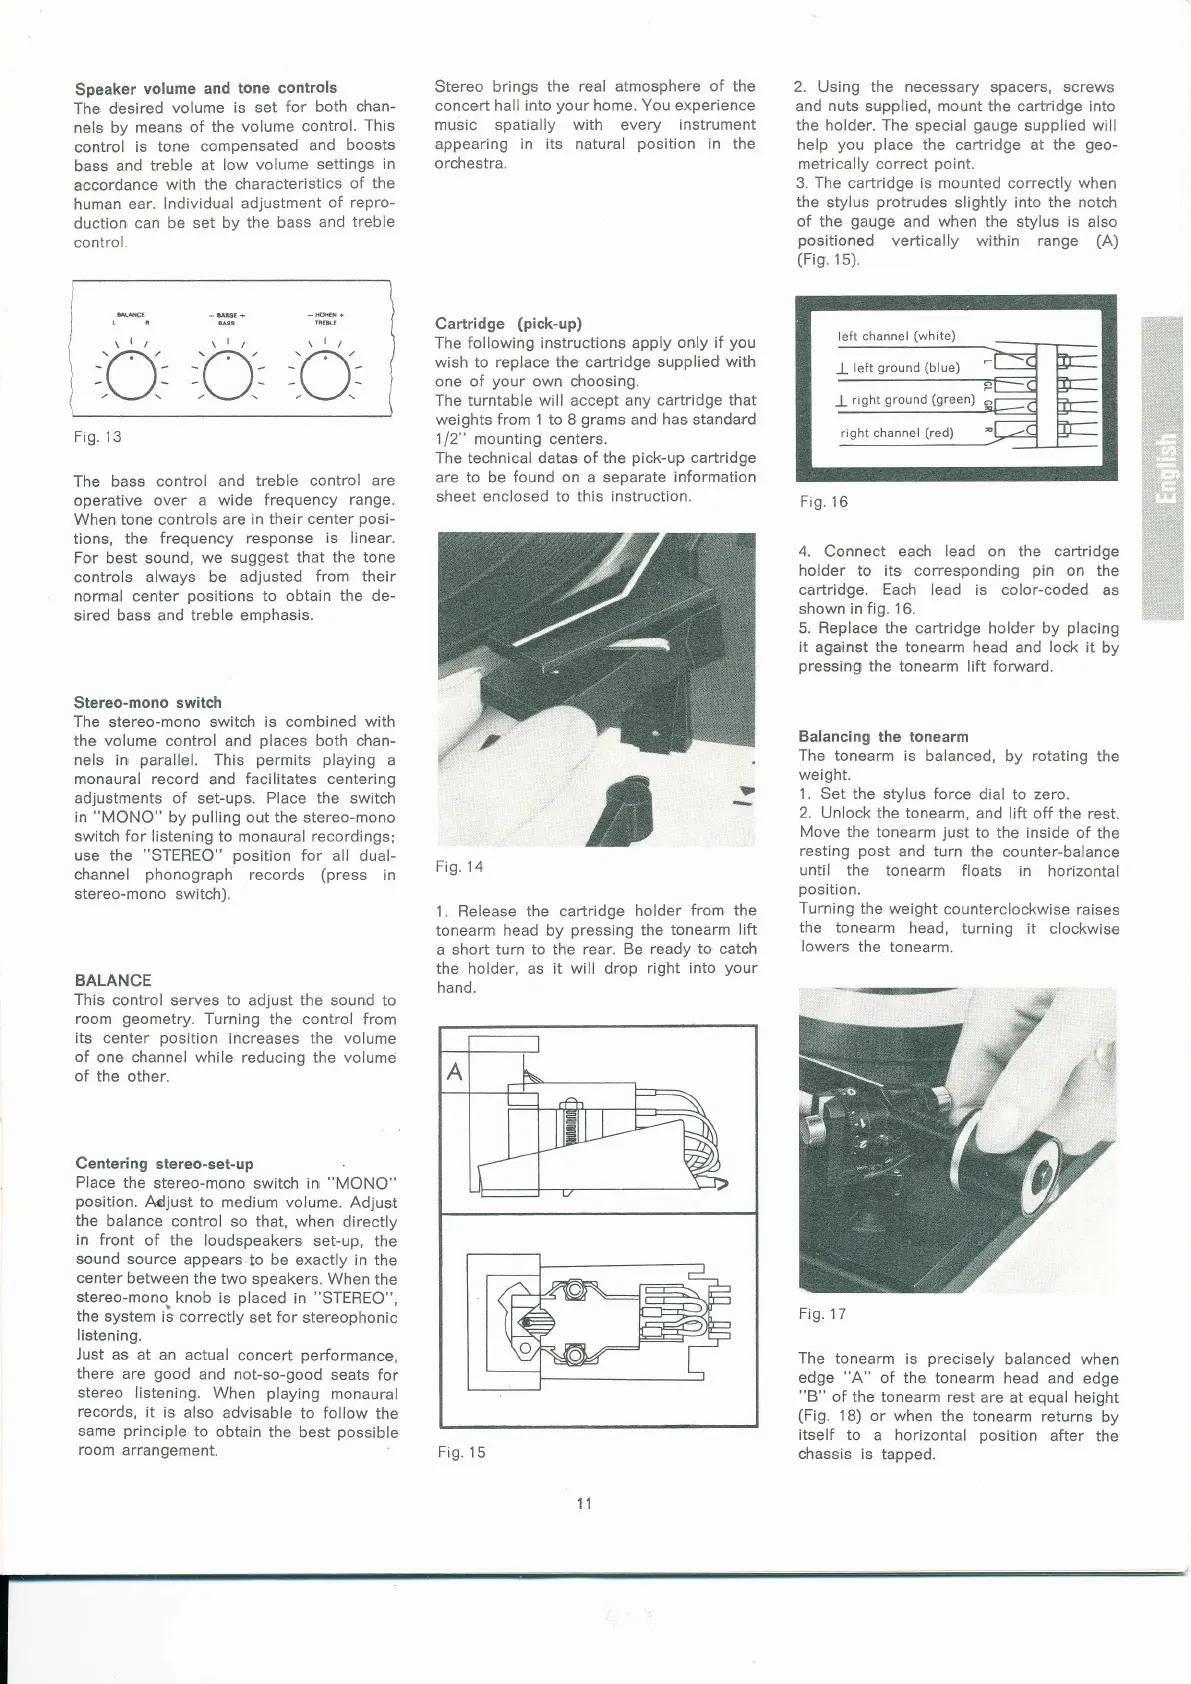
1. Release the cartridge
holder
from the
tonearm head by
pressing
the tonearm
lift
a short turn
to the rear. Be
ready to catch
the holder, as it
will
drop
right into
your
hand.
2.
Using
the necessary
spacers, screws
and
nuts
supplied, mount the cartridge into
the holder. The
special
gauge
supplied will
help
you place
the cartridge at the
geo-
metrically correct
point.
3.
The
cartridge is mounted correctly when
the
stylus
pro.trudes
slightly into the notch
of
the
gauge
and when the stylus is also
positioned
vertically within range
(A)
(Fig.15).
Fig. 16
4.
Connect
each lead on the cartridge
holder to its corresponding
pin
on the
cartridge. Each le.ad is color-coded
as
shown in
fig. 16.
5. Replace the cartridge holder by
placing
it
agains,t the tonearm head and
lock
it
by
pressin,g
the tonearm
lift forward.
Balancing the tonearm
The
tonearm is balanced,
by
rotating
the
weight.
1. Set the
stylus
force
dial to zero.
2. Unlock the tonearm,
and lift off the rest.
Move
the tonearm
just
to the inside of
the
resting
post
and turn
the counter-balance
until the tonearm
floats
in horizontal
position.
Turning
the weight
counterclockwise
raises
the
tonearm
head, turning
it clockwis,e
lowers
the tonearm.
Fig.
'l
7
The tonearm
is
precisely
balanced when
edge
"4"
of the tonearm head
and edge
"B"
of the tonearm
rest are
at equal height
(Fig.
1B) or when
the tonearm returns
by
itself
to a horizontal
position
after
the
chassis is
tapped.
11
Fig. 15


 To Next Page
 Loading...