Full Performance Maintenance Instructions
FBB (Flexible Batch Broiler)
5
OPERATIONAL CHECK
All the steps in this section can be performed during the Pre-Heat cycle. The broiler and gas supply should
be turned off briey when connecting meters to measure gas pressure.
1. Run Broiler through Pre-Heat cycle.
2. Conrm proper inlet gas supply pressure ( Refer to Service Manual if outside of the USA, Canada, or
Mexico ):
a. Natural Gas 7” – 12” W.C.
b. Propane 10” – 12” W.C.
3. Conrm proper gas pressure to Lower Burner:
a. Natural Gas 3.75” W.C.
b. Propane 8” W.C.
4. Conrm proper gas pressure to Upper IR Burners
a. Natural Gas 3.75” W.C.
b. Propane 8” W.C.
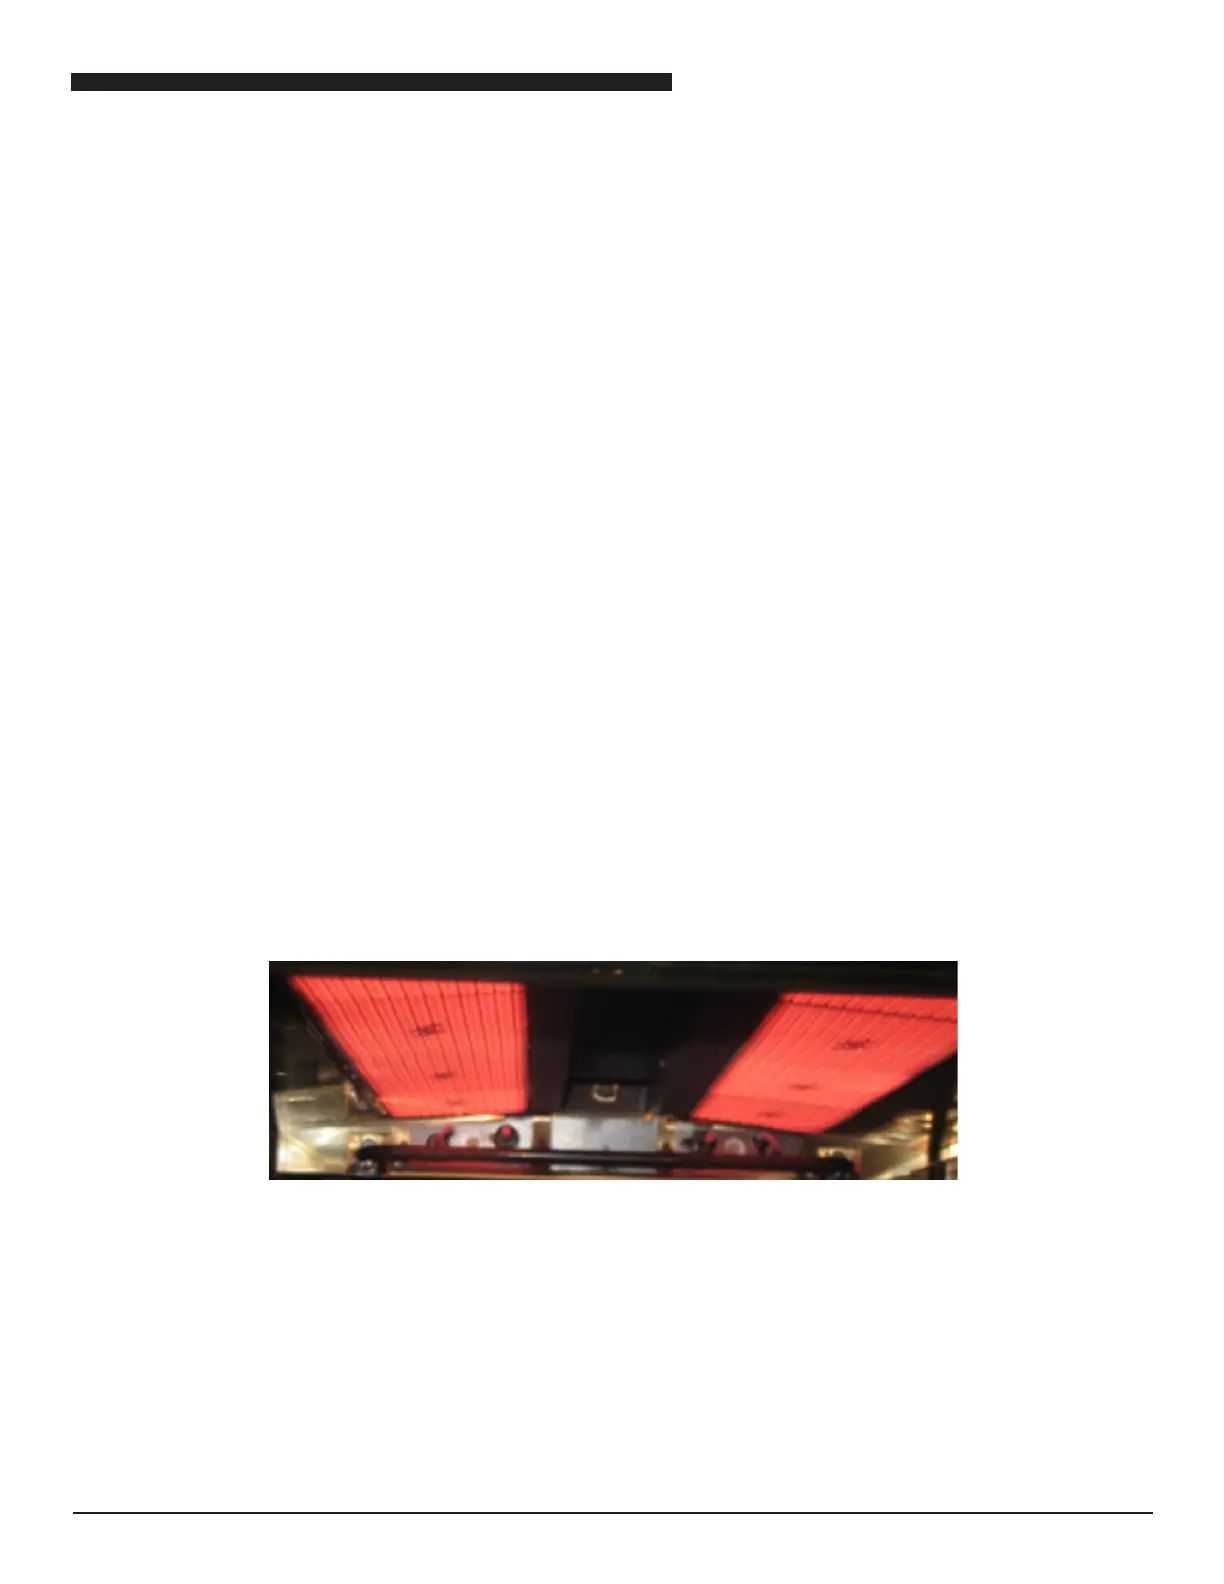
5. Inspect IR Burner appearance. When sufciently hot, IR Burners should appear as in Fig. 1 below.
6. An IR Burner out of adjustment may have blue or orange rolling ames coming off of the tile surface or
hints of blue around the burner perimeter. IR Burners may even be completely out of air adjustment due
to cleaning of air box and blower motor in previous section, which may cause IR Burner to not light. If it is
determined that an adjustment is necessary, make the following adjustment.
• Locate the air adjustment screws in the upper portion of the control compartment.
• Loosen the lock nuts for both IR Burners.
• Turn both screws in (clockwise, decreasing air) ¼ turn at a time until a uniform blue ame or haze is
observed below each of the infrared burner surfaces.
• Back the screws out (counter-clockwise, increasing air) ¼ turn at a time until the blue ame or haze
just disappears.
• Back the screws out an additional ¼ turn.
• Tighten the lock nuts while ensuring the screws stay in position.
FIG. 1