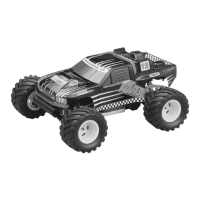
❏ Step 4. From bag PA001, remove the steering rod. Note
the shape of the rod.
❏ Step 5. Use a 3 or 4 hole servo arm from your radio
system. A 1, 2, or 4-armed servo arm will work. Cut off all
but one of the arms by scoring both sides of the servo arm
with a hobby knife and using pliers to snap off the arm.
❏ Step 6. Put the steering rod into the third hole from the
center of the servo arm (approximately 5/8" or 16mm). You
may need to enlarge the hole in the servo arm with a 5/64"
(2mm) drill or a hobby knife.
❏ Step 7. Slip the steering rod through the hole in the rod
connector that is already installed on the servo saver. (Use
the screw that came with your radio system to attach the
servo arm to the steering servo.) Do not tighten the set
screw on the rod connector. You will make the steering
adjustments later.
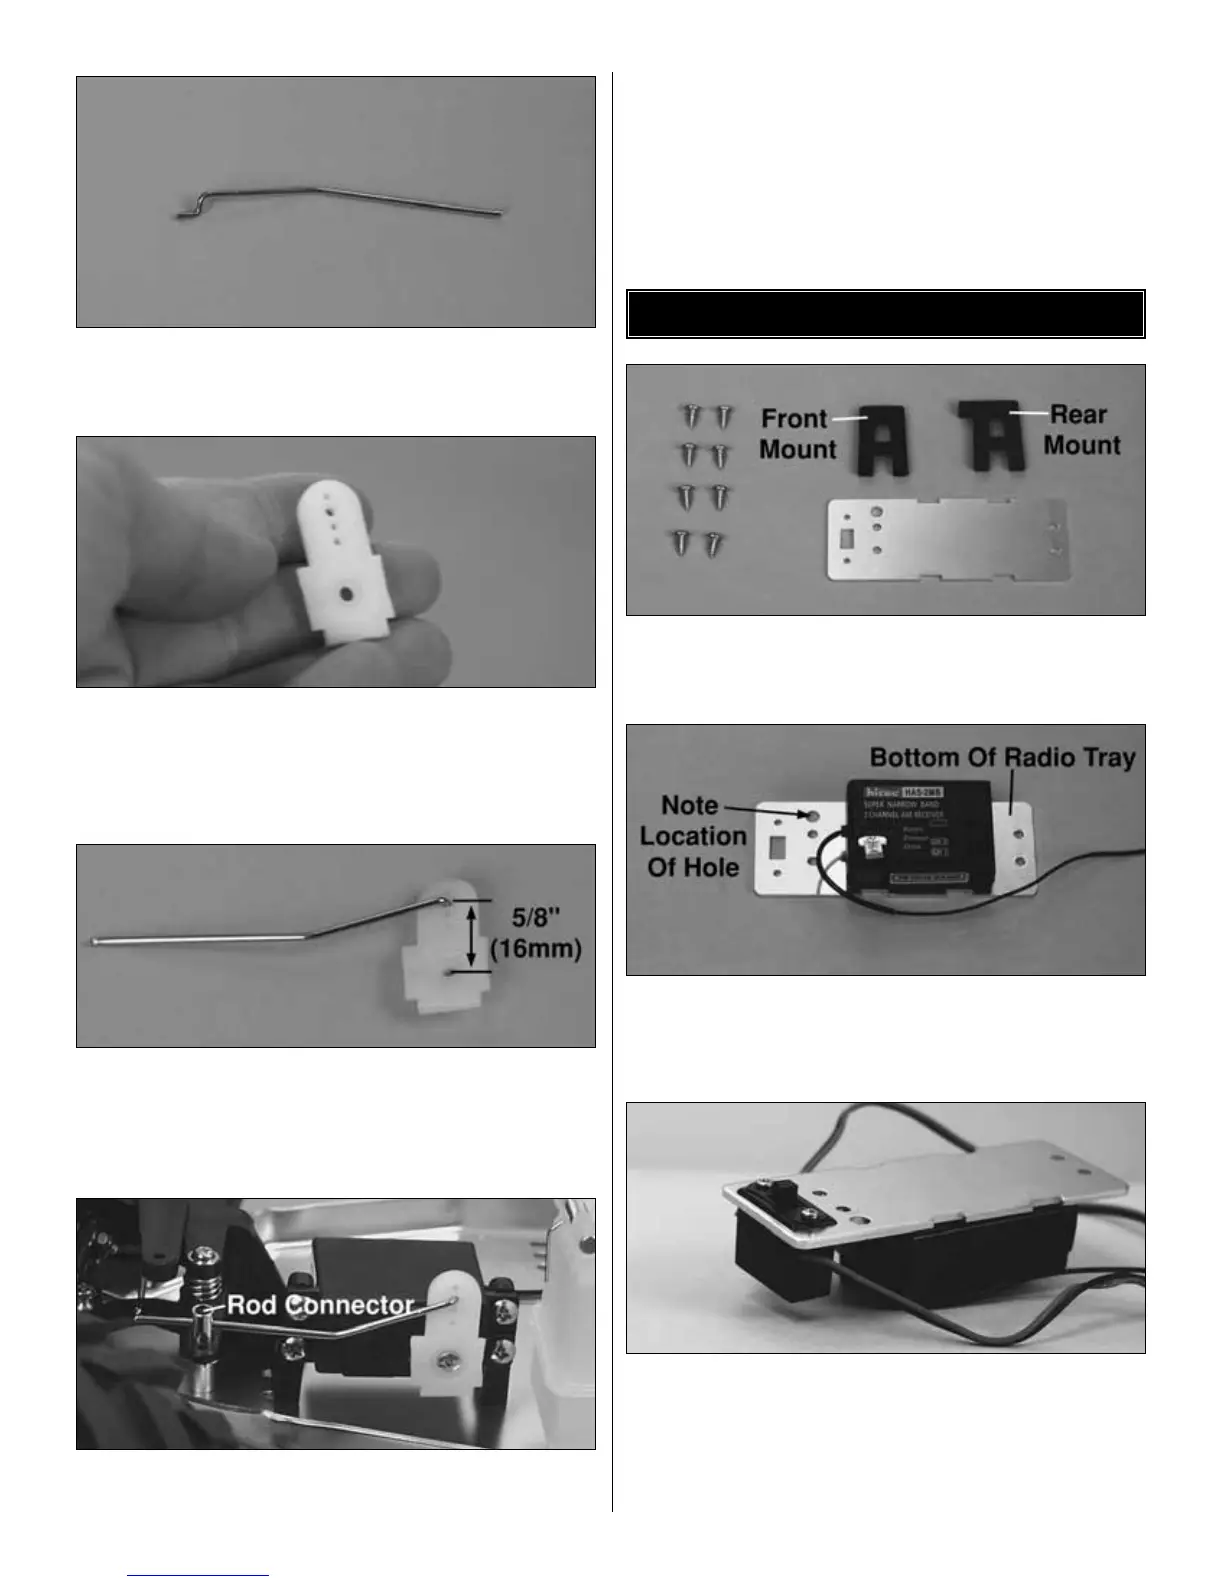
❏ Step 1. From bag PA002, remove all of the parts
included; the radio tray, the (2) radio tray mounts, and the
(8) 3 x 8mm self-tapping screws.
❏ Step 2. Using the provided double-sided tape, attach the
radio receiver to the bottom of the radio tray. To find the
bottom of the radio tray, put the large circular hole to the
upper left as shown.
❏ Step 3. Attach the switch from your radio system so it
protrudes on the top of the servo tray (make sure the switch
is in the OFF position). Remove the two screws on the top
of the switch. Place the switch plate on top of the radio tray,
the switch body on the bottom of the radio tray and then
insert the screws from the top.
SECTION 2: ASSEMBLING THE RADIO TRAY
5