12. Slide the Wear Strip up and out of the way. Insert Drill Bit #30 into a Drill Head. Be sure to tighten the
Drill Head to ensure that the drill does not slip during operation.
NOTE: Always wear the appropriate personal protective equipment when using power tools.
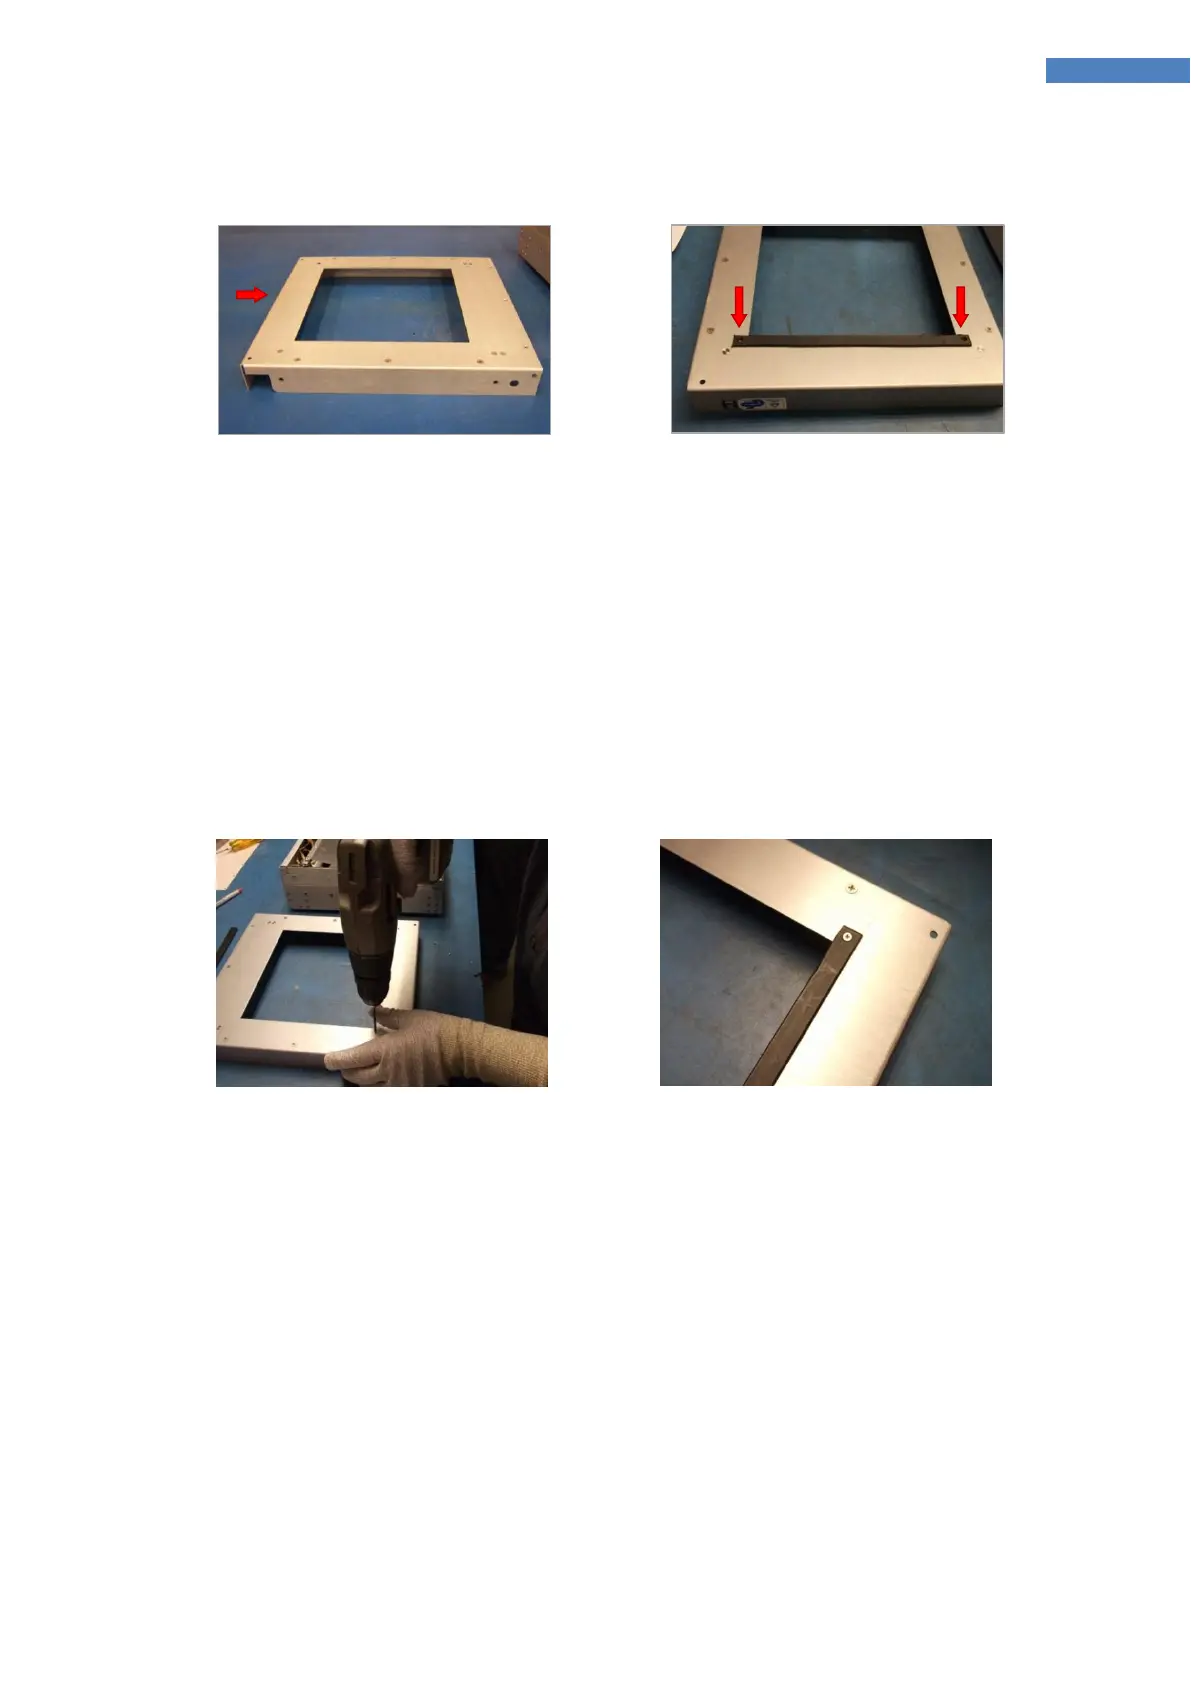
13. Use a Hammer and a Pointed Punch to create a punch mark at the marked locations and then drill
holes thru the two marked locations (Figure 34).
14. Place the Wear Strip back down and confirm the holes line up with the holes just drilled.
15. Install the two M3 x 6 mm Screws (Figure 35).
16. Reinstall the Bottom Housing on the ZIP™ Shutter.
17. Set-up the system according to the Shutter directions. Tighten the belt tension as needed to improve
the belt performance.