5
3. Connecting your LabelWriter Printer
At some point during the software installation, you will be asked to connect your
LabelWriter printer to the USB port.
NOTE
For Windows, do not connect the printer to
your computer until instructed to do so during the
software installation.
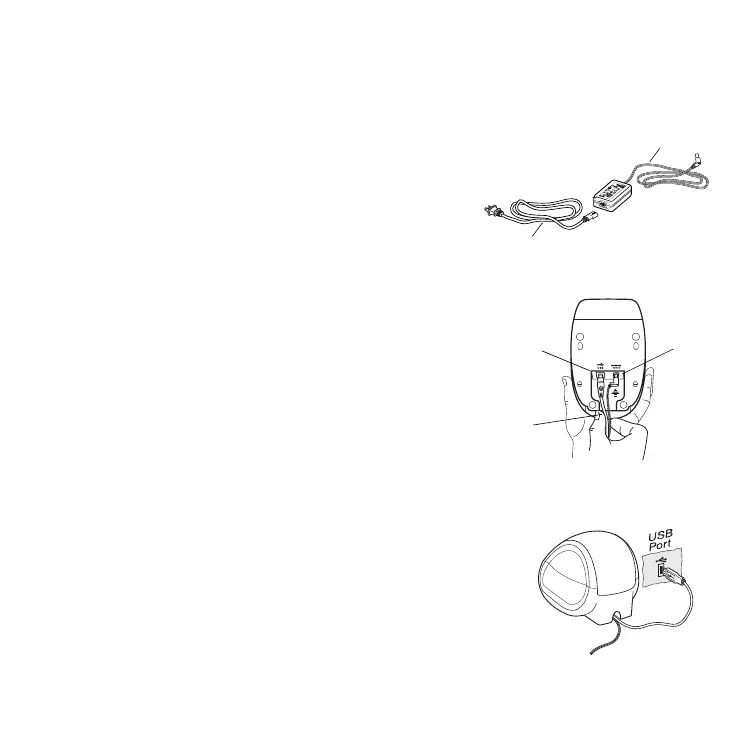
To connect the power
1 Plug the power cord into the power adapter. See
Figure 4.
2 Plug the power adapter into the power connector
on the bottom of the printer. See Figure 5. Make
sure to push the plug in completely.
3 Plug the other end of the power cord into a
power outlet.
To connect the USB cable
1 Plug the USB cable into the USB port on the
bottom of the printer. See Figure 5.
2 Insert the power and USB cables into the cable
channel and set the printer down on your work
surface.
3 When prompted during the software installation and
while the printer is turned on, plug the USB cable into
an available USB port on your computer. See Figure 6.
Power adapter
Power cord
Figure 4
Figure 5
USB
Power
Cable
channel
Figure 6

 Loading...