10
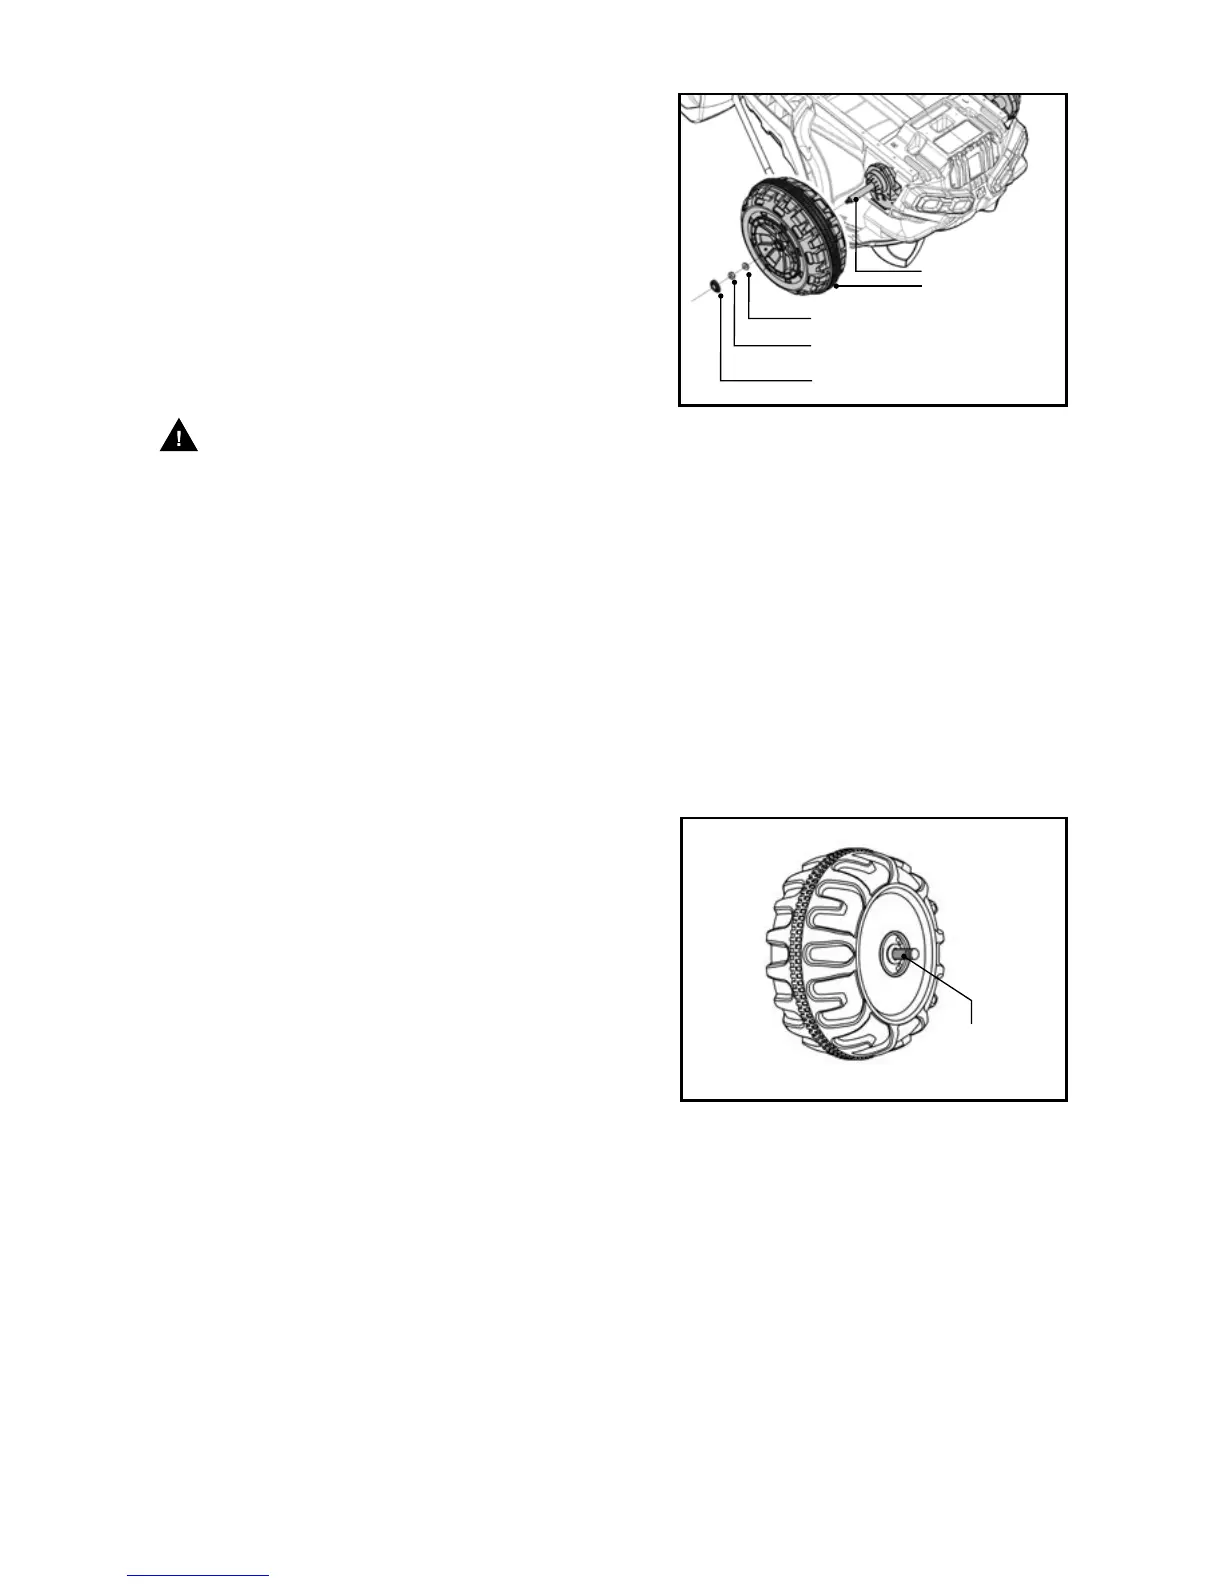
4. DRIVING WHEEL ASSEMBLY
• Adjust the rear axle to make sure the same
amount is exposed on both sides of the car
body.
• Slide one driving wheel onto the rear axle,
matching it to the gearbox.
• Slide a Ø12 washer onto the rear axle.
• While holding the rear axle with a pliers, fit
a M10 locknut on the end of the rear axle
using the included 17mm socket wrench.
WARNING: DO NOT over tighten the
nut. Stop tightening when 1-2 threads on the rear
axle are exposed on the outside of the wheels.
• Install the remaining wheel on the other
side, using both included 17mm socket
wrenches to tighten the nuts.
• Install the axle caps.
Gap
Driving wheel
Rear axle
Ø12 washer
M10 locknut
Axle cap
IMPORTANT! CHECK WHEEL GAP
After assembling any wheel onto the axles,
make sure to check the gap between the
screw thread and the outside of the wheel
(refer to the adjacent diagram). If the gap
is too big, add two or three washers on
the axle to the inside of the wheel. After
tightening the nut on the outside of the
wheel, please spin the wheel to check
if the wheel spins smoothly. If the wheel
gets caught or does not spin smoothly, the
friction may cause damage to the motor. Try
increasing the gap by removing one or two
washers to ensure the wheel spins smoothly.
NOTE: If the wheel nuts are loose, the wheels will not engage
the forward gear. Tighten the nut with the wrench.
 Loading...