11
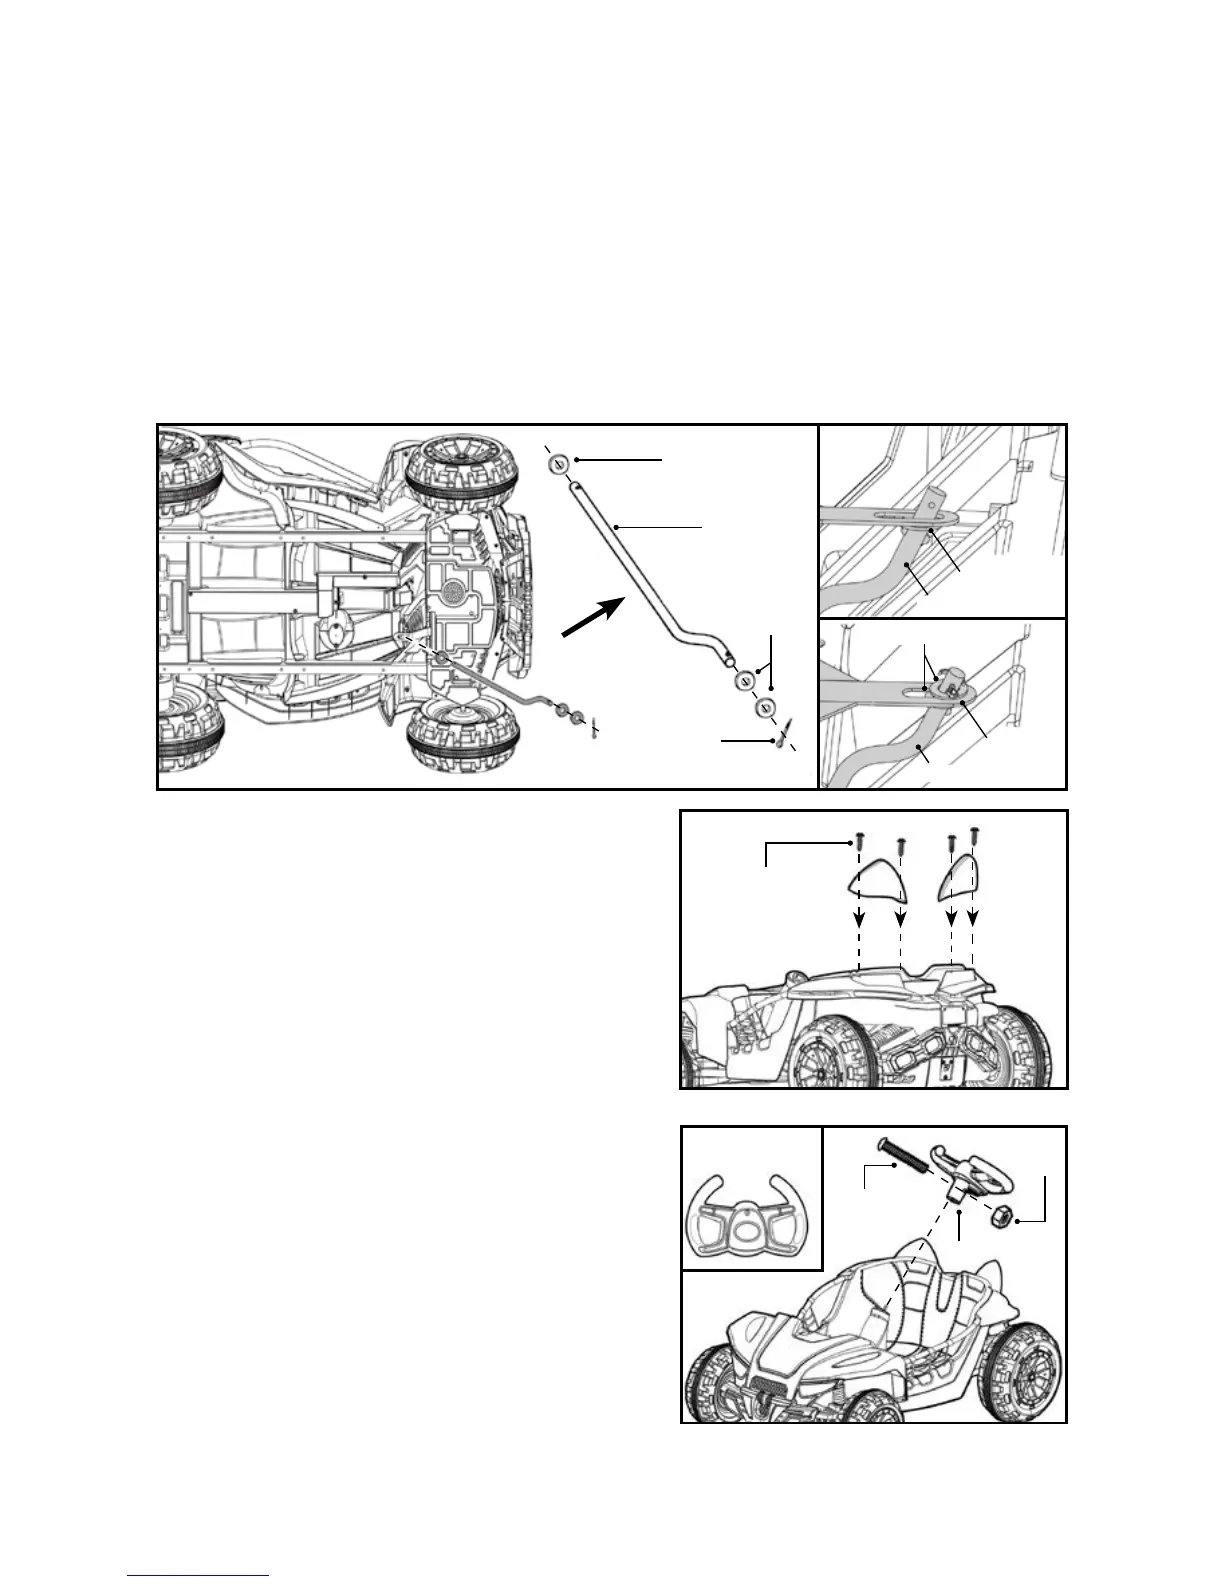
7. STEERING WHEEL ASSEMBLY
• Remove the M5 x 35 machine screw and
M5 nut from the steering wheel with a
screwdriver.
• Insert the steering wheel onto the end of
the steering column, lining up the hole in
the steering column. Reinsert the M5 x 35
machine screw and M5 nut as shown and
tighten securely with a screwdriver.
6. HEADREST ASSEMBLY
• Turn the vehicle body upright.
• Distinguish left and right headrest.
• Fit the right headrest into the right hole and
the left headrest into the left hole on the
rear of the vehicle body as shown.
• Insert four 4 x 12 round head screws and
tighten them with a screwdriver.
UP
M5x35
machine
screw
Steering wheel
M5 nut
4x12
round screw
5. STEERING COLUMN ASSEMBLY
• Turn the vehicle on its side as shown in the diagram.
• Slide a Ø10 washer onto the steering column from the longer end.
• Insert the longer end of steering column shaft through the bottom hole in the
front of vehicle body until it sticks out of the hole in the dash.
• Slide a Ø10 washer onto the short end of the steering column, then insert it
through the hole in the front axle linkage.
• Fit a Ø10 washer onto the short end of the steering column.
• Insert a split pin into the hole in the short end of steering column, and spread it
using needle-nose pliers.
Ø10 washer
Ø10
washers
Split pin
Split pin
Steering
column
Ø10 washer
Ø10 washers
Steering column
Steering column
 Loading...