English
9
Set Up Procedure / Maintenance
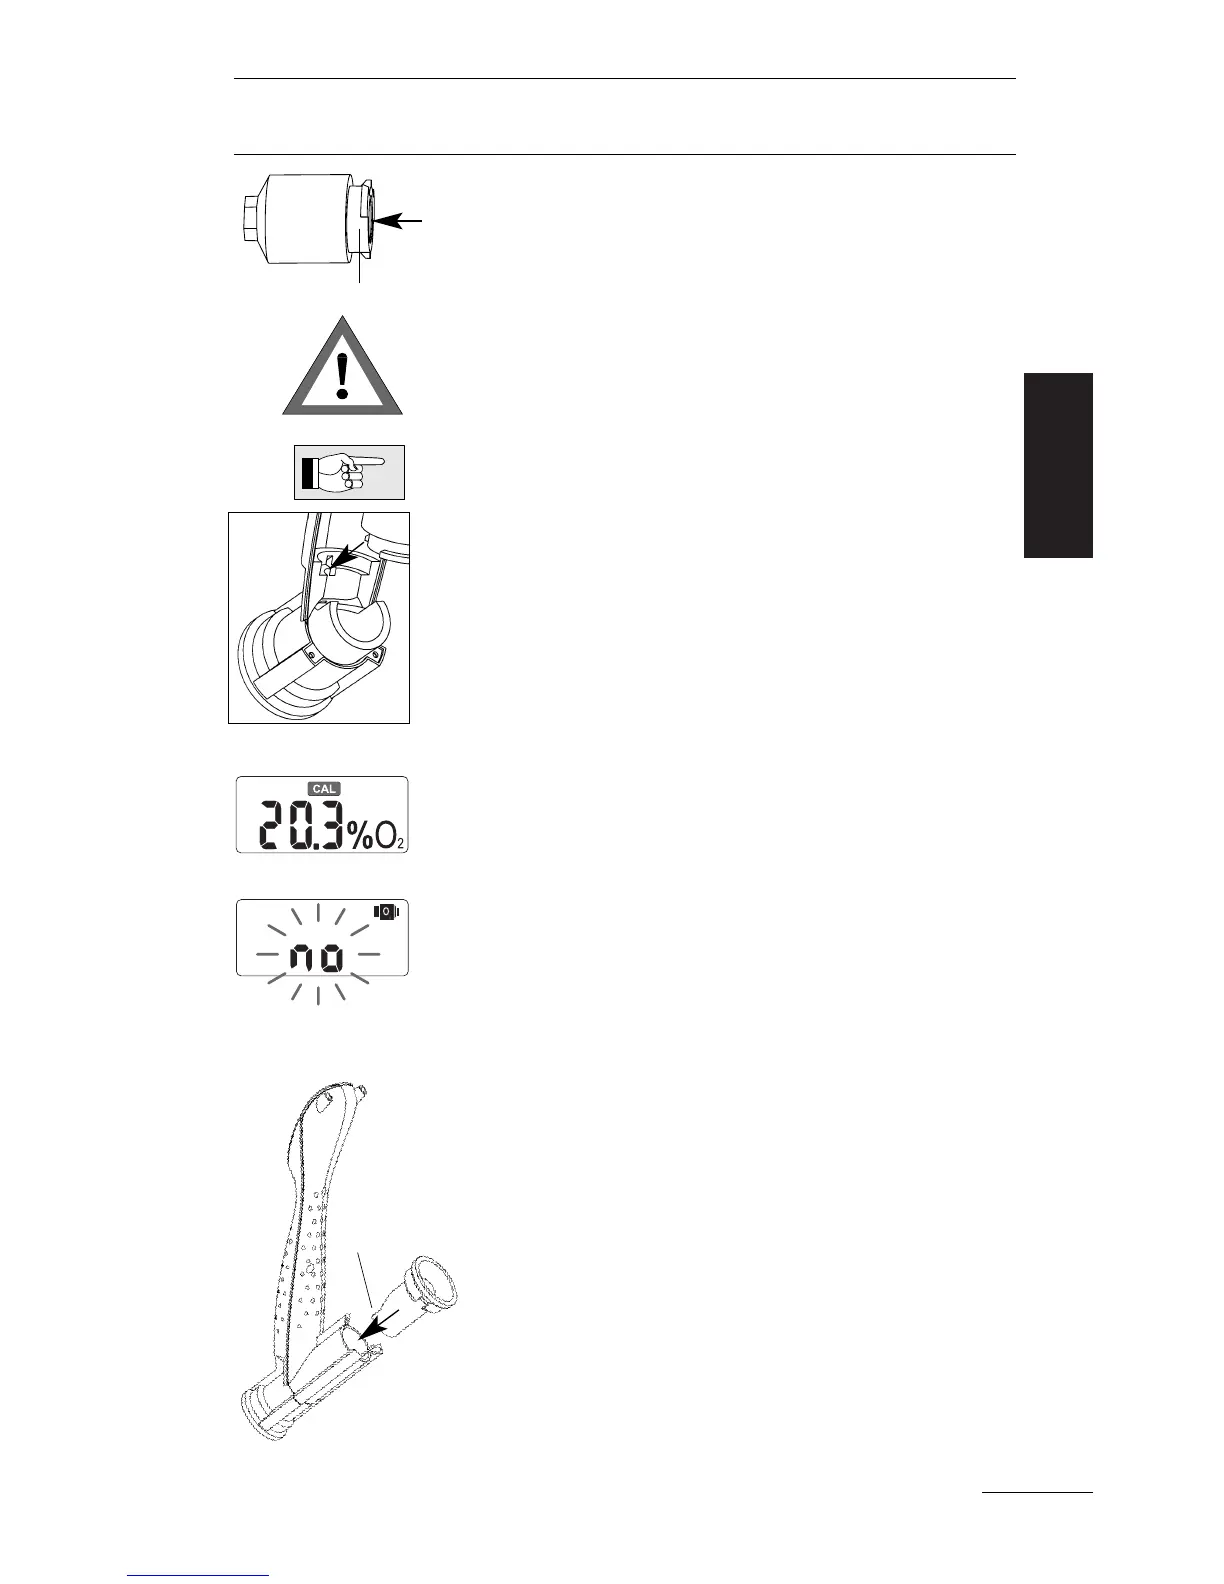
4. Take the new
O
2
sensor out of its package.
Take the O ring off the
O
2
sensor (if there is any
O ring).
Attach the mounting ring by twisting it onto the
O
2
sensor, exactly as shown in the picture on the
left. Maneuver until it fits snugly.
Write the date of the fitting onto the
O
2
sensor.
5. Insert the plug into the socket of the
O
2
sen-
sor. Make sure that the tab, that secures the
plug, is back in place. The lug of the mounting
ring must fit into the notch of the housing.
6. If a battery is mounted: Switch the unit on and
check that the display is on.
The unit will show the CAL symbol, because the
OxySpy requires calibration. The displayed
O
2
percentage may be incorrect.
If "no" and the
O
2
sensor symbol is displayed
check the chapter "Trouble Shooting", page 16.
7. Carefully refit together the 2 parts of the case.
Make sure that none of the wires get trapped
and damaged by the case. Take care that the
two parts fit together well and carefully tighten
the 7 screws.
8. Locate the rubber ring into the housing so
that its opening does not close the gas flow
to the
O
2
sensor.
9. Calibrate the OxySpy or fit a new battery.
See "Calibration" or "Fitting the Battery" on
page 11 or page 10, respectively.
Opening
Mounting ring