12 E-flite F-86 Sabre 15 DF ARF Assembly Manual
Stabilizer Installation
Required Parts
Stabilizer jig center Stabilizer jig side (2)
Right stabilizer Left stabilizer
Airframe assembly
Required Tools and Adhesives
Medium CA Square
6-minute epoxy Mixing cup
Mixing stick Epoxy brush
Paper towel Rubbing alcohol
Low-tack tape Waxed paper
Ruler Felt-tipped pen
Hobby knife with #11 blade
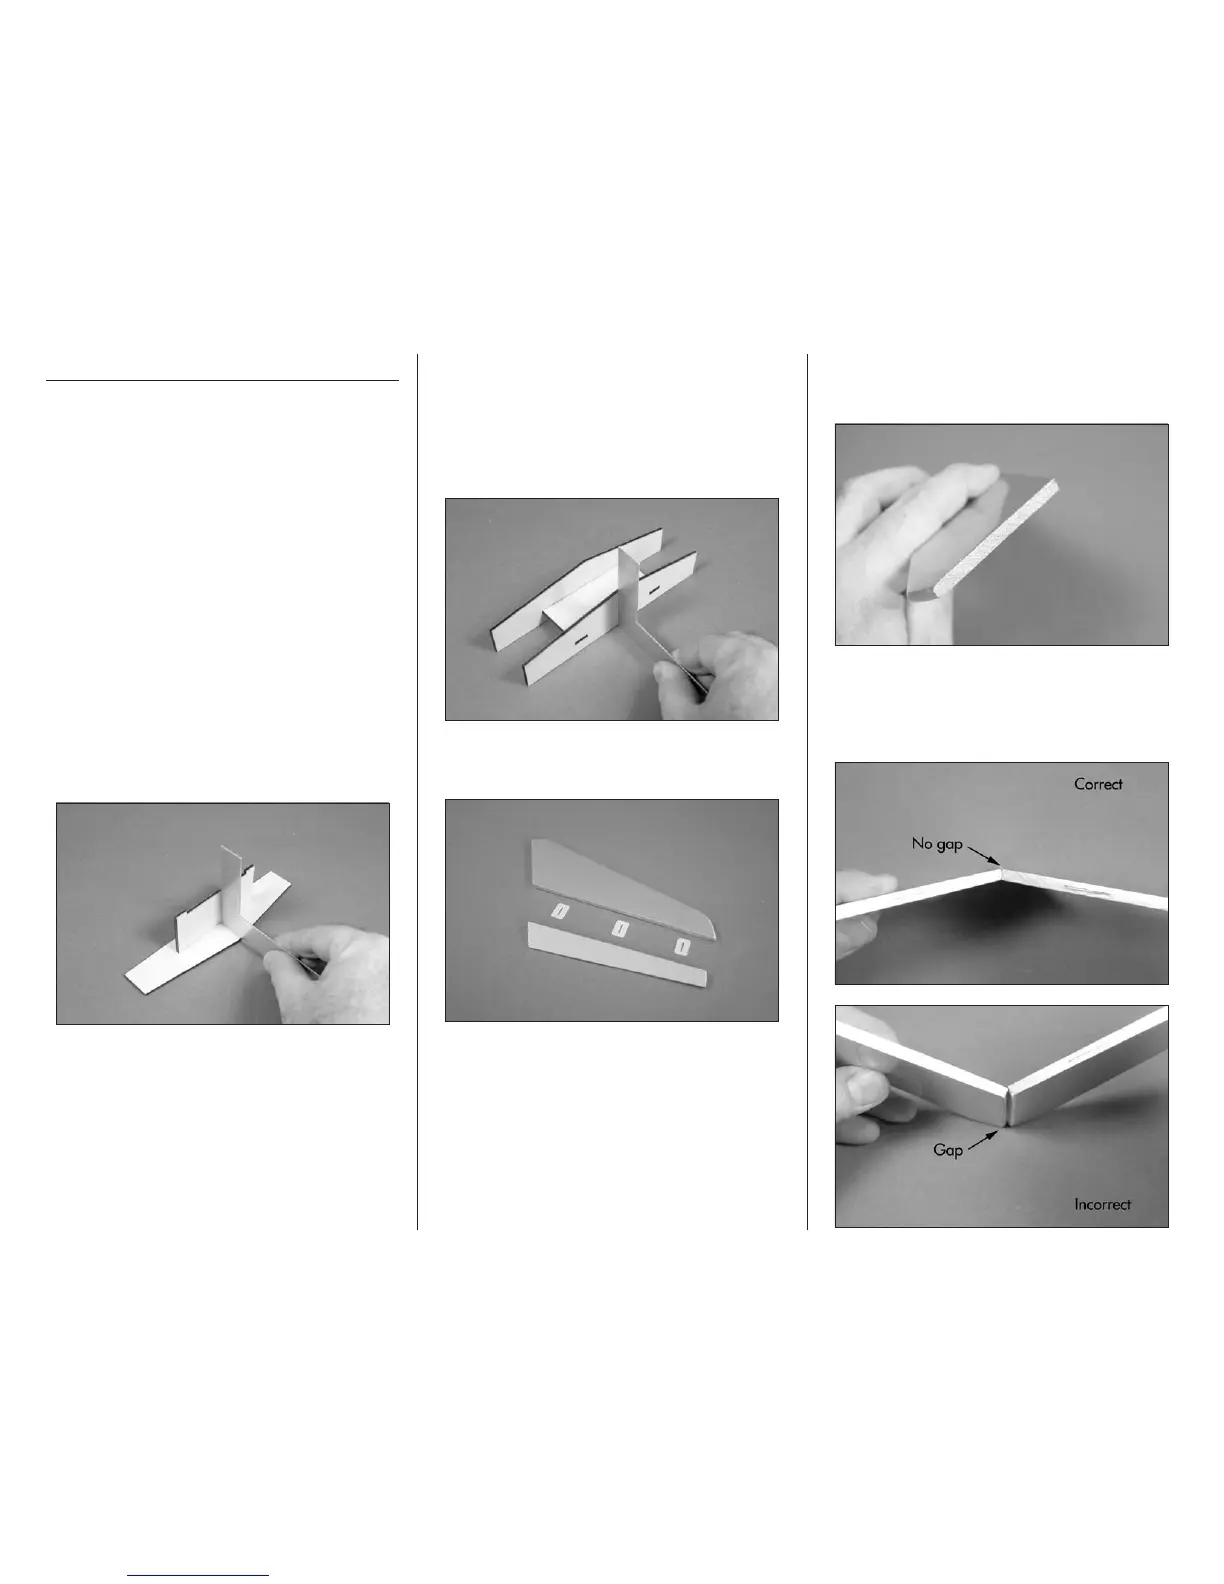
1. Use a square and medium CA to glue the
stabilizer jig center to the stabilizer jig side. The
square will keep the center perpendicular to the
side and result in a straight jig. Not doing so
may result in the jig being crooked and could
produce the wrong angle when gluing the
stabilizer halves together.
2. Use a square and medium CA to glue the
stabilizer jig side to the structure assembled
in Step 1. Using a square will keep the side
perpendicular to the stabilizer jig center. Not
doing so may result in the jig being crooked and
could produce the wrong angle when gluing the
stabilizer halves together.
3. Separate the elevator from the stabilizer. Set the
elevator and hinges aside at this time.
4. Use a hobby knife and a #11 blade to remove
the covering from the end of both the left and
right stabilizers.
5. The stabilizer halves have been prepared at the
factory with an angle so they fit tightly together
when joined. If the fit is incorrect, the two halves
will not fit tightly together.



 To Next Page