3.7 USING ZEITRONIX PRODUCTS
If you are going to use a Zeitronix wideband, the nGauge comes with a Zeitronix driver that uses the serial port to connect digitally to
the Zt-2 controller. This is the preferred way to connect the Zt-2 wideband as compared to connecting the wideband voltage to the
nGauge Analog Input. This allows the nGauge to display all of the Zt-2 signals, including the wideband O2 reading.
• Connect the four wire RJ-12 cable to the Zeitronix port on the back of the nGauge (see Appendix A).
• IMPORTANT: The Zt-2’s USER2 channel may be configured by using the Zeitronix ZDL software on a PC, while the Zt-2 is
connected to the PC through a serial port. When a temperature sensor is assigned to the Zt-2 USER2 input though ZDL
software, an internal pull-up resistor is automatically enabled. No external resistors are required on the Zt-2 USER2 input.
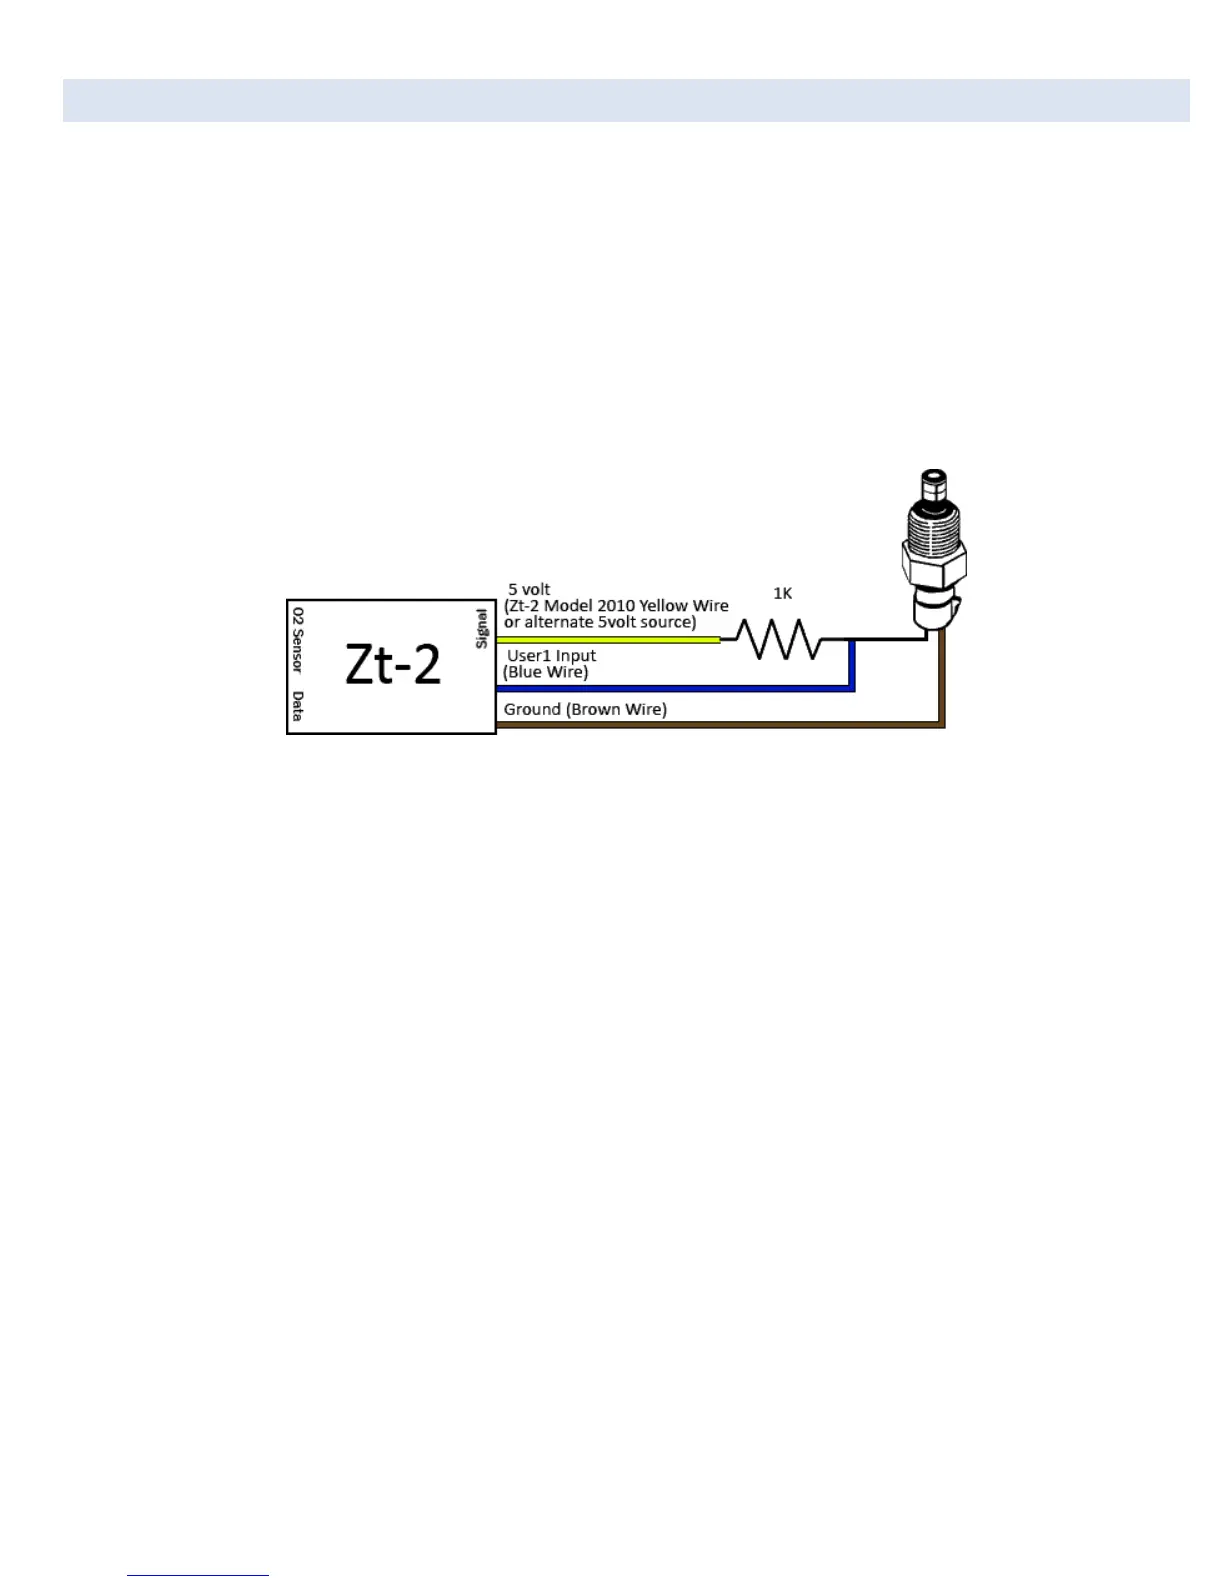
• If any Zeitronix temperature sensors are connected to the Zt-2 USER1 input, or the nGauge Analog-1 or Analog-2 ports,
those inputs require an external 1 K ohm pull up resistor to +5V (see Figure 1). Please see the Zeitronix web page for
further details.
Figure 2: 1kOhm Pull-Up Wiring for Zeitronix Temp Sensors to Zt-2 USER1 Input or nGauge Analog-1 or Analog-2 Ports
• Most Zt-2 signals are mapped to existing signals in the nGauge Analog Driver (for Zeitronix sensors connected to the
Analog-1 and Analog-2 inputs), or in the Zeitronix Driver (for sensors connected to the Zt-2). Signal calculators will be
needed for any unsupported sensors.
 Loading...