29/52
DCBS User Manual / Ref. MAN_DCBS_GM_EN_V1.0
Diagnostic and Charge 10/24
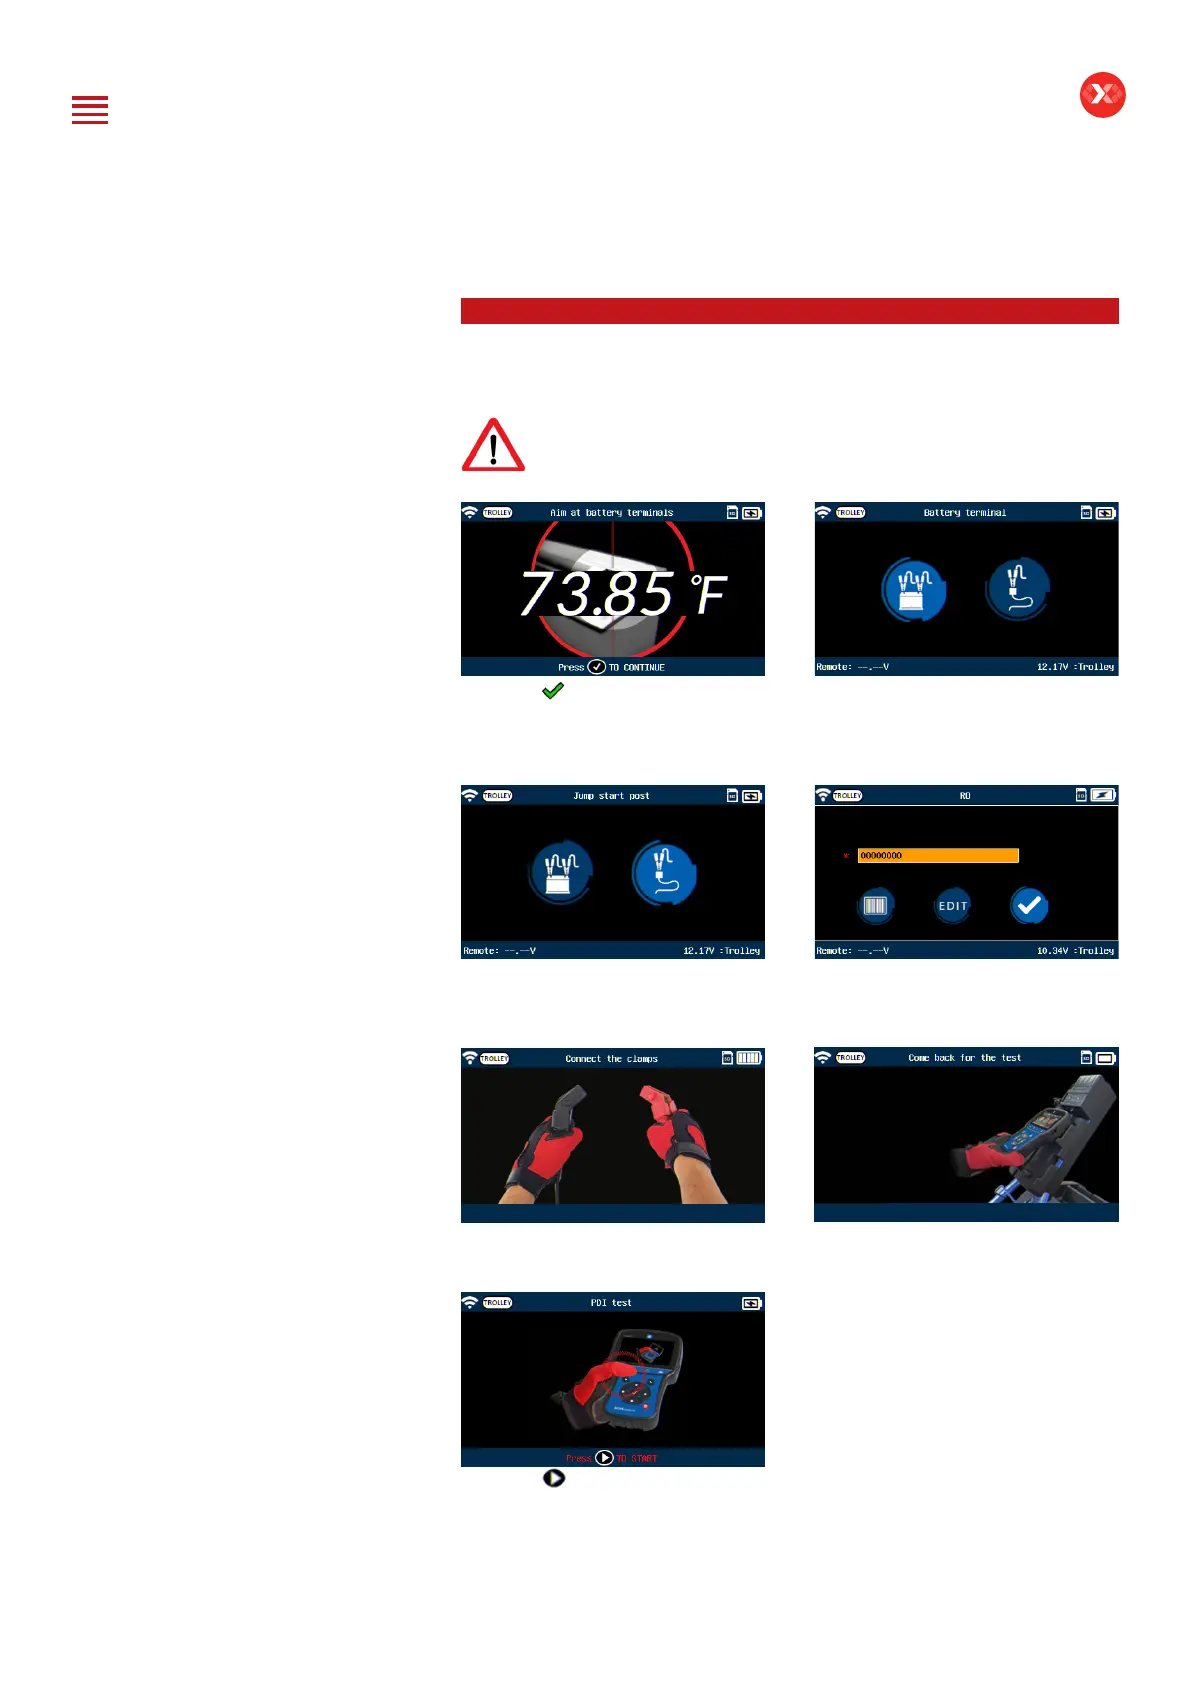
After vehicle or battery selection is made and connection to the trolley
established, the tool will ask to measure the temperature of the battery.
Do NOT point laser at individuals or reective objects.
Press the button on the keypad
to go to the next screen.
Select battery terminal if they
are accessible. (For PDI, it is
recommended to test at bare
battery terminals for most accurate
results).
If the terminals are not accessible,
select Jump Start Post (limits the
current injected into the chassis to
40A).
Enter the plate number and the
VIN of the vehicle. (the VIN is
mandatory to start).
If the clamps are not connected,
the tool will ask to connect the
clamps.
Remote needs to be on the
docking station for Diagnostic to
start.
Press the button to start the
Diagnostic test. If everything is
connected properly, the tool will
perform the test and display the
result.
PRE-DELIVERY INSPECTION ////////
Table of Content
Introduction
Safety Guidelines
Maintenance and Storage
Before Use
Usage Precautions
Disassembly/Damage/Removal
Cleaning the Product
Getting Started
Safety Reminders
Appearance and Dimensions
Trolley LED’s
Remote Presentation
Remote Job Storage
Accessories
Initial Setup
Installation
Battery Cable Clamps Connection
Power Cable Connection and Power On
Dealer Id. N°
Wi-Fi Connection (Remote to Trolley)
Physical Connection (Remote to Trolley)
Update
Settings
Preferences
Other Settings
Diagnostic and Charge
Remote handheld diagnostic tester
-Manual Selection of Battery
-Vehicle Selection from Database
-Start Diagnostic & Results
Trolley Diagnostic
-Complete Diagnostic & Results
-Pre Delivery Inspection Test (PDI) & Results
-Charge & Results
-Load Test & Results
-Enhanced Diagnostic Mode (EDM) & Results
-Reserve Capacity Test & Results
History (Results Storage)
Optimus
-Optimus Installation
-Using Optimus
Support Information
-Batteries
-Error Messages
Warranty