ENGINE BOTTOM END REASSEMBLY
Page D-3
Kawasaki Engine Shop Rebuild Manual
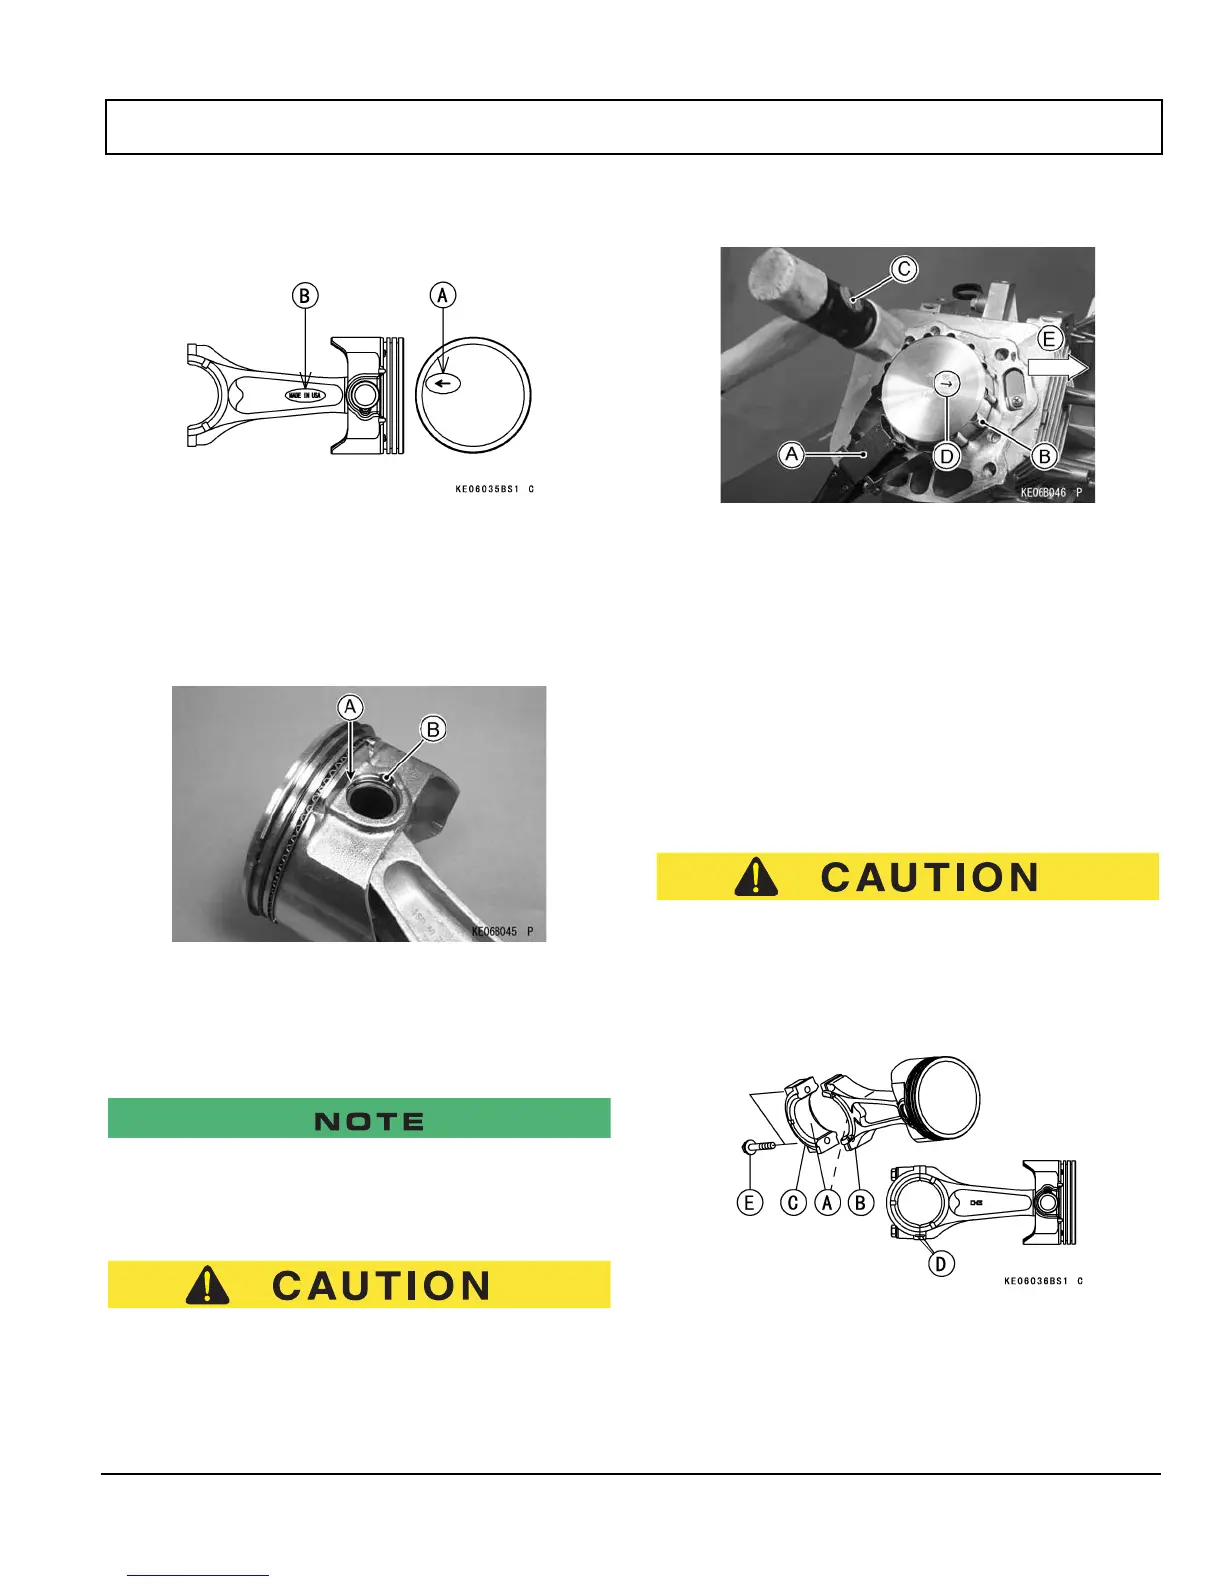
G.
Assemble the piston onto the connecting rod so that
the arrow mark [A] on the top of the piston can be
aligned with “MADE IN USA” [B] on the connecting
rod.
H.
Fit a new piston pin snap ring into the side of the pis-
ton so that the ring opening [A] does not coincide with
the notch [B] in the edge of the piston pin hole.
When installing a piston pin snap ring, compress it only enough
to install it and no more.
Do not reuse the snap rings, as removal weakens and deforms
them. They could fall out and score the cylinder wall.
I. Apply engine oil to the piston skirt and the cylinder
bore.
J.
Using the piston ring compressor grip [A] and the belt
[B], lightly tap the top of the piston with a plastic mal-
let [C] to insert the piston and connecting rod into the
cylinder.
Special Tools - Piston Ring Compressor Grip:
E-Z-GO Part No. N/A
Piston Ring Compressor Belt, 80 ~ 91:
E-Z-GO Part No. N/A
K. Position the arrow mark [D] on the top of the piston
toward the alternator rotor side [E].
The connecting rod and the connecting rod big end cap are
machined at the factory in the assembled state, so they must be
replaced together as a set.
L.
Apply engine oil to the inner surface [A] of the con-
necting rod big end [B] and cap [C].
M. Install the connecting rod big end cap in its original
position on the connecting rod big end by matching
the marks [D].