WEATHER PROTECTION
Page P-3
Repair and Service Manual
Read all of Section B and this section before attempting any procedure. Pay particular attention to all Notes, Cautions and Warnings
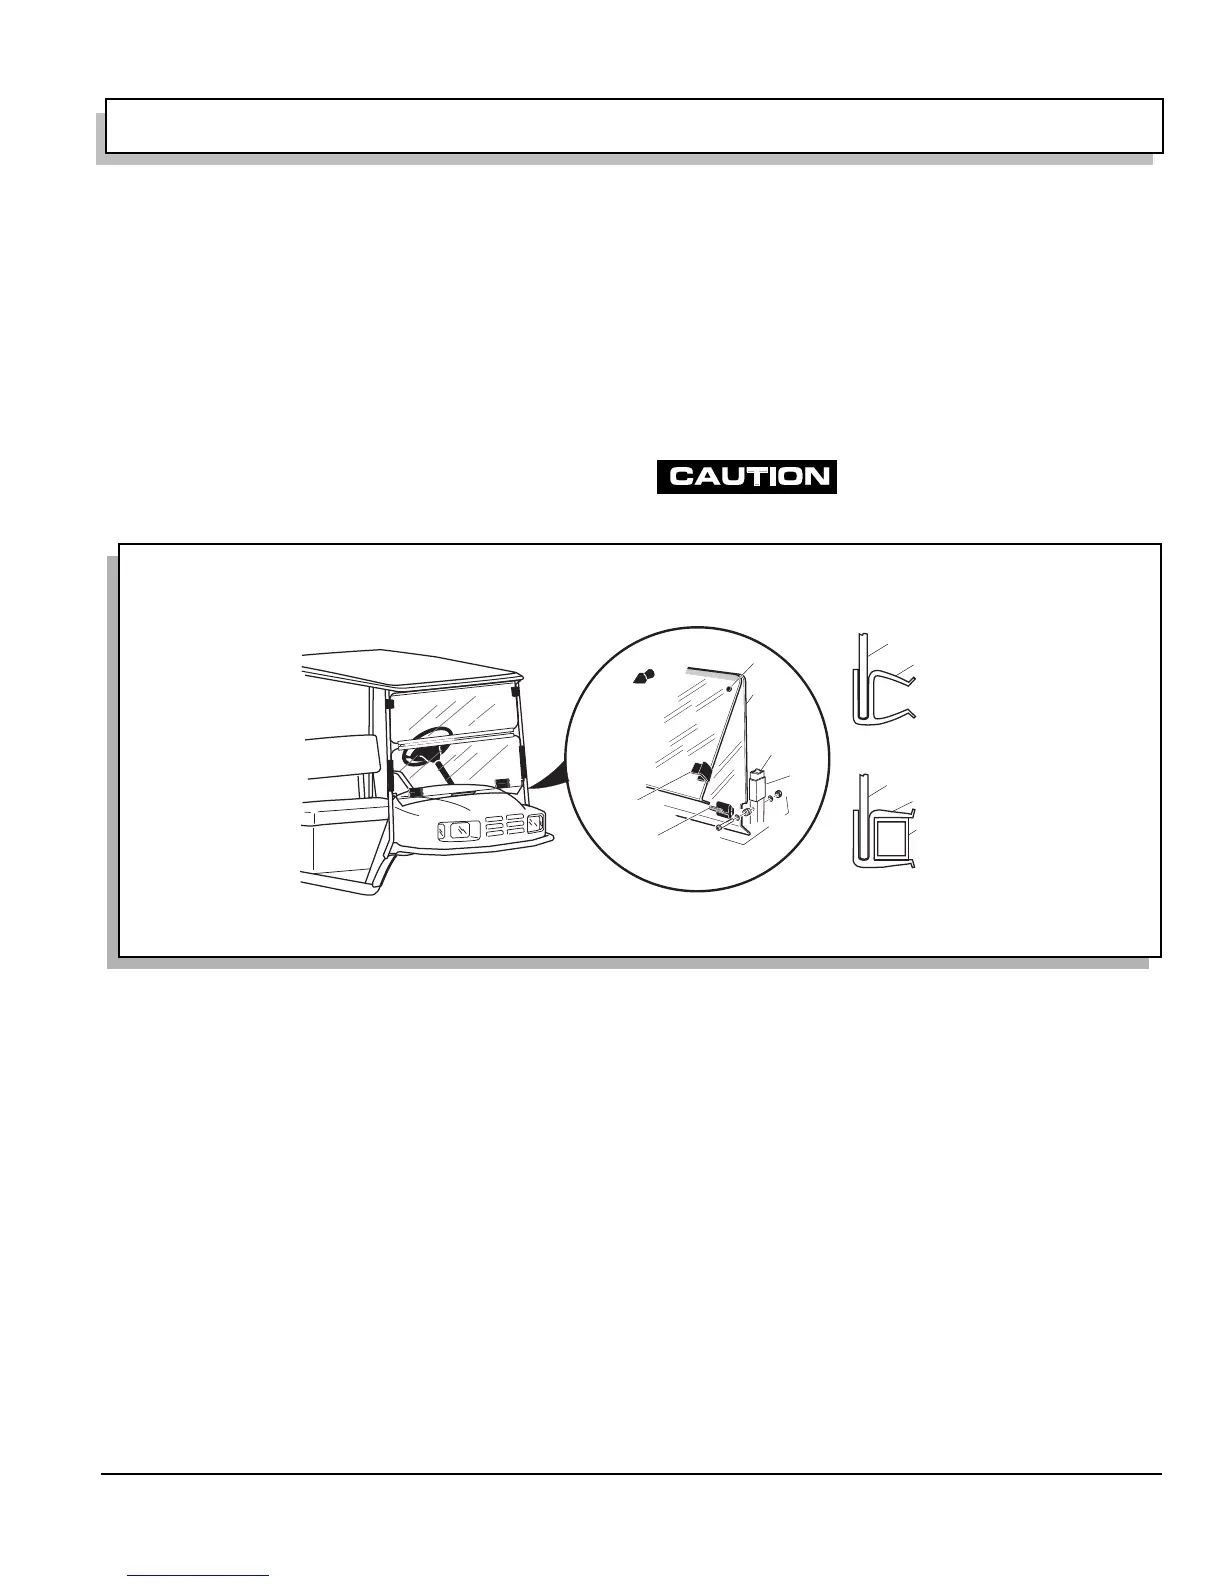
SPLIT WINDSHIELD
Remove protective covering from the windshield (item 3
or 4) (Ref Fig. 2 on page P-3).
Install sash (item11) on each side of the lower section of
windshield. Be sure sashes are centered vertically on the
bottom section. Using a rubber mallet, gently tap sash to
ensure windshield seats properly (Detail A).
Insert screw, washer and rubber grommet (item 10
through existing hole in front strut. Secure with washer
and lock nut (item 10) (Detail B). Do not over-tighten
grommet.
Place bottom section of windshield on rubber grommets
and press the sash, starting at the bottom, onto the front
strut so that it snaps into place. Repeat for opposite side
of windshield.
Swing the top section of windshield up and secure by
hooking the top grip on each side of windshield around
the strut.
To secure windshield when lowered, press edge of wind-
shield firmly into bottom grip.
Take care not to warp windshield when
raising and lowering the top section of
windshield.
ONE-PIECE WINDSHIELD
Remove protective covering from the windshield (item 2)
(Ref Fig. 3 on page P-4).
Install sash (item 3) on each side of the windshield.
Using a rubber mallet, gently tap sash to ensure wind-
shield seats properly.
Insert screw (item 4) through washer (item 5), rubber
grommet (item 6) and existing hole in front strut. Secure
with lock nut (item 7). Do not over-tighten or squeeze
grommet.
Place bottom section of windshield on rubber grommets
and press the sash, starting at the bottom, onto the front
strut so that it snaps into place. Repeat for opposite side
of windshield.
Fig. 2 Split Windshield
DETAIL B
Windshield
Strut
DETAIL C
Sash
Windshield
DETAIL A
Sash
Strut
11
3, 4
6
Front of
Vehicle
5
7
10
 Loading...


