FRONT SUSPENSION AND STEERING
Page E-8
Repair and Service Manual
Read all of Section B and this section before attempting any procedure. Pay particular attention to all Notes, Cautions and Warnings
Replace upper portion of floor mat in plastic trim retain-
ers. Install front wheels per WHEELS AND TIRES sec-
tion and lower vehicle per SAFETY section.
Check front wheel alignment and adjust if necessary.
See ‘Wheel Alignment’ on page E-3.
Hub Replacement
Tool List Qty. Required
Socket, 3/4", 1/2" drive................................................1
Ratchet, 1/2" drive....................................................... 1
Straight blade screwdriver........................................... 1
Ball peen hammer ....................................................... 1
Needle nose pliers.......................................................1
Socket, 1 1/2", 1/2" drive............................................. 1
Wheel bearing grease .............................................. AR
Seal driver ................................................................... 1
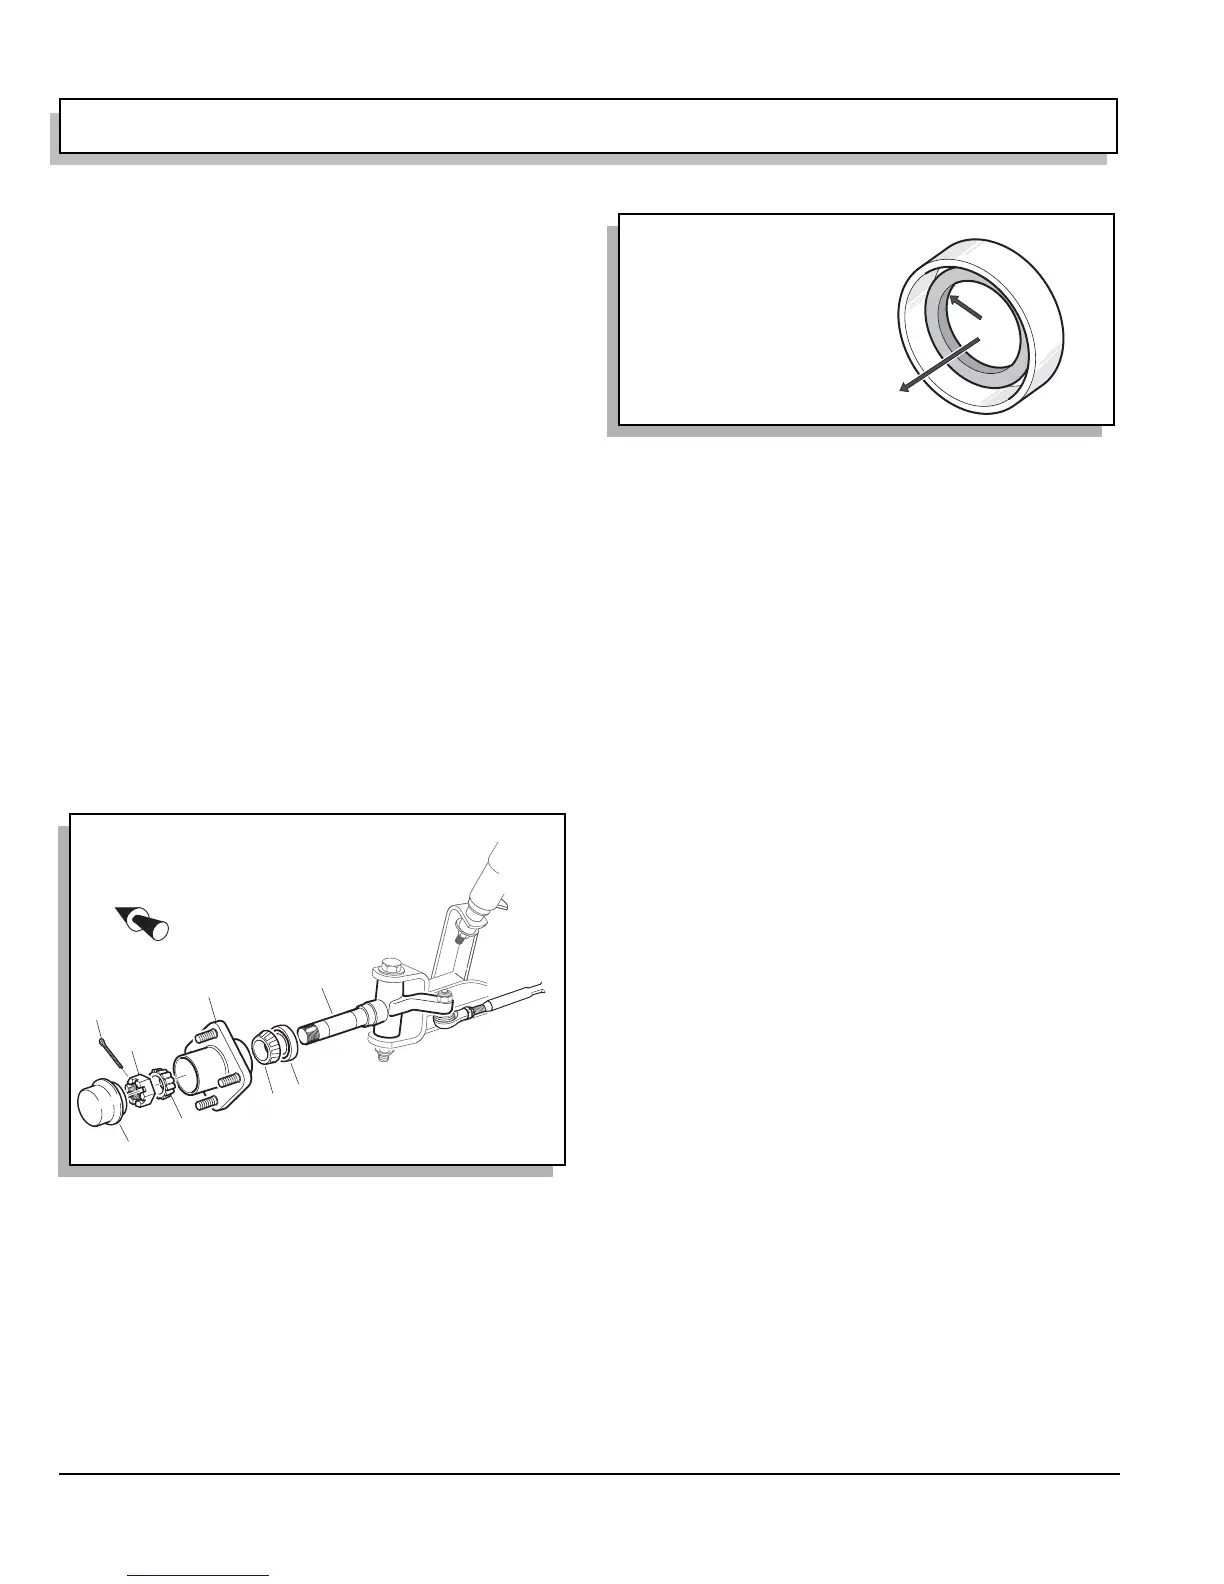
Loosen front wheel(s). Lift and support front of vehicle
per SAFETY section and remove front wheel(s).
Remove the dust cap (1), cotter pin (2) and castellated
nut (3) (Ref Fig. 9 on page E-8). While holding outer
wheel bearing (4) in place, slide hub (5) from spindle (6)
and discard.
Clean spindle and new hub thoroughly with solvent.
Pack new bearings with grease. See ‘Wheel Bearing
Packing’ on page E-2.
Apply a light coat of grease to inner race and place inner
wheel bearing (7) in hub. Orient new grease seal (8) so
the flange side of the seal is facing into the bore. Tap
gently into place until seal is flush with end of hub. Lubri-
cate lips of seal and spindle with grease (Ref Fig. 10 on
page E-8).
Place new hub onto spindle and fill the area between the
two wheel bearings about 1/2 - 3/4 full with grease and
apply a light coating to the outer bearing race.
Install outer wheel bearing (4) and secure hub loosely
with castellated nut. Place wheel onto hub and hand
tighten lug nuts.
Adjust bearing. See ‘Wheel Bearing Adjustment’ on page
E-3.
Replace the dust cap (1).
Lower vehicle per SAFETY section and tighten front
wheel(s) per WHEELS AND TIRES section.
Wheel Bearing and Race Replacement
Tool List Qty. Required
Non-ferrous punch.......................................................1
Ball peen hammer .......................................................1
Bearing driver ..............................................................1
Remove hub (1) from spindle (Ref Fig. 11 on page E-9).
See ‘Hub Replacement’ on page E-8.
Remove the grease seal (3), inner wheel bearing (4) and
bearing races (5) by tapping, through the other side of
hub, the bearing race using a hammer and a soft non-fer-
rous punch. Tap race in a circular pattern while moving
from side to side to avoid damaging bore of hub.
Clean outer wheel bearing (6), inner wheel bearing (4),
hub and dust cap (7) in solvent and dry thoroughly.
Inspect for signs of damage. Pitting or a blue coloration
of the rollers requires replacement of the bearing. If the
roller portion of the bearing is to be replaced, the race
must also be replaced.
To install race (5), make sure bore of hub (1) is clean and
place new race over bore of hub. Evenly tap with ham-
mer and bearing driver to drive race fully in bore. Repeat
on other side of hub.
Clean spindle (2) and pack new bearings with grease.
See ‘Wheel Bearing Packing’ on page E-2.
Fig. 9 Hub Replacement
Front of Vehicle
6
7
8
1
2
4
3
5
Fig. 10 Seal Installation
B
A - Install this side of seal
into housing
B - Lubricate lip of seal
A
 Loading...


