OPERATION AND SERVICE INFORMATION
Page 16
Owner’s Manual and Service Guide
Read all of manual to become thoroughly familiar with this vehicle. Pay particular attention to all Notes, Cautions and Warnings
The oil should be changed with the engine warm. Park the vehi-
cle on a level surface, engage the park brake and remove the
key. Place a drain pan under the engine. Wipe the top of the
engine clean with a cloth (Ref. Fig. 21 on page 16). Remove the
oil fill cap.
Clean the area around the filter. Oil drainage is accom-
plished by removing the three bolts securing the oil filter
to the engine. Remove the filter by pulling it from the
engine and allow the oil to drain. The ‘O’ rings may
remain on the engine or the filter (Ref. Fig. 22 on page
16).
At each oil change, thoroughly inspect filter before clean-
ing. At the first oil change, metal chips and lint may be
found. This is normal, resulting from engine run-in. At
subsequent oil changes, the presence of metal chips
may indicate possible engine damage.
Wear eye protection to reduce the possi-
bility of splashed solvent contacting the
eyes when cleaning oil filter.
Clean the filter by washing in any shop degreaser and
brushing the metal screen clean with a soft brush (Ref.
Fig. 23 on page 16).
Blow out the filter with low pressure air 30 psi (210 kPa)
or less from no closer than 3" (8 cm) and allow to air dry
(Ref. Fig. 24 on page 16).
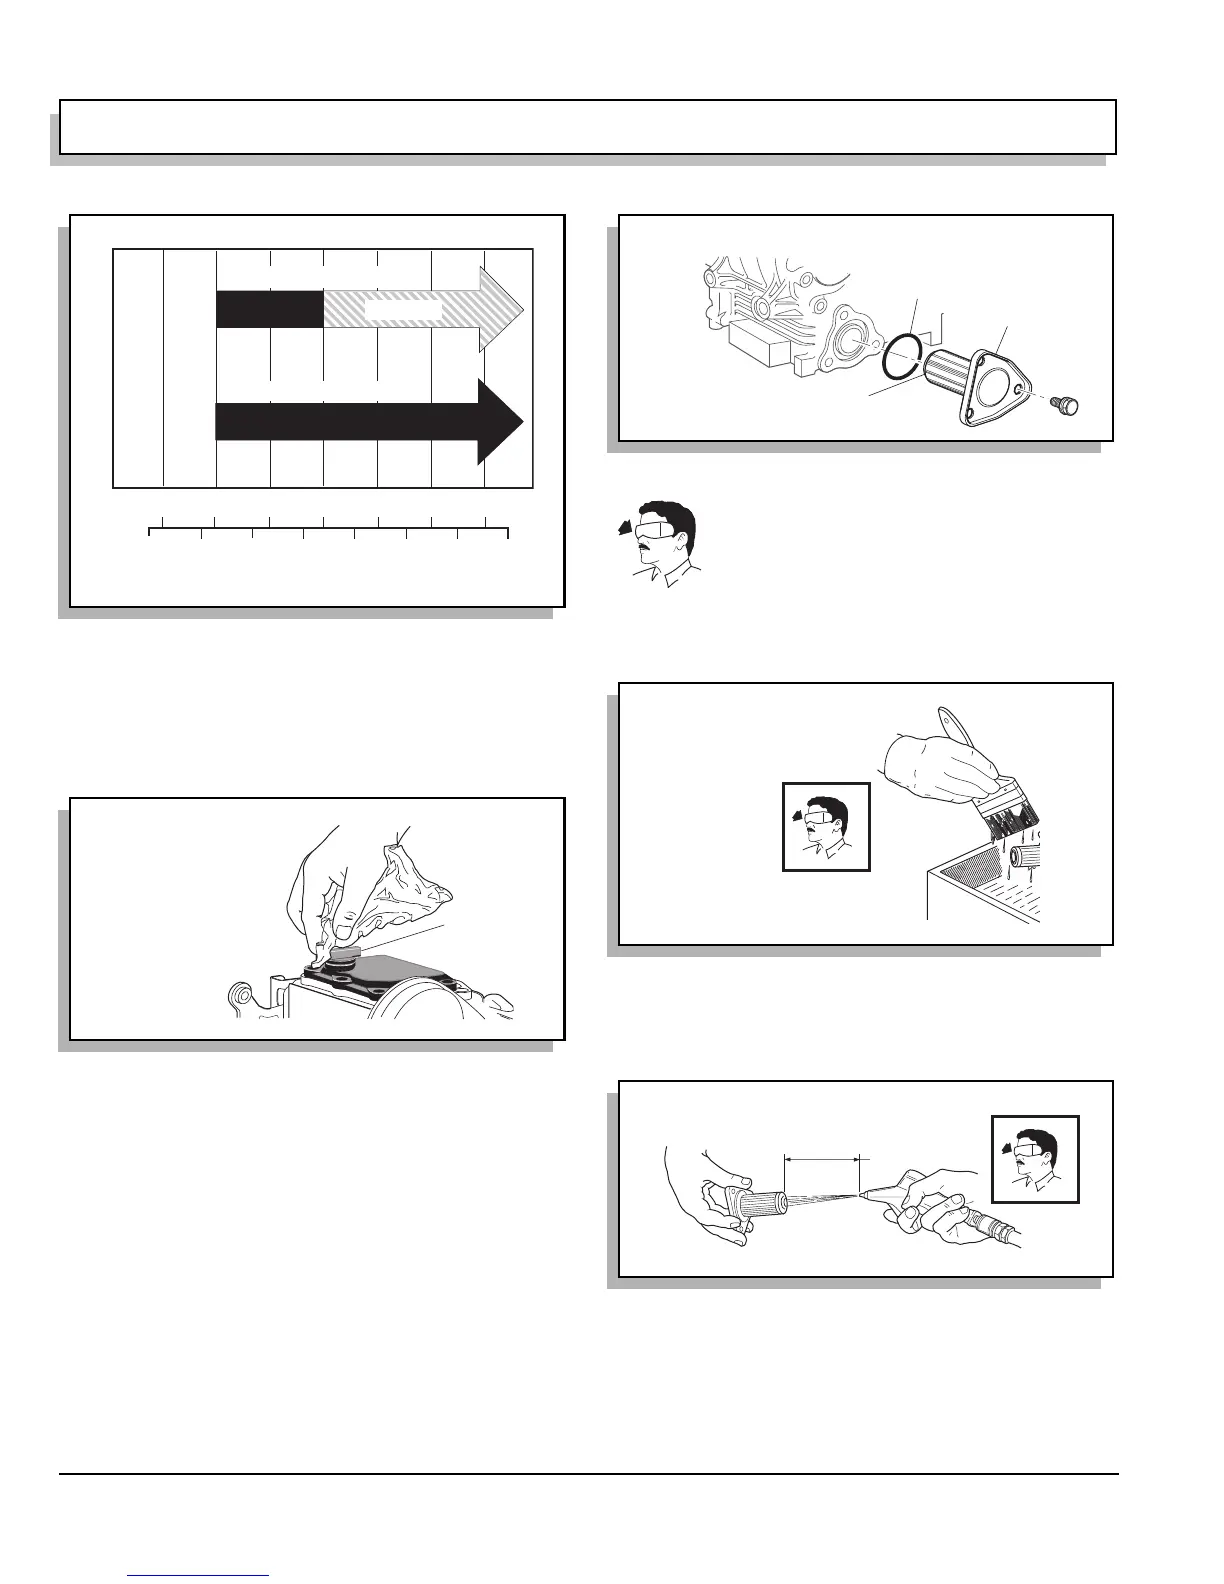
Fig. 20 Oil Viscosity Chart
Fig. 21 Clean Top of Engine
-20 0 20 40 60 80 100
-30 -20 -10 0 10 20
30 40
C
F
0
0
10W-30
10W-40
HEAVY DUTY WORK
LIGHT DUTY WORK
(AIR TEMPERATURE)
10W-30
Ref Ovc 1
Oil Fill C
Ref Cte 1
Fig. 22 Remove Oil Filter
Fig. 23 Clean Oil Filter
Fig. 24 Blowing Out Oil Filter
Oil
Filter
Small 'O' Ring Inside
End Of Oil Filter
Large
'O' Ring
ef Rof 1
Ref Cof 1
3" (8 cm)
Minimum
30 psi (210 kPa) Maximum
e
Bo
1
 Loading...