You’ll notice LCD screen lights momentarily as power is connected.
If not, check wall outlet.
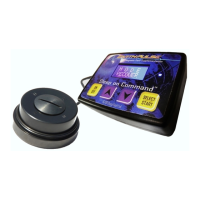
4) Firmly plug electromagnet(s) into remaining jack(s).
Please familiarize yourself now with electromagnet schematic di-
agram so there is no confusion about modular electromagnet parts,
removing cross-polarity-ring, or removing core & base-plate.
5) Remove Electromagnet CROSS-POLARIZING ring so your mag-
net(s) look like the Sleep congured magnet on next page with
cross-polarity-ring removed.
6) Press ON/OFF button; CONTROLLER boots to 8 hours
7) Press UP/DOWN arrow buttons to time desired; press SELECT/
START to select time; LCD then displays 9.6 Hz.
8) UP/DOWN arrows adjust frequency in 1/10 Hz steps. Press SE-
LECT/START to choose frequency and begin output.
9) Blue diode blinks in time with magnetic pulse. Controller is now
active at 70% amplitude.
10) UP/DOWN arrows adjust AMPLITUDE in 10% increments (only
while active and blue diode is blinking). Controller boots to 70% am-
plitude or approximately v.4.7 amplitude. Let your inner self guide you
on knowing how much amplitude is comfortable during initial session
(and during nighttime). Increase and decrease eld amplitude based
on how you feel. Some will feel 50% is enough during initial session.
A small percentage of users are sensitive to EMF even at these low
Infrasonic frequencies and may have to go as low as 10% at rst.
11) Test electromagnet output as shown after the magnet schematic
page. You’ll need Sleep-Congured Magnet to test output. .
BACK TO TABLE OF CONTENTS:
18