EasyManua.ls Logo

Eastwood TIG200 - User Manual

Eastwood TIG200
24 pages
Print Icon
To Next Page IconTo Next Page
Loading...
TIG200 DIGITAL WELDER
ASSEMBLY & OPERATING INSTRUCTIONS
Item #20589

Other manuals for Eastwood TIG200

Questions and Answers

  • A
    Austin HartAug 18, 2025
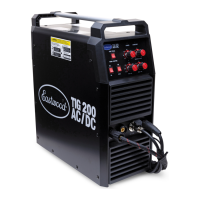
    Why won't my Eastwood Welding System arc start?
    • D
      Douglas MullenAug 18, 2025
      An arc that triggers but fails to start in your Eastwood Welding System can stem from several causes. First, check the ground connection to ensure it's securely attached to a clean surface near the welding area; welding towards the ground is also advisable. Second, verify you're using the correct tungsten type for your base metal, typically thoriated for steels. Lastly, confirm that your shielding gas cylinder is fully open and set to the appropriate flow rate.
  • K
    Kristina WilliamsAug 20, 2025
    What to do if I see porosity in my Eastwood Welding System weld bead?
    • H
      heather25Aug 20, 2025
      Porosity in your Eastwood Welding System weld bead can be caused by several factors. First, ensure proper gas flow by adjusting the shielding gas flow rate and checking for any loose fittings. Second, clean the filler metal to remove any oil, debris, or moisture. Third, prepare the base metal by eliminating any oil, debris, coatings, or moisture. Also, ensure you are welding in an area shielded from wind or fans. Finally, adjust the tungsten so that 1/8” to 1/4” protrudes from the collet.
  • D
    Drew JohnsonAug 23, 2025
    Why does the arc wander when using my Eastwood TIG200?
    • R
      ryanjuanAug 23, 2025
      If the arc wanders and it is hard to concentrate heat in a specific area while using your Eastwood Welding System, consider these potential causes. Ensure the tungsten is properly prepped. Adjust the shielding gas flow rate and check for loose fittings. Remove any contamination by removing the tungsten from the torch, breaking off the contaminated section, and resharpening it. Maintain the tungsten 1/8 to 1/4 inch off the workpiece. Check the ground connection to ensure it's on a clean surface near the welding area. Clean the base metal to remove any oil, debris, coatings, or moisture; for aluminum, remove all oxide using a stainless brush or flap wheel.
  • M
    Ms. Nicole MerrittAug 25, 2025
    How to fix an Eastwood TIG200 Welding System arc that wanders?
    • D
      dkennedyAug 26, 2025
      An arc that wanders, making it hard to concentrate heat, can stem from several issues. Begin by ensuring your tungsten is correctly prepped. Next, verify proper gas flow by adjusting the shielding gas flow rate and inspecting for leaks. If the tungsten is contaminated, remove the contaminated section and resharpen it. Maintain the correct arc length by holding the tungsten 1/8 to 1/4 inch off the workpiece. Check the ground connection to ensure a complete circuit. Clean the base metal, removing any contaminants. Lastly, if using AC, adjust the Clearance Effect knob to shift more negative, reducing heat to the tungsten.
  • L
    ljordanAug 28, 2025
    How to prevent material warping when using Eastwood Welding System?
    • C
      Cody HinesAug 28, 2025
      To prevent material warping with your Eastwood Welding System, ensure sufficient clamping of the workpiece and weld while the clamps are in place. Also, add more tack welds to increase rigidity. To reduce heat, spread the welding out around the area using stitch welding techniques, alternating sides, and allowing the pieces to cool between passes.
  • M
    Mike GarrettAug 30, 2025
    How to remove contamination from Eastwood Welding System weld bead?
    • B
      Bob MorrowAug 30, 2025
      Contamination in your Eastwood Welding System weld bead can be addressed by ensuring the cleanliness of your materials. Remove the tungsten from the torch, break off any contaminated sections, and resharpen it. Clean the filler metal to eliminate any oil, debris, or moisture. Thoroughly clean the base metal, removing any oil, debris, coatings, or moisture; if working with aluminum, remove all oxide using a dedicated stainless brush or flap wheel.
  • S
    sheltonseanSep 2, 2025
    What causes cracking in Eastwood Welding System weld bead?
    • W
      wpetersonSep 2, 2025
      Cracking in your Eastwood Welding System weld bead can be due to several factors. Reduce heat and allow more time between passes if there is too much heat in the material. Preheat the base metal if it is absorbing too much heat. Ensure you are using the appropriate filler wire type and diameter for the joint being welded.
  • T
    Timothy OlsonSep 4, 2025
    Why is the tungsten melting in my Eastwood TIG200?
    • R
      Robyn GarciaSep 4, 2025
      Melting tungsten in your Eastwood Welding System can be attributed to a few reasons. Adjust the flow rate of the shielding gas and check for loose fittings. Increase the tungsten diameter, consulting the chart for proper sizing. Ensure you are using 100% Argon when TIG welding.
  • S
    Sarah FrankSep 7, 2025
    How to prevent a crater in the end of Eastwood TIG200 Welding System weld bead?
    • W
      William LeeSep 7, 2025
      To prevent a crater at the end of your Eastwood Welding System weld bead, keep the torch on the base metal while the post flow shielding gas flows to protect and cool the metal and tungsten. Reduce current and add more filler at the end of the weld, and consider back stepping to ensure no crater forms.
  • N
    Nathan WillisSep 9, 2025
    What to do if my Eastwood TIG200 Welding System tungsten is contaminated?
    • C
      Chelsea BurkeSep 9, 2025
      If your Eastwood Welding System tungsten becomes contaminated due to contact with the base metal, maintain a distance of 1/8” to 1/4” between the tungsten and the base metal. If contact occurs, immediately break off the end of the tungsten and resharpen it.

Summary

Safety Information

Electric Shock and Fire Hazards

Precautions to prevent electric shock, fire, and explosion during welding.

Electromagnetic Fields and Arc Ray Hazards

Highlights risks associated with electromagnetic fields and arc rays.

Fumes, Gases, and Hot Metal Hazards

Details dangers from fumes, gases, hot metal, and flying chips.

Welder Specifications

Input, Output, and Temperature Ratings

Details electrical input, output current/voltage, and operating temperature ranges.

Front Panel Controls and Displays

Control Switch Groups Overview

Introduces the six major groups of function switches on the front panel.

Dual-Function Knob and Parameter Settings

Setting Procedure and Display Readout

Guide to using the dual-function knob for settings and understanding the display.

TIG;DC Welding Parameters

TIG;DC Setting Parameters

Details parameters like pre-flow, arc current, slope-up, and post-flow times.

TIG;DC Welding Data Tables

Provides tables for material thickness, electrode, rod, and current settings.

TIG Welding Setup

Shielding Gas System Connection

Step-by-step instructions for connecting the shielding gas system.

TIG Welding Operation

Torch Handling and Puddle Formation

Techniques for torch handling, filler rod use, and forming a welding puddle.

TIG Torch and Tungsten Maintenance

Tungsten Sharpening Technique

Detailed procedure for correctly sharpening tungsten electrodes.

TIG Welding Troubleshooting

Arc Start, Stability, and Quality Issues

Diagnosing and fixing problems with arc start, wandering, and weld quality.

Eastwood TIG200 Specifications

General IconGeneral
Amperage Range10-200A
AC Frequency Control20-250 Hz
AC Balance Control30-70%
Weight45 lbs
Welding ProcessesTIG, Stick
Protection ClassIP21S
TIG Welding CapabilityYes
Stick Welding CapabilityYes
High Frequency StartYes
Pulse WeldingYes
AC/DC OutputYes
Duty Cycle60% at 200A

Related product manuals