EasyManua.ls Logo

Eastwood VERSA-CUT 40 - User Manual

Eastwood VERSA-CUT 40
20 pages
Print Icon
To Next Page IconTo Next Page
Loading...
VERSA-CUT 40
CNC PLASMA CUTTER
ASSEMBLY AND OPERATING INSTRUCTIONS
Item #66725

Other manuals for Eastwood VERSA-CUT 40

Questions and Answers

  • J
    Julie GayAug 19, 2025
    What to do if my Eastwood Welding System does not turn on?
    • M
      Mindy JonesAug 19, 2025
      If your Eastwood Welding System doesn't turn on, it could be due to several reasons. First, check the A/C voltage source (120 or 240V AC) and reset or replace the circuit breaker or repair the wall circuit. Also, inspect the power switch connections for looseness or breaks and repair them. The power switch itself might be faulty, so consider replacing it. Finally, if there is 24V DC at X3, but the fan isn't running, the fan may need to be replaced.
  • A
    amandawhiteAug 21, 2025
    Why does my Eastwood Welding System immediately trip the circuit breaker when I switch it on?
    • S
      Stacy RogersAug 21, 2025
      If your Eastwood Welding System immediately trips the circuit breaker, it could be due to: * An internal wiring short circuit (repair the wiring or replace the bottom board if the connector is damaged). * A short circuit on the bottom board (replace the bottom board). * A short circuit on the top board (replace the top board).
  • M
    Michael CollinsAug 25, 2025
    Why is there a pilot arc but no cutting arc on my Eastwood Welding System?
    • N
      Nicholas ChavezAug 25, 2025
      If your Eastwood Welding System has a pilot arc but no cutting arc, the issue might be due to loose or damaged torch connections, which should be repaired. Also, check for loose or poor ground connections and repair them as needed. Inspect the torch nozzle or electrode for damage and replace any damaged components. A faulty 20W 1.8 Ohm resistor could also be the problem, replace the resistor if it measures less than 1.8 Ohms. Finally, the top or bottom board might be faulty, and replacement may be necessary.
  • J
    Joseph GonzalezAug 26, 2025
    What does it mean when the overload light is on in my Eastwood Welding System?
    • R
      Robert GomezAug 26, 2025
      If the overload light is on, it could be due to several reasons. You might have exceeded the duty cycle, in which case you should restart the unit after it cools off. There may be an open or loose connection between the top board and middle board, so repair any loose connections. A faulty top, middle, or bottom board could also cause this issue, and replacing the respective board may be necessary.
  • S
    sparkerAug 28, 2025
    What should I do if there is air flow but no pilot arc when the trigger is pulled on my Eastwood Welding System?
    • M
      Marvin RiversAug 28, 2025
      If your Eastwood Welding System has air flow but no pilot arc when the trigger is pulled, there might be an open or loose internal connection between the top board and bottom board; repair any loose connections. Also, faulty capacitors could be the cause; replace the bottom board if they are damaged. Inspect the reed switch and replace it if it does not close. Another potential issue is a faulty arc gap on the bottom board; clean and adjust the arc gap as necessary. Finally, the bottom or top board could be faulty; try replacing the bottom board first, and if the unit still doesn’t work, replace the top board.
  • A
    Amy WyattAug 30, 2025
    How to troubleshoot no air flow or pilot arc when trigger is pulled on Eastwood Welding System?
    • H
      Heather WellsAug 30, 2025
      If there is no air flow or pilot arc when you pull the trigger on your Eastwood Welding System, it could be due to a faulty torch trigger; replace the torch if the switch is faulty. Check for loose or open connections in the torch trigger circuit and repair them. If the unit operates, the trigger isolation board may be faulty and needs replacement. Also, inspect the connection between the top board and bottom board for looseness and repair it. If the voltage is 0V DC, the bottom board may be faulty and needs replacement. If voltage drops, replace the top board; if there's no drop, change the bottom board. If it still doesn’t work, replace both boards.
  • C
    Christopher GarciaSep 1, 2025
    Why my Eastwood Welding System plasma cutter will not power up?
    • G
      Gina WhiteSep 1, 2025
      If your Eastwood Welding System plasma cutter will not power up and the green indicator does not illuminate, there are several potential causes: * The power supply breaker may have tripped. If so, reset the breaker. * The power switch may not be fully on. Ensure the power switch is fully in the “ON” position so the GREEN indicator illuminates. * The duty cycle may have been exceeded, causing the plasma cutter to overheat, which illuminates the AMBER indicator. Turn the power switch OFF and allow the plasma cutter to cool down for 15 minutes before trying again. * The plasma cutter may not be plugged into the proper power supply. Check that the VERSA-CUT 60 is connected to a properly grounded, 120 Volt AC, 20 Amp or 240 Volt AC, 50 Amp circuit.
  • S
    stephen04Sep 3, 2025
    Why is the cutting arc weak or unstable on my Eastwood VERSA-CUT 40?
    • A
      Anna TaylorSep 3, 2025
      A weak or unstable cutting arc on your Eastwood Welding System can be caused by several factors. First, check for low supply voltage, which could be due to undersized wiring or an extension cord; address the line voltage if it's less than 120V/240V AC. Inspect for loose internal connections and repair them. A faulty current potentiometer could also be the issue; replace it if faulty. If the voltage is less than 310V DC, replace the bottom board; if it's 310V DC, replace the top board.
  • K
    kathrynallenSep 5, 2025
    Why is the fan not running when my Eastwood VERSA-CUT 40 Welding System powers up?
    • M
      Megan StewartSep 5, 2025
      If your Eastwood Welding System powers up but the fan isn't running, it could be due to an open or loose connection in the fan circuit; repair any loose connections. The fan itself might be faulty and need replacement. Alternatively, the control board could be faulty, requiring replacement of the bottom board.
  • M
    Michelle DanielsSep 7, 2025
    What to do if my Eastwood Welding System has a pilot arc but no air flow when the trigger is pulled?
    • E
      Eric MillerSep 8, 2025
      If your Eastwood Welding System has a pilot arc but no air flow when the trigger is pulled, the air supply might be off or blocked; re-attach, unblock, or replace the air supply lines as needed. A faulty air solenoid could also be the problem; if there's 24V DC at Con 8 and no click, replace the gas solenoid. If there's 0V DC at Con 8, the bottom board may be faulty and needs replacement.

Summary

Warranty Information

Statement of Limited Warranty

Details the limited warranty terms and conditions for the Eastwood Versa-Cut 40 CNC Plasma Cutter.

Warranty Period and Coverage

Outlines the duration of coverage for plasma cutters and other components, listing specific warranty periods.

Obtaining Warranty Coverage

Specifies the process for obtaining warranty service, including contacting Eastwood for an RMA number.

Warranty Repair and Costs

Explains the procedure for warranty repairs, including the purchaser's responsibility for shipping costs.

Warranty Limitations

Defines exclusions and limitations on Eastwood's liability, including consequential damages.

Product Includes

Included Components List

Lists the items included with the Eastwood Versa-Cut 40 CNC Plasma Cutter, such as the cutter, ground clamp, and cables.

Product Specifications

Technical Specifications

Provides detailed technical data including voltage, current, duty cycle, air requirements, and dimensions.

Safety Information

Important Notes and Hazard Definitions

General safety advice, definitions of DANGER, WARNING, CAUTION, NOTICE, and reading instructions.

Duty Cycle and Overload Protection

Explains duty cycle meaning and the unit's overload protection system with AMBER indicator.

Electrical Shock and Fire Safety

Electric Shock Hazards

Details dangers of electric shock during plasma cutting and necessary precautions for user safety.

Fire and Explosion Hazards

Warns about sparks igniting flammable materials and precautions for preventing fires and explosions.

Health Hazard Warnings

Covers health risks from electromagnetic fields, arc rays, and plasma cutting fumes/gases.

Operational Safety Precautions

Fire Hazard, Hot Surfaces, and Flying Chips

Alerts to fire risks, hazards of hot surfaces, and injuries from flying metal chips.

First Aid Procedures

Provides basic first aid guidance for fume exposure and other injuries.

Connecting the Plasma Cutter

Power and Air Source Connection

Guides on connecting the plasma cutter to appropriate power outlets and air supply sources.

Control Panel and Features

Front Panel Controls and Indicators

Describes the functions of buttons, knobs, and displays on the front control panel.

Rear Panel Connections

Identifies the ports and switches located on the rear panel of the plasma cutter.

CNC Plasma Cutter Setup

Installing Ground Cable and Clamp

Instructions for properly connecting the ground cable and clamp to the plasma cutter.

Connecting Air Supply

Steps for connecting the compressed air supply, including fitting types and air quality recommendations.

Installing Plasma Cutting Torch

Guidance on connecting either a hand torch or a machine torch to the plasma cutter.

Connecting CNC Controls

CNC Control Connection

Details how to connect the plasma cutter to CNC tables using the provided cable and pinout information.

CNC Wiring Safety

Critical safety warnings regarding improper wiring practices for CNC connections.

Operating the Plasma Cutter

Air Flow Adjustment

Procedure for setting the correct air flow rate through the torch for optimal cutting performance.

Plasma Cutting Modes

Explains the different trigger modes (TEST, 2T, 4T) for various cutting applications.

Hand Plasma Cutting Operation

Step-by-step instructions and safety precautions for performing manual plasma cuts.

Machine Torch CNC Plasma Cutting

CNC Cutting Safety Precautions

Safety warnings specific to operating the plasma cutter with a CNC machine.

Cutting Settings Guide

Provides base guidelines for amperage and air pressure based on material thickness for cutting.

CNC Plasma Cutting Best Practices

Torch Height and Angle

Recommendations for torch positioning (height and angle) for optimal CNC plasma cutting results.

Cut Speed Reference Table

A baseline table for setting cut speeds and pierce times based on material thickness for CNC operation.

Maintenance

General Maintenance Checks

Routine inspections of torch, connections, and overall unit condition before use.

Torch Consumable Maintenance

Guidance on inspecting and replacing worn torch consumables for optimal performance and arc starting.

Troubleshooting

Operational Problems and Solutions

Addresses issues like no power, overheating, and indicator lights with corresponding corrective actions.

Cutting Quality Problems

Solutions for degraded cut quality, poor connections, incorrect settings, and voltage issues.

Troubleshooting (Continuation)

Inconsistent Arc Issues

Troubleshooting steps for inconsistent or fluctuating plasma arcs, including consumables and air supply.

Arc Ignition and Transition Problems

Solutions for the plasma arc blowing out, not igniting, or failing to transition from pilot to cutting arc.

Troubleshooting (Continuation)

Cut Completion Issues

Addresses problems where the cut does not complete through the workpiece, including settings and material limits.

Additional Items and Accessories

Recommended Accessories

Lists related accessories and must-have items like CNC tables, welders, and 3D printers.

Torches and Consumables

Details available torch options and a comprehensive list of consumable items for the plasma cutter.

Optional and Replacement Items

Lists optional accessories and replacement parts, such as welding jackets, helmets, and extension cords.

Overview

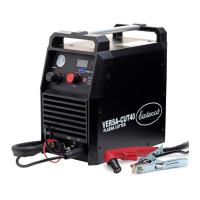
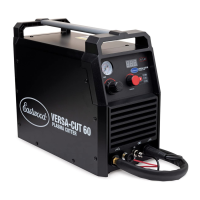
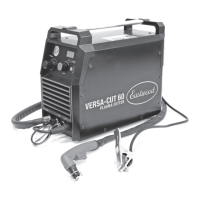
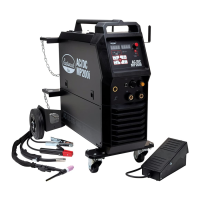
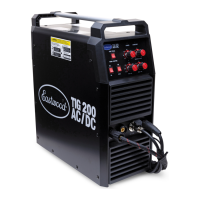
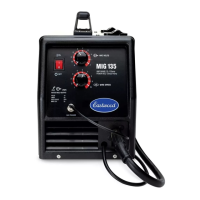
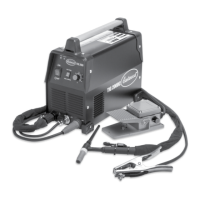
The Eastwood Versa-Cut 40 CNC Plasma Cutter is a sophisticated tool designed for precise and efficient metal cutting. It excels at making clean, fast cuts through various metals, including steel, stainless steel, and aluminum, ranging from thin 24-gauge to thicker 3/8" material. This unit stands out by offering both traditional hand torch operation and advanced CNC (Computer Numerical Control) functionality, making it versatile for a wide range of applications.

One of the key usage features of the Versa-Cut 40 CNC is its blowback pilot arc, which minimizes the possibility of interference during operation. This feature contributes to more reliable arc starts and consistent cutting performance. The plasma cutter also boasts dual voltage capability, allowing it to operate on either 120V household outlets or full 240V power, providing flexibility depending on the available power source. For CNC integration, a rear-mounted 12-pin plug is specifically designed for hardwiring to dedicated CNC plasma table controls, with or without a height controller, streamlining the setup for automated cutting tasks.

The control panel of the Versa-Cut 40 CNC is intuitively designed for ease of use. It includes a pressure control knob to adjust air pressure, a pressure gauge to monitor it, and an amperage control to set the plasma cutting current. An amperage display shows the selected cutting amperage, ensuring precise control over the cutting process. The unit offers multiple plasma cutting modes—TEST, 2T, and 4T—selectable via a push button. The TEST mode is useful for adjusting air flow and pressure. The 2T mode activates plasma cutting as long as the trigger is held, suitable for short cuts. The 4T mode allows for continuous cutting with a single trigger press, ideal for longer cuts or situations where holding the trigger is impractical. An Overload Indicator illuminates if the duty cycle is exceeded or if other abnormalities occur, providing a visual warning to the operator.

Connecting the plasma cutter to its power and air sources is straightforward. It requires a dedicated 240 VAC, 50 AMP circuit breaker protected outlet with a NEMA 6-50R receptacle, or a 120 VAC, 20 AMP grounded NEMA 5-15R outlet using the included adapter cord. For air supply, the unit needs a pressurized source providing 5-7 CFM at 60 psi of clean, dry air. A moisture trap is highly recommended to ensure optimal consumable life, and the unit itself has an internal "last-chance" moisture separator that drains automatically when the compressed air source is disconnected.

For CNC control, the plasma cutter comes with a 10-foot cable that plugs into the 12-Pin CNC Control Connection, enabling direct integration with Eastwood Versa-Cut CNC Plasma Tables. This cable can also be modified for use with other manufacturers' CNC plasma tables, with detailed pinout information provided for custom setups. The CNC control board offers various connections for start/stop signals, divided arc voltage for torch height control (THC), and "Ok to move" signals, allowing for comprehensive automation.

Safety is a paramount consideration in the design and operation of the Versa-Cut 40 CNC. The manual emphasizes precautions against electric shock, fire, and exposure to harmful fumes and arc rays. Operators are advised to wear dry, protective clothing, welding gloves, and insulated footwear, and to use welding screens to protect bystanders. The unit should always be operated in a clean, dry, well-ventilated area, away from flammable or explosive materials. Disconnecting the plasma cutter from the power supply before maintenance or consumable changes is crucial.

Maintenance features focus on ensuring the longevity and performance of the torch and its consumables. Operators are instructed to constantly inspect the torch nozzle for erosion, molten metal accumulation, or burning, replacing damaged parts immediately to prevent further damage and ensure good cutting quality. Before each use, all electrical connections, cables, and the torch itself should be inspected for damage. The plasma cutter's blowback start mechanism, where the electrode and nozzle contact until air pressure separates them, should be regularly checked to ensure it depresses and springs back unassisted. If service is needed, pressurized air, brushes, rubbing alcohol, or acetone-based products can be used for cleaning. The manual provides exploded views of both hand and machine torches to guide users in replacing consumable parts such as electrodes, nozzles, air diffusers, and outer nozzles. These components are designed to be replaced as a set for best performance.

The Versa-Cut 40 CNC Plasma Cutter is a robust and adaptable tool, offering both manual and automated cutting capabilities with a strong emphasis on user control, safety, and ease of maintenance.

Eastwood VERSA-CUT 40 Specifications

General IconGeneral
Plasma Cutter TypeInverter
Input Voltage110/220 VAC
Duty Cycle60% at 40 Amps
Dimensions15 x 6 x 12 in
Air Pressure60 psi (4.1 bar)
Air Flow Requirement4.5 CFM

Related product manuals