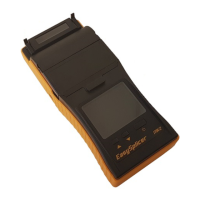
Error messages and how to resolve:
Error message: Action: Resolve:
Calibrate again. Calibration failed. Do a new calibration.
CLEAN ELECTRODES Calibration failed 3 times. Clean the electrodes. First use
the electronic clean in the menu
(up to 4 times). And if
that is not sufficient, also
clean mechanically with a small
knife.
ERROR: CLOSE LID Lid is open. Close the lid.
BATTERY EMPTY Battery empty. Connect the charger (and
continue working/charging).
BAD FIBER Cannot detect two good Fiber dirty, broken, faulty.
looking fibers.
TOO MUCH OFFSET v-groove IS dirty. Clean the v-groove.
Offset over 10um v-groove is a bit dirty. Clean the v-groove.
Angle=0.5 Angle=2.5 Cleaver didn't cut correctly. Too big angle made by a bad
cleave. Simply strip and cleave
again.
CLEAN V-GROOVE v-groove IS dirty. Clean the v-groove.
BAD SPLICE Auto estimation didn't The splice doesn't look good.
approve the splice Redo the splice (or check with
loss meter).
Est. Loss: >0.1dB The splice failed. Do a calibrate on a new clean
fiber and then redo the splice.
RIGHT FIBER MISSING Right fiber is missing or Splicer cannot detect a good
poorly placed. looking fiber on the right side.
Re-do, re-place.
LEFT FIBER MISSING Left fiber is missing or Splicer cannot detect a good
poorly placed. looking fiber on the left side.
Re-do, re-place.
RIGHT FIBER DIRTY Right fiber is dirty. Strip, clean and cleave it again.
LEFT FIBER DIRTY Left fiber is dirty. Strip, clean and cleave it again.
Special operations with the buttons:
If the splicer for some reason should stop responding to the buttons, there is a way to
RESET the splicer (instead of removing the battery). Push both up and down
buttons at the same time and a hardware reset will occur.
If the middle button is pressed during power on, the splicer will prepare for receiving a
new firmware. The white led will be on but the display will be black. This is described in
more detail in the upgrade guide. This follows the new firmware.
23