Strip and clean the fiber.
•
Cleave the fiber.
•
Place the fiber holders in the splicer. Push down the bracket which holds the fibers
in place in the v-groove
•
See the operation of the above at page 13-15 and/or watch our Video at:
https://www.dropbox.com/sh/t1bwwrk0i9str6a/AAAKnje_Mvc-_SeXVUH1v0Jva?dl=0
•
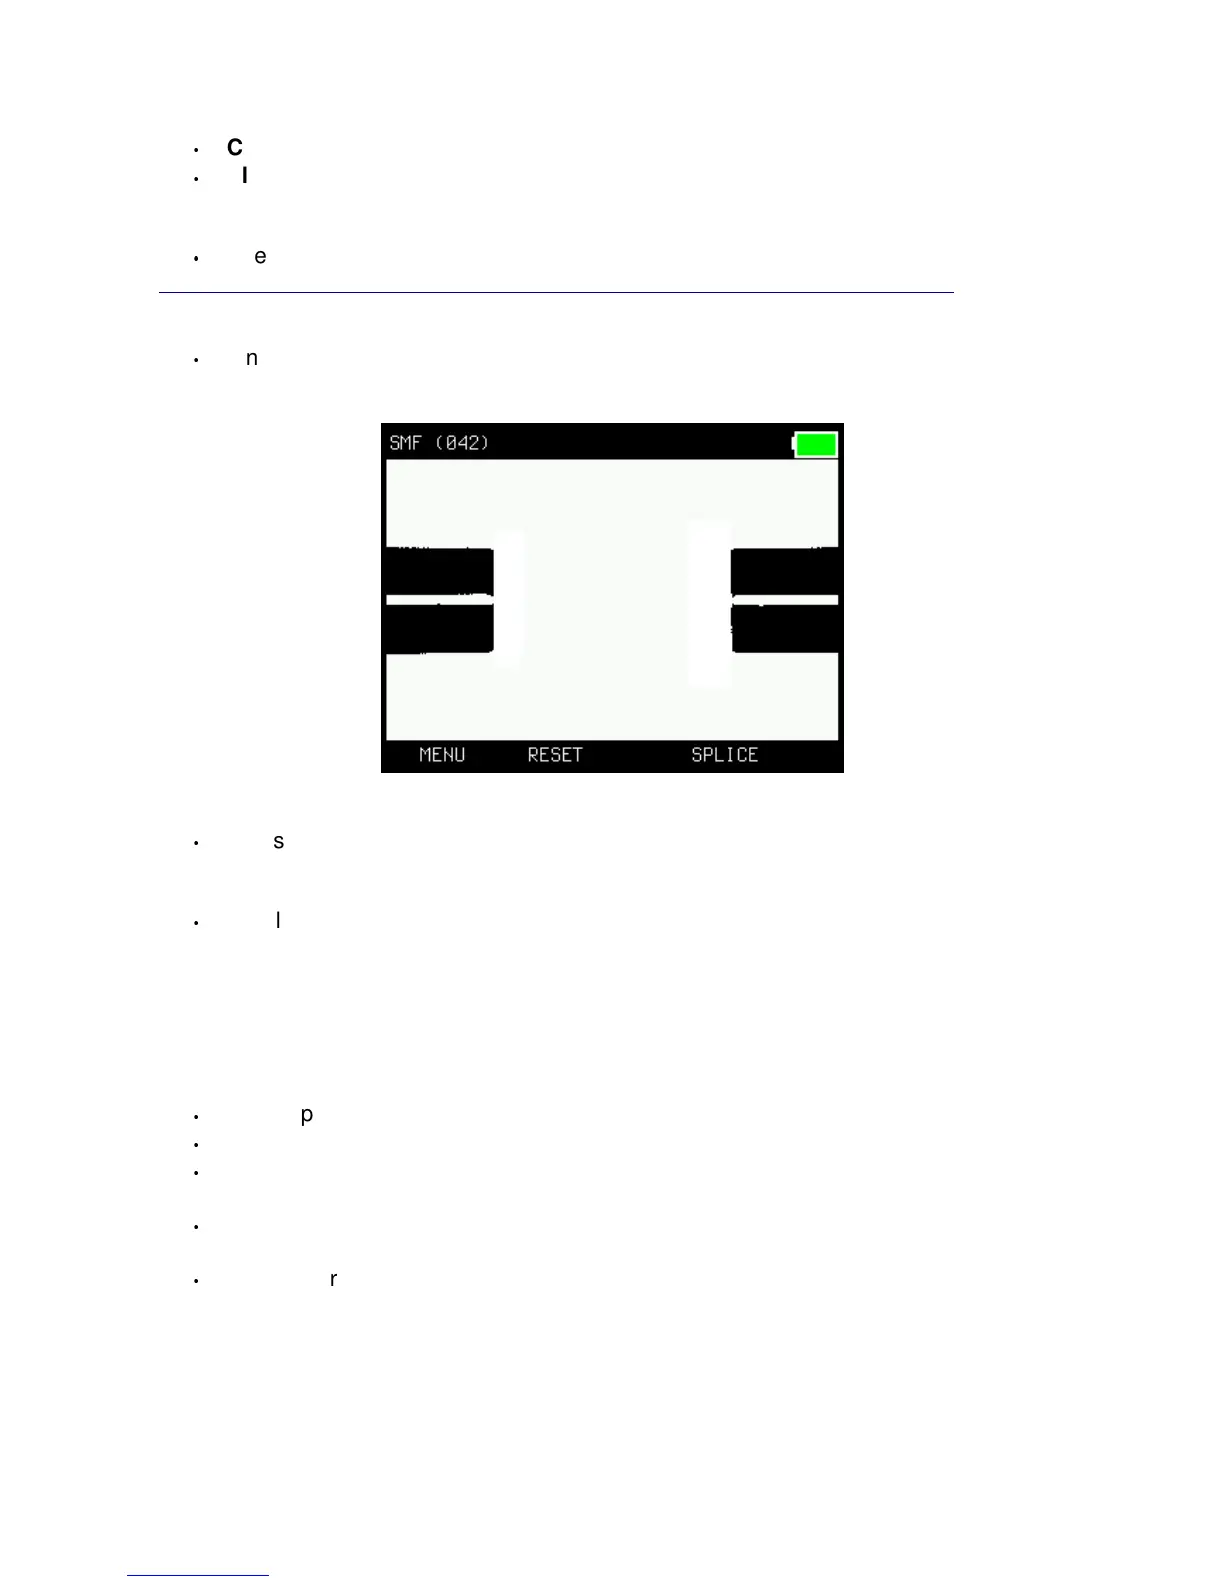
If needed, press “RESET”.
The fiber ends should be seen in the display, a bit like this when ready for splicing:
•
Press the “SPLICE”-button (large button). The fibers will move together and spliced.
The whole process will be shown in the display and take less than 10 sec.
An automatic pull-test will be performed after the splicing.
•
Finally, the splicer will show the estimated splice loss (in dB and in green color) or, if
the process failed, “Bad splice” (if so, re-do the operation from “strip and cleave”
above).
Oven operation – sleeve protection!
•
Open up the oven (with the little arm on the left hand side of the oven).
•
Lift up the bracket over the v-groove and then open up both fiber-holders.
•
Push the shrink-tube over the spliced part and place the fiber/tube in the center of
the oven. Lock the fiber (and close the oven-lid) with the oven-arm.
•
Start the oven by pressing the “OVEN”-button. The oven is preset for a 45sek
operation but can be set in many combinations (see in the Menu-system).
•
The splicer is ready for another splice while the oven is in operation (start from
above again). Press “RESET” if the oven-operation is not needed.
6