36
LCD touchscreen display programming
PRC-E Series Instruction Manual MN014003EN August 2015 www.eaton.com
Tap the “Input #” textbox,
This will display the dropdown box list of inputs.
Tap one of the available entries to choose the input to use
for the group control.
The “Time Delay” is a time value set for the group when
the switch is activated. After the timer delay expires, the
group will be commanded “OFF”, for example, if the time
delay is set for 10 minutes, when the input is closed, the
group will turn “ON”, then, when the time delay reaches 0
the group will turn “OFF”. For “Maintained” type switches,
it does not matter that the switch remains closed; the group
will turn OFF after the time delay expires.
To set the time delay, tap the “Hours” entry textbox.
This will display the numeric keypad.
Tap the number buttons to input the value of hours for the
time delay timer.
Tap the “Enter” button to accept the input.
Tap the “Minutes” entry textbox.
This will display the numeric keypad.
Tap the number buttons to input the value of minutes for
the time delay timer.
Tap the “Enter” button to accept the input.
ote:N Notice that the “Save” button in the top right corner
of the “Associate Input with Group” screen did
turn red, indicating that there are some changes to
the configuration in this screen. The changes were
accepted, but not yet saved in the controller until the
red “Save” button is tapped.
Once the input configuration edits are complete, tap the
red “Save” button to save the changes. To leave the page
without saving changes, just tap the “Back” button.
Creating time schedules
Schedules are ON/OFF actions programmed to control
points within the Pow-R-Command system. A point can be
a flag, controllable circuit breaker, or group. The schedule
can be by the day-of-the-week, time-of-day, the date, and/or
astro time. This can be done as a one time day/date entry, a
daily or weekly action, or a one-shot On or Off event.
Entering schedules
ote:N If you are creating a simple schedule for a group,
the group’s “Associate Schedules with Group”
configuration area may be used instead of general
“Schedules” configuration area.
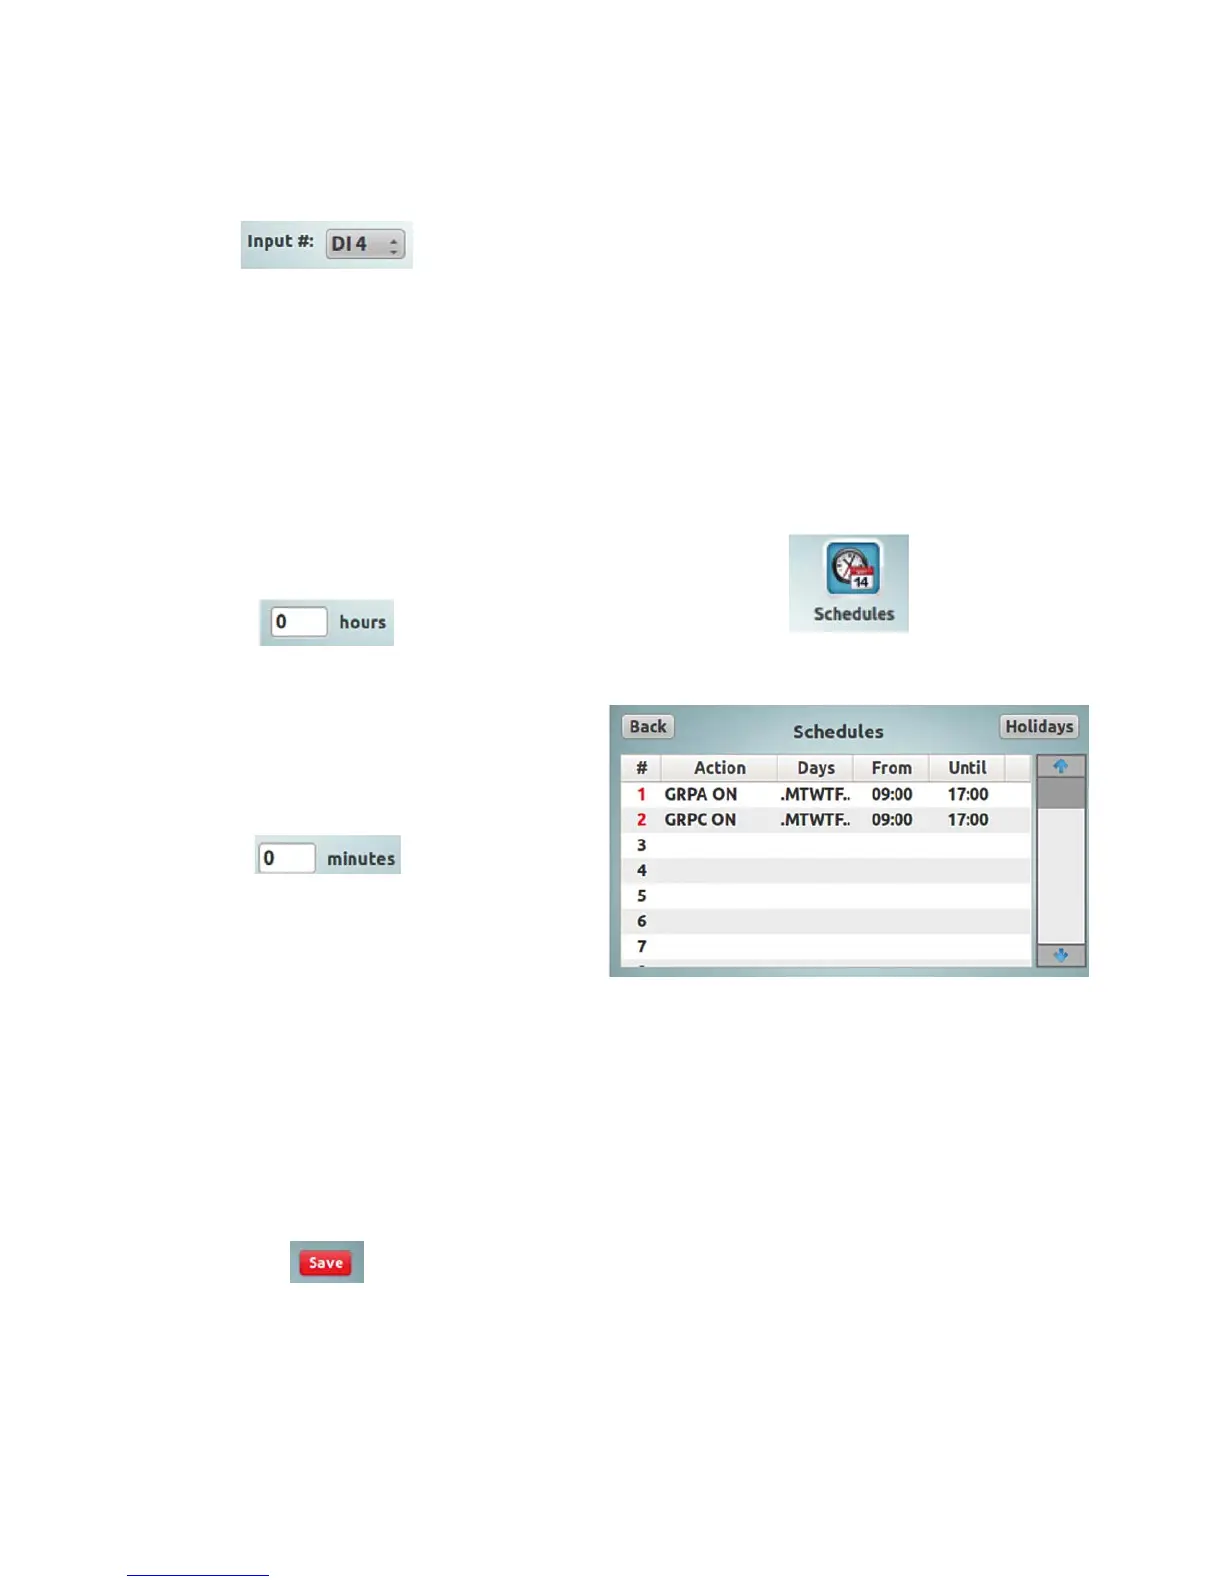
In the “Main Menu” screen, tap the “Schedules” icon.
This will display the “Schedules” screen.
From the “Schedules” screen, individual schedules can be
added, edited, deleted, and the status of the schedule can
be viewed. The holiday list can be updated and edited as
well.
Each line in this screen is a separate schedule entry. The #
is the schedule number. The number’s text color changes to
red when the schedule is “active”.
The “Action” field displays a command (or a part of the
command with a trailing ellipses) activated at the “From”
time of the schedule; this command is reversed at the
“Until” time of a standard schedule. If the schedule is
configured as an “Event’, it only issues the command at
the “From” time, and there is no “Until” time specified, so
there will not be a reversal of the action.
The “Days” field displays the days of the week that the
schedule will activate. This includes Sunday(S), Monday(M),
Tuesday(T), etc. and Holiday(H).