74
Web page programming
PRC-E Series Instruction Manual MN014003EN August 2015 www.eaton.com
Input the required numeric value for the feedback point
address using the keyboard.
ote:N Care must be taken to ensure that the action for the
press of the button actually changes the state of the
feedback point.
After a change is made the message “Changes are
Pending” will display in red next to the “OK” button.
To save changes, click the “OK” button to apply the program
changes to the Digital Switch.
Example 1. This programming example is a 6-button switch
programmed to turn ON and OFF a circuit breaker supplying
an area. Also, there is step dimming setup to dim fixtures
connected to the digital switch analog output in this area.
There is no photo sensor or occupancy sensor used in
this example.
ote:N When controlling fluorescent ballasts, the analog
point value of the OFF button should not be set to
zero. The setting should be greater than 50% so the
fluorescent tubes will have sufficient voltage to strike
while the output ramps up. The OFF button value
should be set to a unique value, if it is set equal to
any of the other steps, both buttons will illuminate
when either is activated.
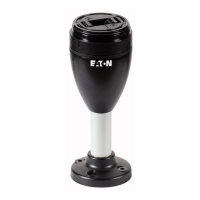
Digital Switch sensors
The PRC Digital Switches with 2, 4, an 6 buttons have
a universal input locally on each switch and the 2- and
4-button switches have an additional digital input locally on
the switches. Also a 0–10 V analog output is available on
each switch for dimming.
To access the switch sensor input/output configuration, click
the “Sensors” tab.
This displays the configuration page for the inputs and
output of the selected digital switch.
Sensor 1: This is the onboard universal input which is
labeled “AI” on the switch terminal block. A motion sensor
or toggle switch dry-contact can be connected to this input
to control the lights in the area or an analog photo sensor
with 0–10 V range can be connected.
Sensor 2: This is the onboard digital input that is available
on the 2- and 4-button models only. It is labeled as DI on
the switch terminal block. This input can be connected to
any dry-contact input when set to motion sensor.
Output level: The analog output level can be setup to be
trimmed at a maximum and a minimum level and an initial
default level.
Setting sensor 1 as a motion sensor
dry-contact input
The motion sensor is a maintained type of the input. The
digital point is turned ON in the host PRC-E controller when
the input is closed, and turned OFF when the input is open.
Click the radio button beside motion sensor.
After the motion sensor radio button is chosen a point input
box will appear.
This point will be controlled point when the input is turned
ON and OFF. This point could be an individual circuit breaker,
a group of circuit breakers or a system flag.
Click the dropdown list arrow beside the input box.
 Loading...