5
Installation
Notes:
• Priortopullingcablesthroughceilings/walls,rsttesttoensuretheentireinstallation
works properly.
• To achieve maximum distance and performance, use 24 AWG Solid-Wire UTP Cat6
cable (such as N202-Series cable). Using stranded-wire Cat6 cable or cable with a
gauge (AWG) higher than 24 AWG will result in a shorter extension distance. Higher
gauge cabling (such as 26 AWG) has a more limited transmission capability than
lower gauge cabling.
1. Makesureallequipmentintheinstallationispoweredo.
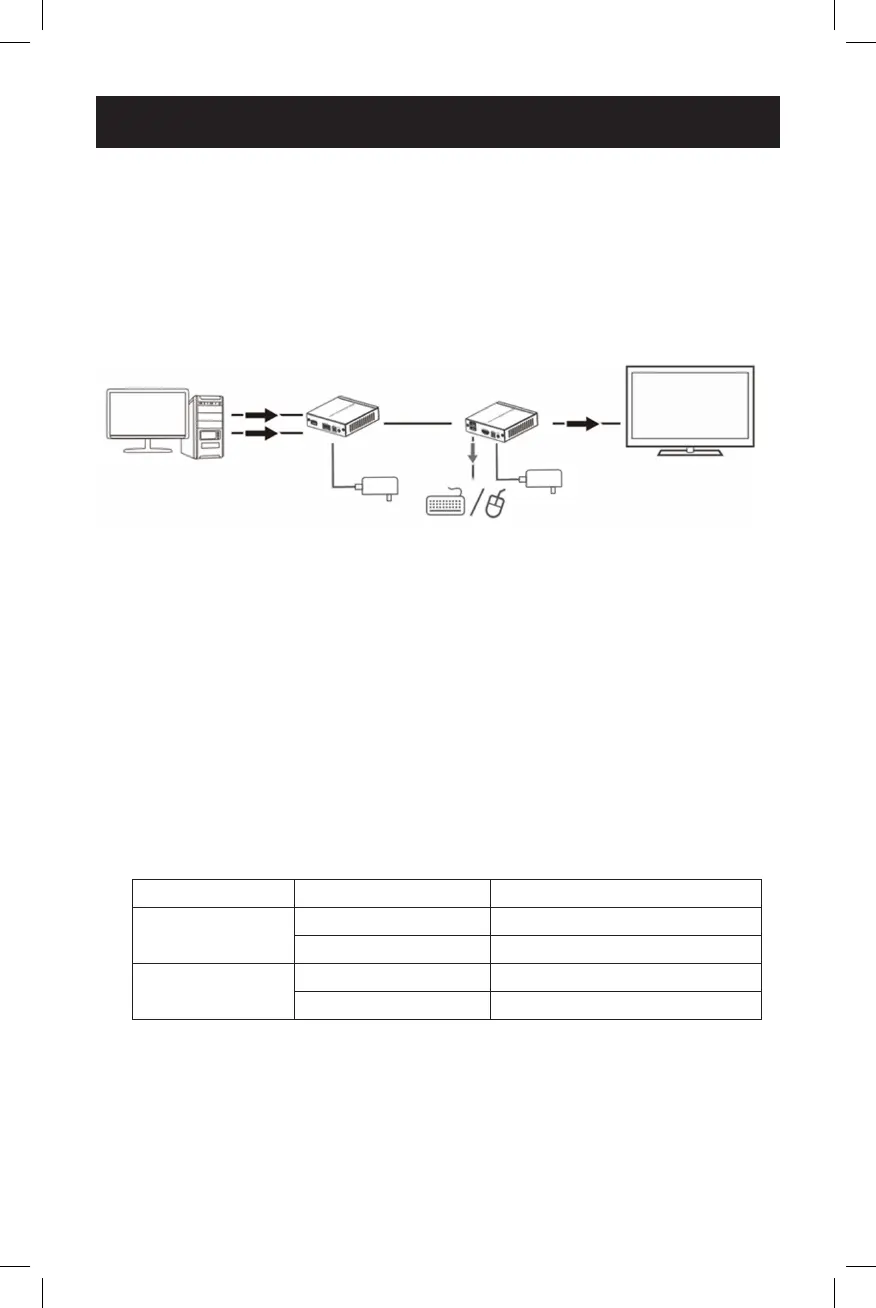
2. Using the included USB 2.0 A (M/M) cable, connect the PC USB port on
the transmitter to an available USB-A port on your source.
3. Using an HDMI cable (such as P569-XXX-CERT or
P568-XXX-2A Series cables), connect the transmitter’s HDMI INPUT port
to an available HDMI port on your source.
4. (For bi-directional IR functionality - Optional) Connect the included
IR-IN or IR-OUT cable to the transmitter unit.
5. Using a user-supplied Cat5e (such as the N002-Series) or Cat6
(N202-Series) cable, connect one end of the cable to the HDBT OUT port
on the transmitter unit. Below is a table of the maximum distances that
can be extended with Cat5e and Cat6 cables.
Category Cable Max Cable Length Max Resolution Supported
Cat5e
115 ft. (35 m) 4K x 2K @ 30 Hz
197 ft. (60 m) 1920 x 1080 @ 60 Hz (1080p)
Cat6
130 ft. (40 m) 4K x 2K @ 30 Hz
230 ft. (70 m) 1920 x 1080 @ 60 Hz (1080p)
6. Connect the other end of the Cat5e/Cat6 cable to the HDBT IN port on
the receiver unit.
7. Connect your keyboard and mouse to the USB ports labeled Keyboard/
Mouse on the receiver unit.
HDMI
USB
PC HDMI Display
Keyboard / Mouse
Transmitter Receiver
Power
Power
USB

 Loading...