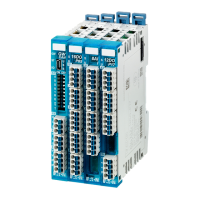
33 Analog weigh module XN-322-2DMS-WM
33.6 Calibrating the force transducer
XN300 slice modules 02/24 MN050002EN Eaton.com 260
33.6 Calibrating the force transducer
1. The ADC's gain must be adjusted as required by the specifications in the
transducer's data sheet. The way it is set should ensure that the
transducer range being used takes advantage of the ADC's value range
to the greatest extent possible without exceeding it.
2. The transducer's zero point (tare) is calibrated with the minimum load on
the sensor and mode = 6 (configuration of cutoff frequency for AIx, bits
11-13). This defines the initial value for the scale.
3. The transducer's full-scale calibration is carried out with the maximum
load on the sensor and mode = 7 (configuration of cutoff frequency for
AIx, bits 11-13). This defines the final value for the scale. The final value
for the scale can only be calibrated to a value between 50% and 100%
of the positive measuring range.
Please refer to
„Application examples“.
33.7 Specific technical data for the module
Number of channels 2 Wheatstone bridges
D-A converter 24 Bit
Supply voltage for Wheatstone bridges +5V
Load cell characteristic values 0.25mV/V 0.5mV/V 1mV/V 2mV/V 16mV/V
Measurement ranges
1)
± 1.875mV ± 3.75mV ± 7.5mV ± 15mV ± 120mV
Measured value ± 8388608
dez
= ±800000
hex
, zero value =800000
hex
Configurable parameters
Filter value 2 … 5 … 1023
Filter Type Sinc4 … Sinc4 … Sinc4
Limit frequency (–3 db) 144 Hz … 57.7 Hz … 0.282 Hz
Conversion time 4ms … 9ms … 1702 ms
Noise-free resolution
2)
15.5 Bit … 16 Bit … 20 Bit
Open sensor detection
Yes
Working resistance per channel
150 - 5000
Measuring accuracy
3)
±0.0031% noise for filter word 2
Temperature drift ± 0.001% /°C
Can be calibrated no
1) The measuring ranges are sized for load cell overstretching of 50%
2) Typical values with active sinc filter and measuring range of 2 mV/V
3) A system calibration with the sensor, in which the minimum and maximum values are calibrated, is required in
order for the measuring accuracy value to be met. The minimum value must be calibrated first, followed by the
maximum value. The maximum value can only be calibrated to a value between 50% and 100% of the positive
measuring range.

 Loading...