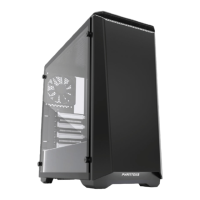
QUICK INSTALLATION GUIDE
1.
I/O PANEL
2.
PANEL REMOVAL
1. USB 3.0
2. Microfone
3. Fone de ouvido
4. Redenição de Energia
5. Botão de Alimentação
6. LED
7. FAN (P400S only)
8. HDD LED
1. USB 3.0
2. Microphone
3. Casque
4. Réinitialisation de
l’alimentation
5. Bouton d’alimentation
6. LED
7. FAN (P400S only)
8. HDD LED
1. USB 3.0
2. Microfono
3. Cue
4. Ripristino alimentazione
5. Tasto d’alimentazione
6. LED
7. FAN (P400S only)
8. HDD LED
1. USB 3.0
2. Micrófono
3. Cascos
4. Resetear
5. Botón de alimentación
6. LED
7. FAN (P400S only)
8. HDD LED
1. USB 3.0
2. Microphone
3. Headphone
4. Reset
5. Power Button
6. LED
7. FAN (P400S only)
8. HDD LED
Unscrew the 4 thumb screws (A.) to remove the side panels (B)
Dévissez les vis à main pour enlever les panneaux latéraux.
Lösen Sie die 4 Rändelschrauben zum Entfernen der seitlichen Blenden.
Svitare le 4 viti per rimuovere i pannelli laterali.
Desaperte os 4 parafusos para remover os painéis laterais.
Desatornille los 4 tornillos de pulgar para retirar los paneles laterales.
Schroef 4 duimschroeven los om de zijpanelen te verwijderen.
For the front panel, place your hands on the area shown and pull outward.
Pour le panneau avant, placez vos mains sur la zone achée, et tirez vers l’extérieur.
Positionieren Sie auch bei der Frontblende Ihre Hände an der angezeigten Stelle
und ziehen Sie sie dann nach außen.
Per il pannello anteriore, posizionare le mani sull’area mostrata e tirare verso
l’esterno.
Para o painel frontal, coloque as mãos na área ilustrada e puxe para fora.
Para sacar el panel frontal, coloque las manos en el área indicada y tire hacia afuera.
Voor het verwijderen van het voorpaneel, trek het paneel naar u toe zoals aange-
geven op de tekening.
This is a quick installation guide to help you get started with the Eclipse P400(s).
For the full (detailed) version of the manual please visit
WWW.PHANTEKS.COM.
底部滤尘网
下部ダストフィルター
하단 먼지 필터
Нижние пылевые фильтры
Long Press: On/O
Short Press (<1sec): Choose LED Color (10 colors)
2 Sec Press: Choose Mode
Mode 1: Static Mode 2: Breathing Mode 3: Color Cycle
<1 sec
2 sec
HOLD
RGB LED Control (6) Instructions:

 Loading...