EasyManuals Logo

Eclipse P400 User Manual

Eclipse P400
13 pages
To Next Page IconTo Next Page
To Previous Page IconTo Previous Page
Page #9 background imageLoading...
Page #9 background image
16 17
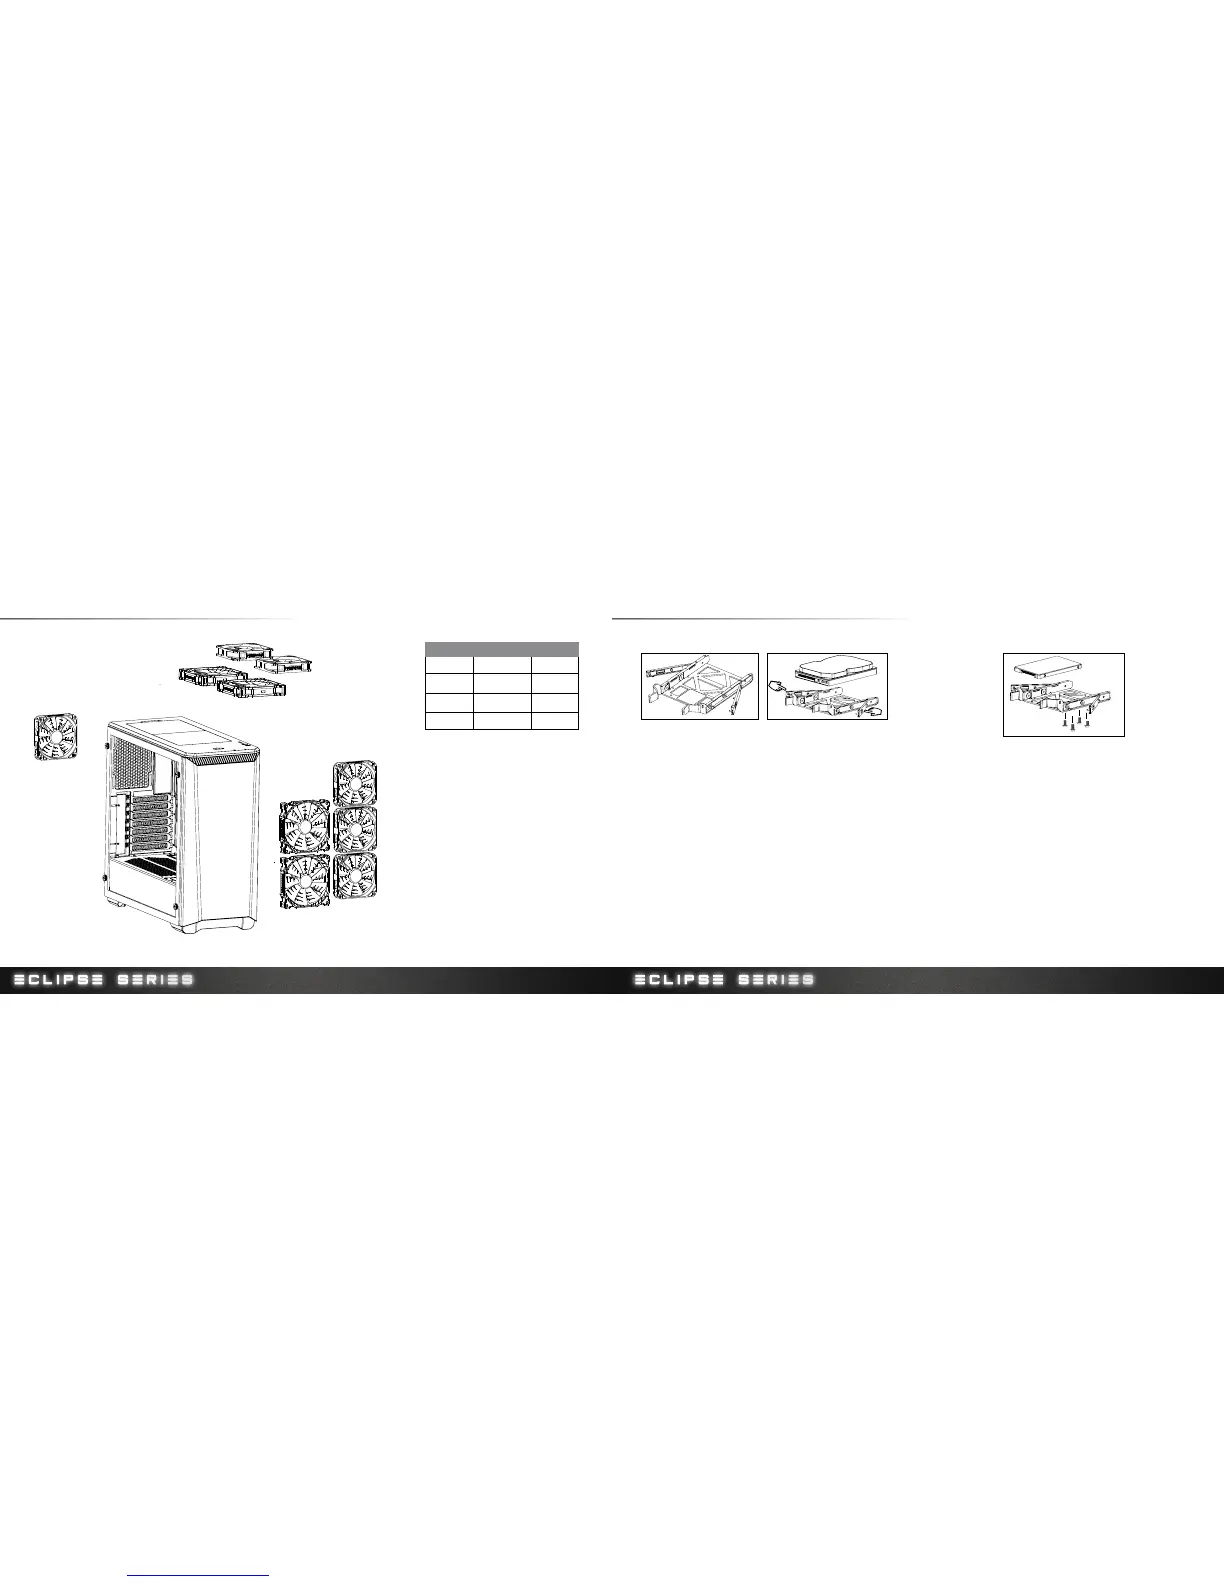
10. FAN COMPATIBILITY
FAN COMPATIBILITY TABLE
140mm 120mm
Top
2 2
Front
2 3
Rear
- 1
3.5” INSTALLATION 2.5” INSTALLATION
11. HARD DRIVE INSTALLATION
Slide in the SSD and screw in from the side to lock in place.
将SSD滑入支架后并在支架侧面锁入螺丝固定。
SSD を挿入し、側面からねじで留め、固定します
SSD 밀어 제자리에 고정합니다 측면에서의 나사.
Вставьте кронштейн SSD в паз и закрутите сбоку.
Place hard drive into tray and push in the arms to lock.
把硬盘放入托盘,并推入两边侧翼锁住。
ハードドライブをトレイに置き、アームを押して固定します。하
드 드라이브를 트레이에 넣고 암을 안쪽으로 눌러 고정합니다.
Установите жесткий диск в лоток и нажмите на рычажки для
фиксации.

Questions and Answers:

Question and Answer IconNeed help?

Do you have a question about the Eclipse P400 and is the answer not in the manual?

Eclipse P400 Specifications

General IconGeneral
TypeMid Tower
Dimensions210mm x 465mm x 470mm
Motherboard SupportATX, Micro-ATX, Mini-ITX
Expansion Slots7
Cooling SupportFront: 3x 120mm or 2x 140mm, Top: 2x 120mm or 2x 140mm, Rear: 1x 120mm
Pre-installed Fans1x 120mm Rear
Maximum GPU Length395mm
Maximum CPU Cooler Height160mm
Maximum PSU Length270mm
Front Radiator SupportUp to 360mm
Rear Radiator Support120mm
MaterialSteel
Drive Bays2 x 2.5", 2 x 3.5"
Front I/O Ports2x USB 3.0, Audio In/Out