10
7. ASSMBLY
7.1 PREPARING
Pull the bike out of the carton with all the elements in it. Be careful not to scratch the bike
and at the same time be careful not to damage any cable or other components. Make
sure that there is no missing item in the bike and report any comments to the seller.
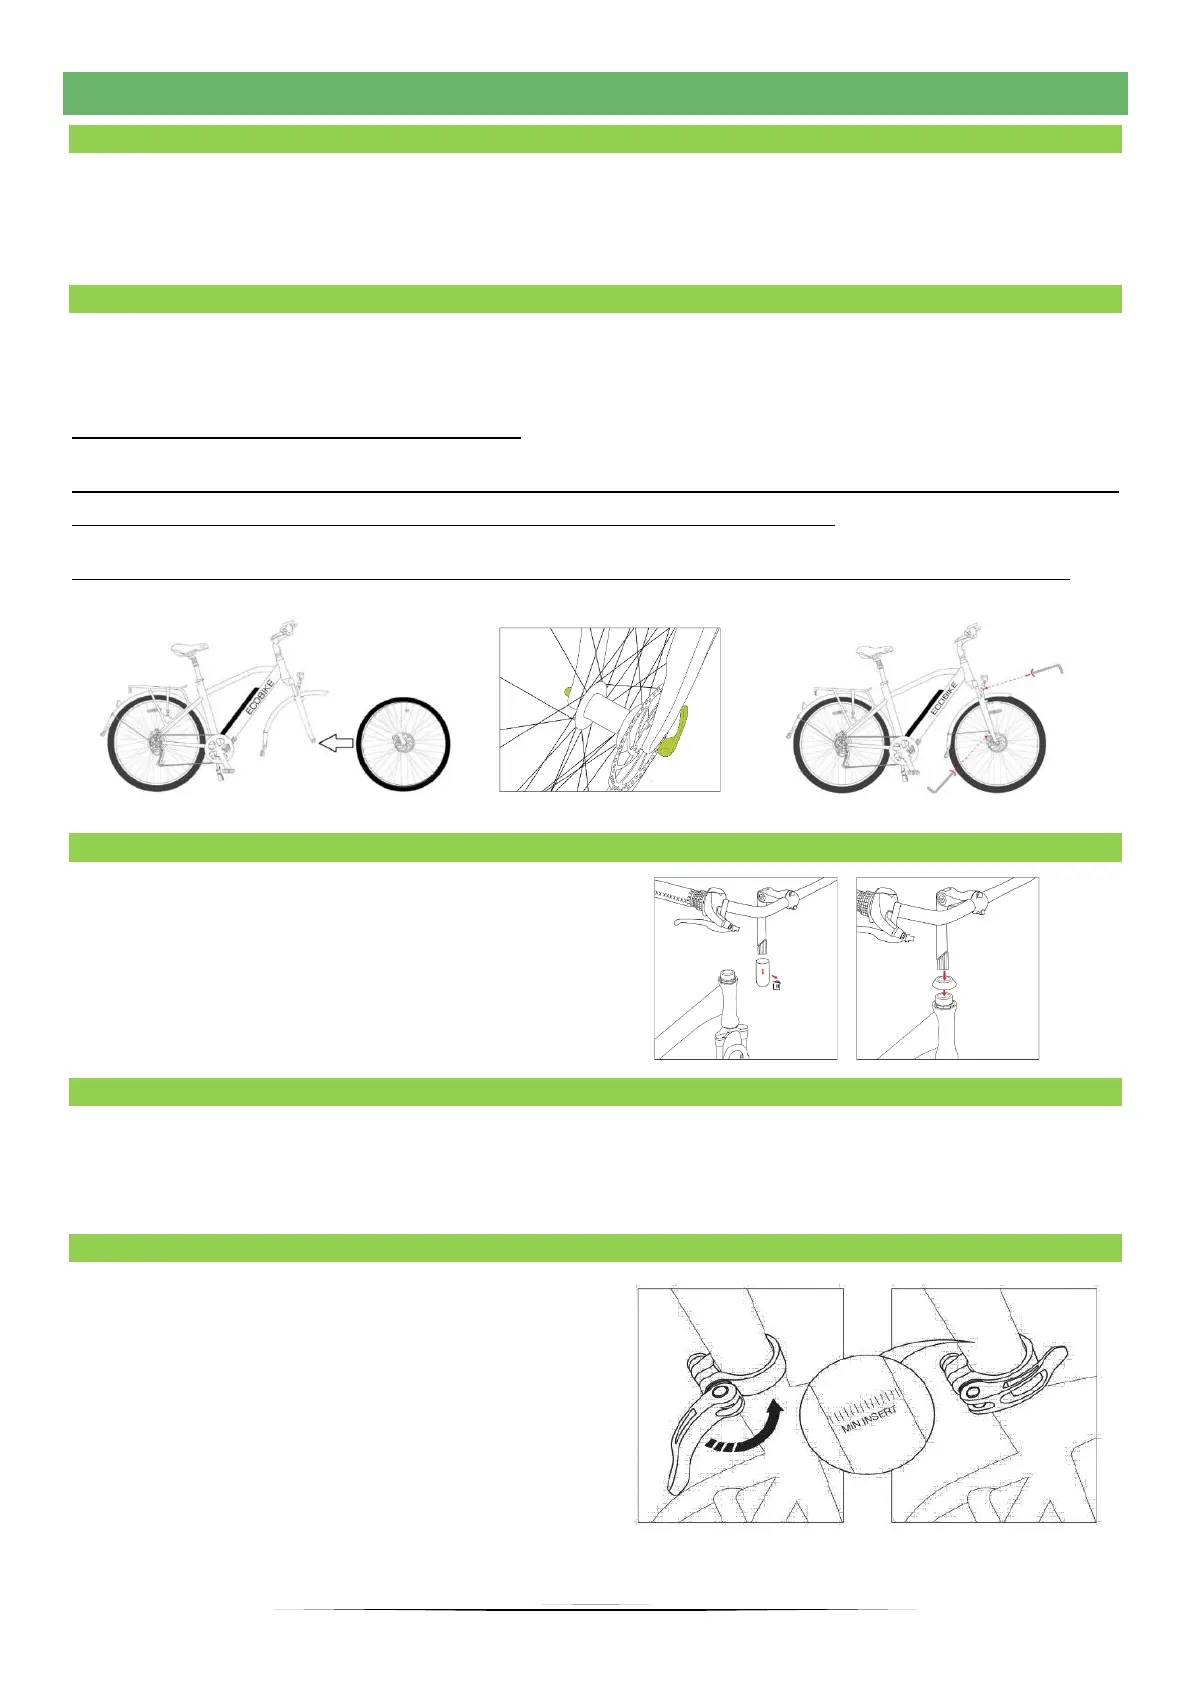
7.2 FOLD THE FRAME
The front wheel is dismantled, therefore after opening the cartoon it is necessary to remove
the protective foils and mount it on the front fork.
Picture 1 – Put front wheel into the fork.
Picture 2 – insert the "pin" through the wheel, tighten the nut on the left side so that the
quick-release closure is tightened with the appropriate resistance.
Picture 3 - Put the fender together with the lamp on the wheel and tighten the screws.
7.3 HANDLEBAR ASSEMBLY
1. Put the handlebar in the most
comfortable position for you and tighten
all screws according to the picture below.
2. The handlebar should be mounted so
that there are no clearances.
7.4 PEDALS ASSEMBLY
➢ Tighten the pedal with the letter "R" on the right side clockwise,
➢ Tighten the pedal with the letter "L" on the left hand side clockwise.
7.5 SADDLE ASSEMBLY
1. Loosen the quick-release nut on the
bicycle frame and insert the saddle
post.
2. Tighten the clamps of the seatpost
clamp in such a way that the quick
coupling clamps with the
appropriate resistance.
 Loading...