www.ecosmartre.com
ENGLISH
e-NRG Bioethanol is the only fuel to use in this appliance.
How to Operate the Burner
Decanting your e-NRG Bioethanol from the Jerry Can
into the Burner
WARNING: Fire hazard. Be sure Burner is cool before lling. Let stand
at least 60 minutes after ame is extinguished before relling.
WARNING: Refuel only through the lling point. Never pour fuel
directly onto the burner.
WARNING: Fire hazard. Do not overll. Fill only to MAX mark. Never
lift the Jerry Can to allow faster ow – insert the spout fully and rest
it on the base of the grid. Used properly, the Jerry Can spout will help
prevent over-lling and spillage.
As an additional safety measure, we recommend that you remove the
burner and check that there is no unexpected fuel collection in the Top Tray.
The Fire Company Pty Ltd recommends that the quantity of e-NRG
Bioethanol poured into the burner be burnt until empty rather than
extinguishing the re early. Extinguishing the re early can result in a
larger amount of residual fumes in the Burner and a more volatile
re-ignition.
When fumes are combined with excess fuel it could be a hazard to
people who are unaware of the Fire operation and its condition of use
(e.g smokers). Ensure only those who have read the instructions attempt
to operate the burner.
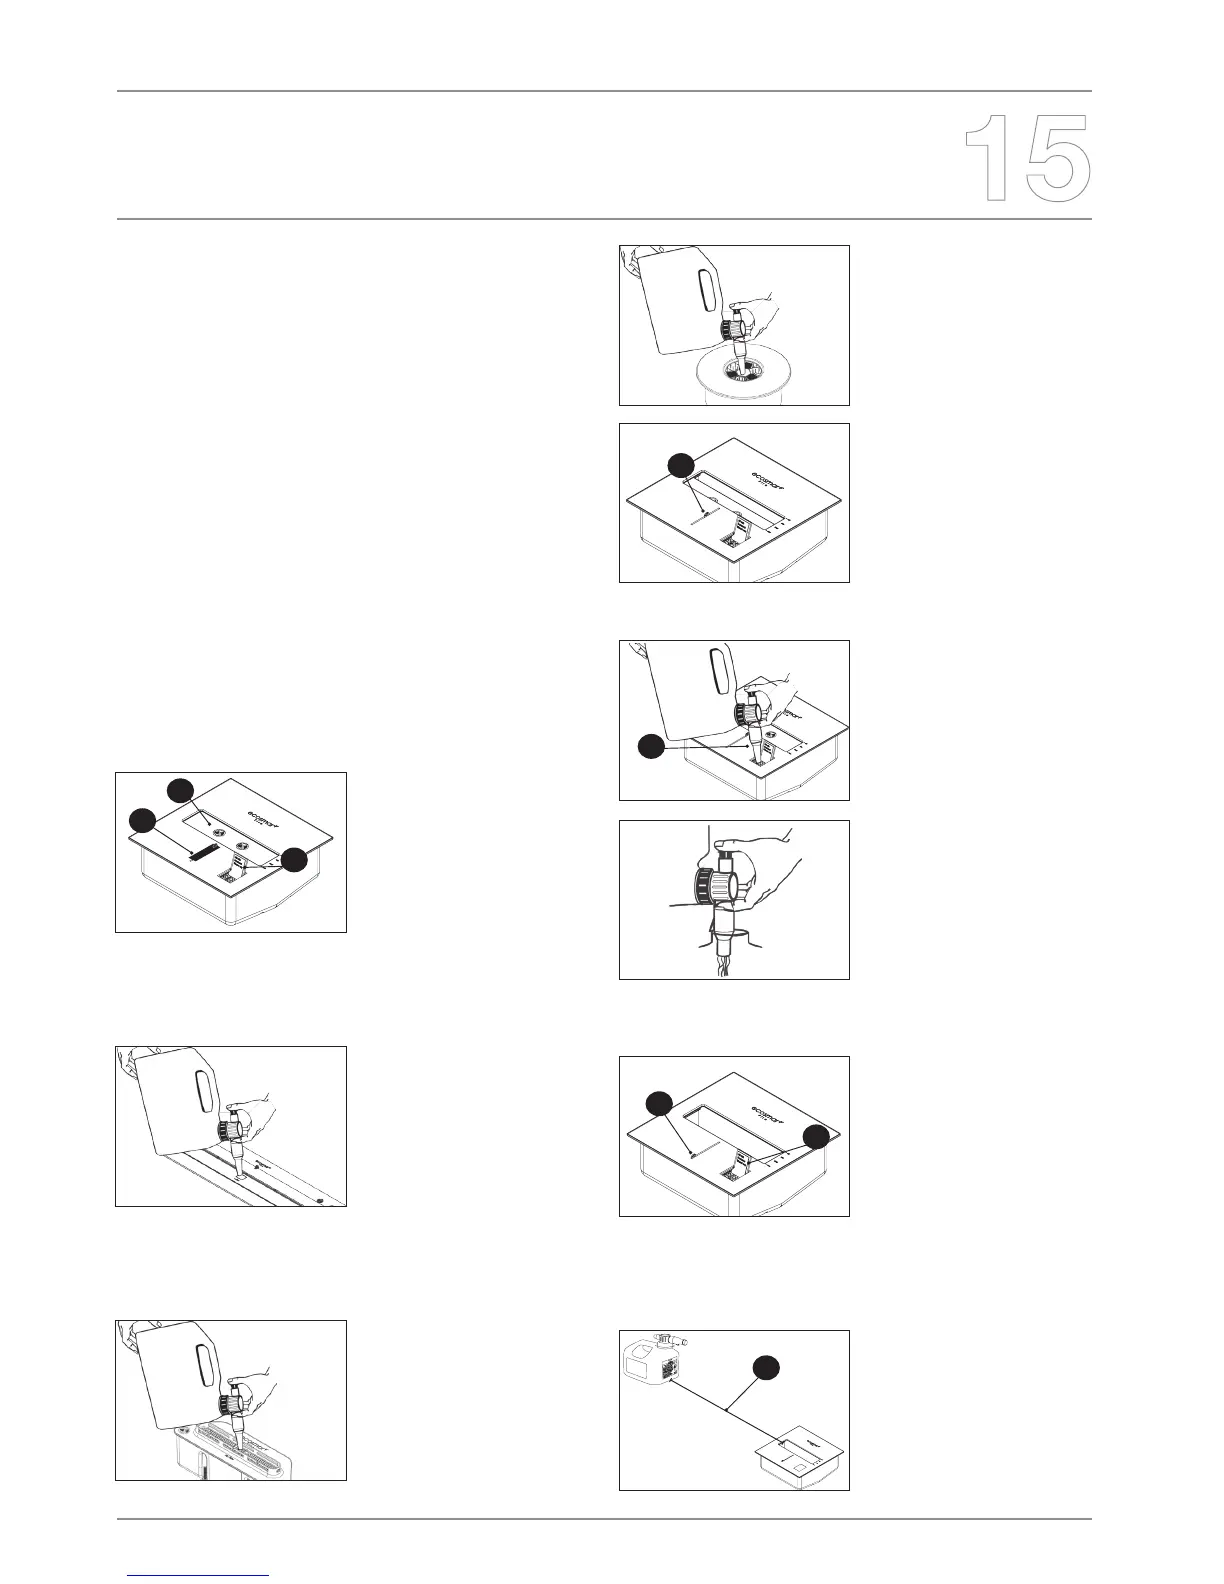
AB8 & AB3:
To ll the AB Series, position the
Jerry Can spout in the middle of
the burner mouth.
4
4. Re-position the Burner slider
ensuring the grid work of the
burner is visible through the
lling point. This will clear the
lling point for the insertion of
the Jerry Can spout as well
as allowing visual monitoring
of the amount of fuel being
added, according to the volume
markings on the Burner.
5. Once ready, carefully place
the Jerry Can spout inside the
lling point. NEVER ll over the
maximum level as indicated
on the burner vent inside the
Burner and only ll to the level
that you require for burning
time.
6. Use both hands to pour. Place
the palm of one hand on the
top of the nozzle with your
thumb on the green button.
Use your other hand to tip
the can vertically and hold it
steady. Press down on the
green button to release the
fuel. To stop the ow, simply
release the green button.
8
7. When lling is complete, ip
the lid that covers the lling
point so it closes the lling
point.
8. Re-position the slider to the
fully open position. Check
surrounding area for any
spillage. WARNING: Fire
hazard. Clean up any spilled
fuel before lighting the
burner. See Troubleshooting
page 20 for clean-up
procedure.
9
1500mm [59.1in]
9. Make sure that the Jerry Can
is at least 1500mm [59.1in]
away from the replace before
you ignite the re.
1
3
2
1. Remove the transport locking
strip and position the slider
mechanism setting so the
chamber is fully open.
2. Inspect inside the burner
mouth to ensure it is clean and
clear of any foreign particles.
3. Access the lling point by
ipping the small lid which is
located in the bottom right
corner of the burner.
XL Series:
The XL Series feature a spring
loading cap. It is engineered so
that the Jerry Can spout is fully
enclosed prior to releasing the
fuel supply, thus allowing lling
at a high rate, whilst eliminating
splashing as the fuel is being
decanted.
The XL ame is most visible
when the burner is lled to the
MAX line.
VB2
To ll the VB Series, position the
Jerry Can spout in the middle of
the burner mouth.
5
7