ES300 Installation & Owner’s Manual
7
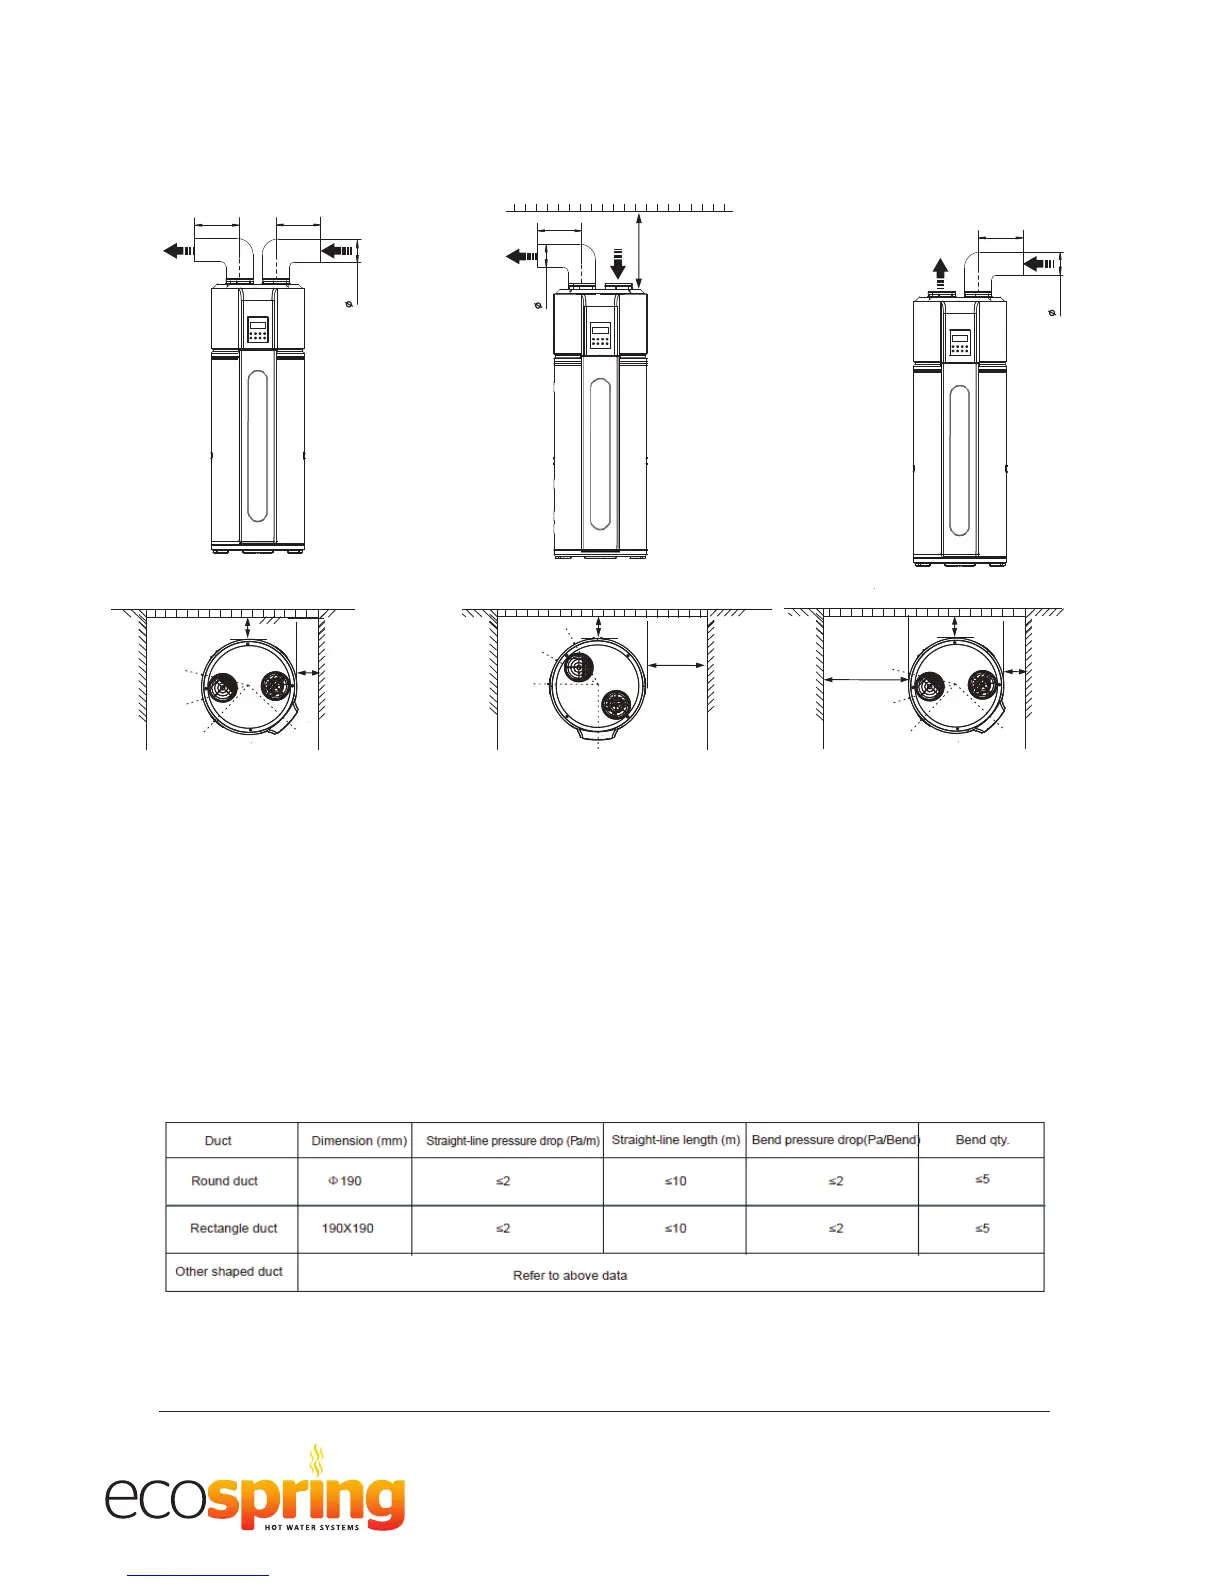
Fig.4-3-2
Display
≥100mm
≥
150mm
Air inletAir outlet
A
B
Fig.4-3-1
Water inlet &
outlet
Anode & Coil
PTR Valve
Display
≥100mm
≥500mm
190mm
Air inlet
Air outlet
A
Fig.4-3-3
Water inlet &
outlet
Anode & Coil
PTR Valve
≥450mm
Fig.4-3-4
Display
≥100mm
≥150mm
190mm
Air inletAir outlet
B
Fig.4-3-5
Fig.4-3-6
Water inlet&
outlet
Anode& Solar
Coil
PTR Valve
≥600mm
4.3 Installation - Indoors
4.3.1 Duct Connections
Air inlet and outlet both connected with ducts.
Installation takes advantage of the warmer
air source and ducts the cold air to other
rooms where required.
A+B≤10m
Air inlet without duct, air outlet connected to duct.
Installation that does not want to have the
cooler air effect the temperature of the room.
A≤10m
Air inlet connected to duct, air outlet without duct.
Installation takes advantage of a warmer
air source and discharges the cold air
into the room.
A≤10m
190mm
4.3.2 Duct Description