Part #1403, 1404, 1405, 1406, 1407, 1409, 1410, 1411, 1412 & 1413
Rev. 3/21/13- QT/mc
Page 1
©2013 Edelbrock LLC
Brochure #63-0061
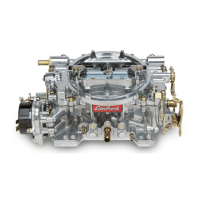
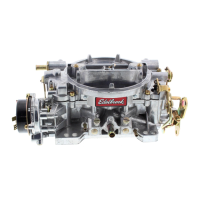
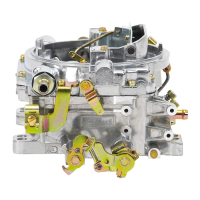
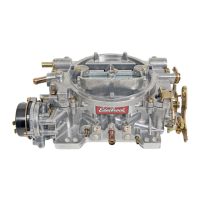
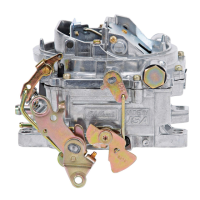
EDELBROCK PERFORMER SERIES CARBURETORS
Part #1403, 1404, 1405, 1406, 1407, 1409, 1410, 1411, 1412 & 1413
INSTALLATION INSTRUCTIONS
®
PLEASE study these instructions carefully before beginning this installation. Most installations can be accomplished with common tools and
procedures. However, you should be familiar with and comfortable working on your vehicle. If you do not feel comfortable performing this installation,
it is recommended to have the installation completed by a qualified mechanic. If you have any questions, please call our Technical Hotline at:
1-800-416-8628, 7:00 am - 5:00 pm, Pacific Standard Time, Monday through Friday.
IMPORTANT NOTE: Proper installation is the responsibility of the installer. Improper installation
will void your warranty and may result in poor performance and engine or vehicle damage.
DESCRIPTION: Edelbrock Performer Series Carburetors have been calibrated, factory flow-tested, and preset. These instructions also apply to
carburetors featuring our EnduraShine™ finish. Please read all instructions prior to installation. These are non-emissions carburetors, check your
local emissions laws.
ATTENTION: EDELBROCK CARBURETORS ARE NOT CALIBRATED FOR OR COMPATIBLE WITH ALCOHOL RACE FUEL OR E85 PUMP FUEL.
USE OF ALCOHOL OR E85 IN YOUR EDELBROCK CARBURETOR WILL DAMAGE YOUR CARBURETOR AND VOID YOUR WARRANTY. THESE
FUELS CAN ALSO DAMAGE OTHER FUEL SYSTEM COMPONENTS, UNLESS SPECIFICALLY DESIGNED FOR USE WITH ALCOHOL FUELS.
NOTE: Edelbrock Performer Series carburetors are not for computer-controlled applications. That includes some 1981 & later GM
vehicles with Q-Jet carburetor and some 1981 & later Ford vehicles with automatic overdrive (AOD) transmissions.
KIT CONTENTS:
q 1 Installation Instruction Sheet
q 1 Warranty Card
q 1 Square-Bore Base Gasket
q 1 Air Horn Gasket
q 1 Air Cleaner Stud
q 1 Red Choke Positive Wire (Electric choke carburetors only)
q 1 Black Choke Ground Wire (Electric choke carburetors only)
q 2 5/32” Vacuum Caps (Except #1409 & 1410)
q 1 5/32” Vacuum Tee (Except #1409 & 1410)
q 1 1/4 NPT Pipe Plug (Except #1409 & 1410)
q 1 Throttle Cable Ball-End Stud - 10-32 x .250”
(Except #1409 & 1410)
q 1 10-32 Hex Nut (Except #1409 & 1410)
q 1 3/16” Internal Star Washer (Except #1409 & 1410)
q 4 5/16” SAE Flat Washers (EnduraShine™ finish only)
q 1 In-line Fuel Filter Kit (#1405 and #1406 Only)
CHECK THE FOLLOWING BEFORE BEGINNING INSTALLATION
WARNING: WHEN WORKING AROUND GASOLINE, ALWAYS WORK IN A WELL VENTILATED AREA AND KEEP ALL OPEN FLAMES, SPARKS, AND
OTHER SOURCES OF IGNITION AWAY FROM THE WORK AREA. FAILURE TO DO SO CAN RESULT IN A FIRE OR EXPLOSION.
q Replace or add an in-line fuel filter. Dirt (i.e. corrosion residue or
other debris) found in carburetor will void your warranty.
q Check and replace the air filter if necessary.
q Check PCV valve and replace if clogged.
q Check all hoses for leaks or cracks and replace if necessary.
q Check fuel pump for proper operation. Replace if necessary.
q Check the intake manifold and cylinder head gaskets for leaks and
replace if necessary.
q Check the ignition system: clean and gap or replace spark plugs,
plug wires, and adjust ignition timing to proper specifications.
PARTS AND TOOLS RECOMMENDED FOR INSTALLATION
q New fuel filter (Edelbrock #8135 or equivalent)
q Chrome Steel Fuel Line Kit #8134 includes fuel filter.
q Banjo Fuel Fitting #8089 (if required for air cleaner clearance).
q New air cleaner (Edelbrock #1221 or #4221 recommended). If
stock or other air cleaner is to be used, check fit on carburetor
before installation to determine if Edelbrock Air Cleaner Spacer
#8092 is required.
q Choke cable kit (manual choke only) or electrical connectors
(electric choke only).
q Throttle, transmission, and cruise control bracket #8031, 8036,
or 8030 (chrome) for 1972-1978 small-block Chevrolet. Other
applications may require modification to original bracket.
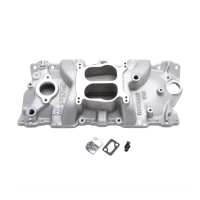
q Divided Square-Bore Heat Insulator Gasket #9266 for dual-plane
(stock or Performer series) manifolds. May be used in place of
Square-Bore Adapter Plate #2732 on some Edelbrock manifolds.
q Throttle Linkage Kits for Ford or Chrysler applications (See
Carburetor PREPARATION, Step #1)
q Carburetor adapter, if carburetor is to be installed on other then
square-bore intake manifold. See steps #4 and #5 for specific part
numbers. Do not use a 4-bbl to 2-bbl adapter (Use Edelbrock carbs
on intake manifolds designed for 4-bbl carburetors only!)
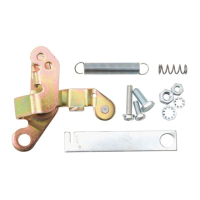
q Universal Throttle Return Spring Kit #8005 (if original return spring
cannot be reused).
q Sockets/wrenches/tubing wrenches
q Pliers
q Hacksaw and/or tubing cutter
q Screwdrivers & Torx driver (for electric choke models)
q Wire crimpers (for electric choke models)
q Test Meter or Test Light (for electric choke models)