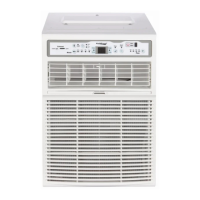
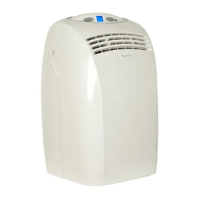
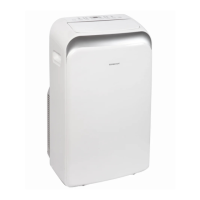
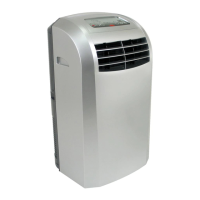
This document describes the Koldfront Casement Window Air Conditioner, model CAC10000W, providing instructions for its installation, operation, and maintenance.
Function Description
The Koldfront Casement Window Air Conditioner is designed for domestic home use to cool and dehumidify a room. It operates on a 115-volt, 60 Hertz, AC-only, 15-Ampere fused electrical supply. The unit is equipped with a Leakage-Current Detection and Interruption (LCDI) safety plug to reduce the risk of fire due to arcing faults in the power supply cord. It offers various operating modes including Auto, Cool, Dry, and Fan, allowing users to select the desired function based on their comfort needs. The unit can also exhaust stale air to the outside when the exhaust control is set to "Open."
Usage Features
The air conditioner can be controlled via a control panel on the unit or a remote control.
- Power On/Off: The unit is turned on or off by pressing the On/Off button on the control panel or remote.
- Temperature Adjustment: Users can set the desired temperature between 62°F (17°C) and 86°F (30°C) using the Left (Decrease) or Right (Increase) buttons. The unit will automatically maintain the selected temperature.
- Fan Speed Adjustment: The fan speed can be adjusted through four settings: Auto, Low, Medium, and High, by pressing the Fan Speed button. In "Dry" mode, the fan speed is automatically set to Low and cannot be adjusted.
- Operating Modes:
- Auto Mode: The unit automatically selects cooling or fan operation based on the selected temperature and current room temperature, maintaining the desired temperature efficiently. Fan speed is automatically set in this mode.
- Cool Mode: The unit cools the room to maintain the desired set temperature. Users can adjust the temperature and fan speed.
- Dry Mode: The unit operates as a dehumidifier, with some cooling occurring. The fan runs at Low speed, which is not adjustable.
- Fan Mode: This mode is used for room circulation or to exhaust air (with the vent open) when cooling is not desired. Users can choose any fan speed, but the set temperature cannot be adjusted. The display shows the actual room temperature.
- Digital Display: The display shows the set temperature in Celsius or Fahrenheit in most modes. In Fan Only mode, it shows the ambient room temperature. To switch between °F and °C, press both the Left and Right buttons simultaneously for 3 seconds.
- Energy Saver Feature: Available in Auto, Cool, and Dry modes, this feature helps save energy. The fan runs for three minutes after the compressor shuts off, then cycles on for two minutes at ten-minute intervals until the room temperature rises above the set temperature, at which point cooling resumes. The fan speed can be adjusted in this mode.
- Timer (Auto Start/Stop) Feature: Users can program the unit to automatically start or stop after a set period. The Auto Start program is initiated when the unit is off, and Auto Stop when it is on. The time can be adjusted in 1½-hour increments up to 10 hours, and then 1-hour increments up to 24 hours. Turning the unit on or off or setting the timer to 0.0 cancels the program.
- Sleep Feature: Available in Auto or Cool modes, this feature gradually increases the selected temperature by 2°F (1°C) after 30 minutes, and again after another 30 minutes. This new temperature is maintained for six hours before returning to the original setting. It can be canceled by pressing the Sleep button again.
- Air Directional Louvers: The 4-way louvers allow users to direct airflow up, down, left, and right to distribute air throughout the room.
- Exhaust Control: This control allows the air conditioner to either circulate inside air (Closed, for maximum cooling) or exhaust stale air to the outside (Open).
- Remote Control: The remote control provides convenient access to change modes, fan speed, timer, and temperature settings, and to set sleep mode. It uses a CR2025 3V battery. The remote should be used within 16 feet (5m) of the unit and kept away from direct sunlight.
Maintenance Features
Regular maintenance is crucial for maximizing performance, efficiency, and prolonging the unit's life. Always unplug the air conditioner before cleaning.
- Air Filter Cleaning: The air filter should be checked at least once a month. A "Filter Check" LED light illuminates after 250 hours of operation as a reminder. To clean, push the vent handle to "vent closed," grasp the filter, pull it out, wash it with liquid dishwashing detergent and warm water, rinse thoroughly, gently shake off excess water, and ensure it is completely dry before replacing. Alternatively, the filter can be cleaned with a vacuum. Never use hot water over 104°F (40°C) or operate the unit without the air filter. After cleaning, press the Filter Check button to reset the indicator light.
- Cabinet Cleaning: To clean the cabinet and front, unplug the unit. Dust with an oil-free cloth or wash with a cloth dampened in a solution of warm water and mild dishwashing detergent. Rinse thoroughly and wipe dry. Avoid harsh cleaners, wax, or polish. Wring excess water from the cloth before wiping around the controls to prevent damage.
- Winter Storage: If storing the unit during winter, remove it carefully according to installation instructions. Clean it thoroughly, cover it with plastic, or return it to its original carton. Store the unit upright in a cool, dry location.
- Troubleshooting: The manual includes a troubleshooting guide to help resolve common issues such as the unit not functioning, air not feeling cold enough, ice forming on the cooling coil, frequent on/off cycling, noise, water dripping, and inability to adjust temperature. It also lists error codes for room temperature sensor (AS) and evaporator temperature sensor (E1), advising users to turn the unit off and on to clear the code, or visit the support website if the issue persists. In Fan mode, sensor errors display "LO" or "HI."
- Energy Saving Guide: Tips include not covering the air outlet, using the timer to pre-cool the room, minimizing heat sources, closing windows and doors, using the unit in a contained room, ensuring no air gaps, minimizing humidity, waiting at least 3 minutes before restarting the compressor, and regularly cleaning air filters.