2 / 5 P/N 387040P-EN • REV 013 • ISS 20SEP17
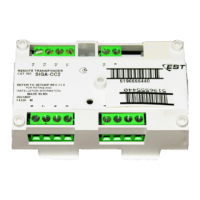
Figure 1: Installing the SIGA-CC2 module
(1) Compatible electrical box
(3) SIGA-CC2 module
(3) Wall plate
(5) #6-32 × 5/8 machine screw
(4X)
(6) #4 × 1/2 self-tapping screw
Protection from transient spikes
For installations in which the output circuit connects to
electromechanical bells or horns, install a bipolar transient
protector (P/N 235196P) to protect the module from transient
spikes caused by switching inductive loads. Locate bells and
horns at least 6 ft. (1.8 m) from the module.
To install a bipolar transient protector:
1. Install the transient protector across the output circuit
inside the electrical box with the module. See Figure 2.
Figure 2: Bell circuit showing bipolar transient protector
placement
Wiring
Wire this device in accordance with applicable national and
local codes, ordinances, and regulations.
General wiring notes
• Refer to the Signature loop controller installation sheet for
SLC wiring specifications.
• Each terminal on the module is limited to a single
conductor.
• Test resistors are supplied with the SIGA-CC2 to prevent
trouble signals on unused circuits during installation.
When connecting field wires, remove the test resistors and
install a UL/ULC Listed 47 kΩEOLR at the end of the
circuit.
• The module does not support conventional smoke
detectors.
Riser wiring notes
• For maximum line impedance, refer to the installation
manual for the fire alarm panel. Maximum circuit
capacitance is 0.1 µF.
• If the riser is used for more than one notification zone,
install in accordance with the survivability from attack by
fire requirements in NFPA 72 National Fire Alarm and
Signaling Code.
• The SIGA-CC2 module does not supervise the riser; the
fire alarm control panel provides this function.
To wire the module:
1. Verify that all field wiring is free of opens, shorts, and
ground faults.
2. Strip 1/4 in. (about 6 mm) from the ends of all wires that
connect to the terminal block of the module.
When stripping wire ends, exposing more wire may cause
a ground fault; exposing less wire may result in a faulty
connection.
3. Connect the field wires. See Figure 3 and Figure 4.

 Loading...