7.4 SOLAR PANEL INSTALLATION
The solar panels should be installed in the “portrait” orientation with the top and bottom of each
panel extending above and below the top and bottom rack rail, respectively, (i.e. the top and bottom
of the panels should overlap the rack rails the same amount so that the panels are approximately
centered top-to-bottom on the rack rails).
Step 1: Using the team-lift technique, center the solar panel on the upper and lower rack rails. While
the panel is held in place, install two end clamps on the side of the panel as described below.
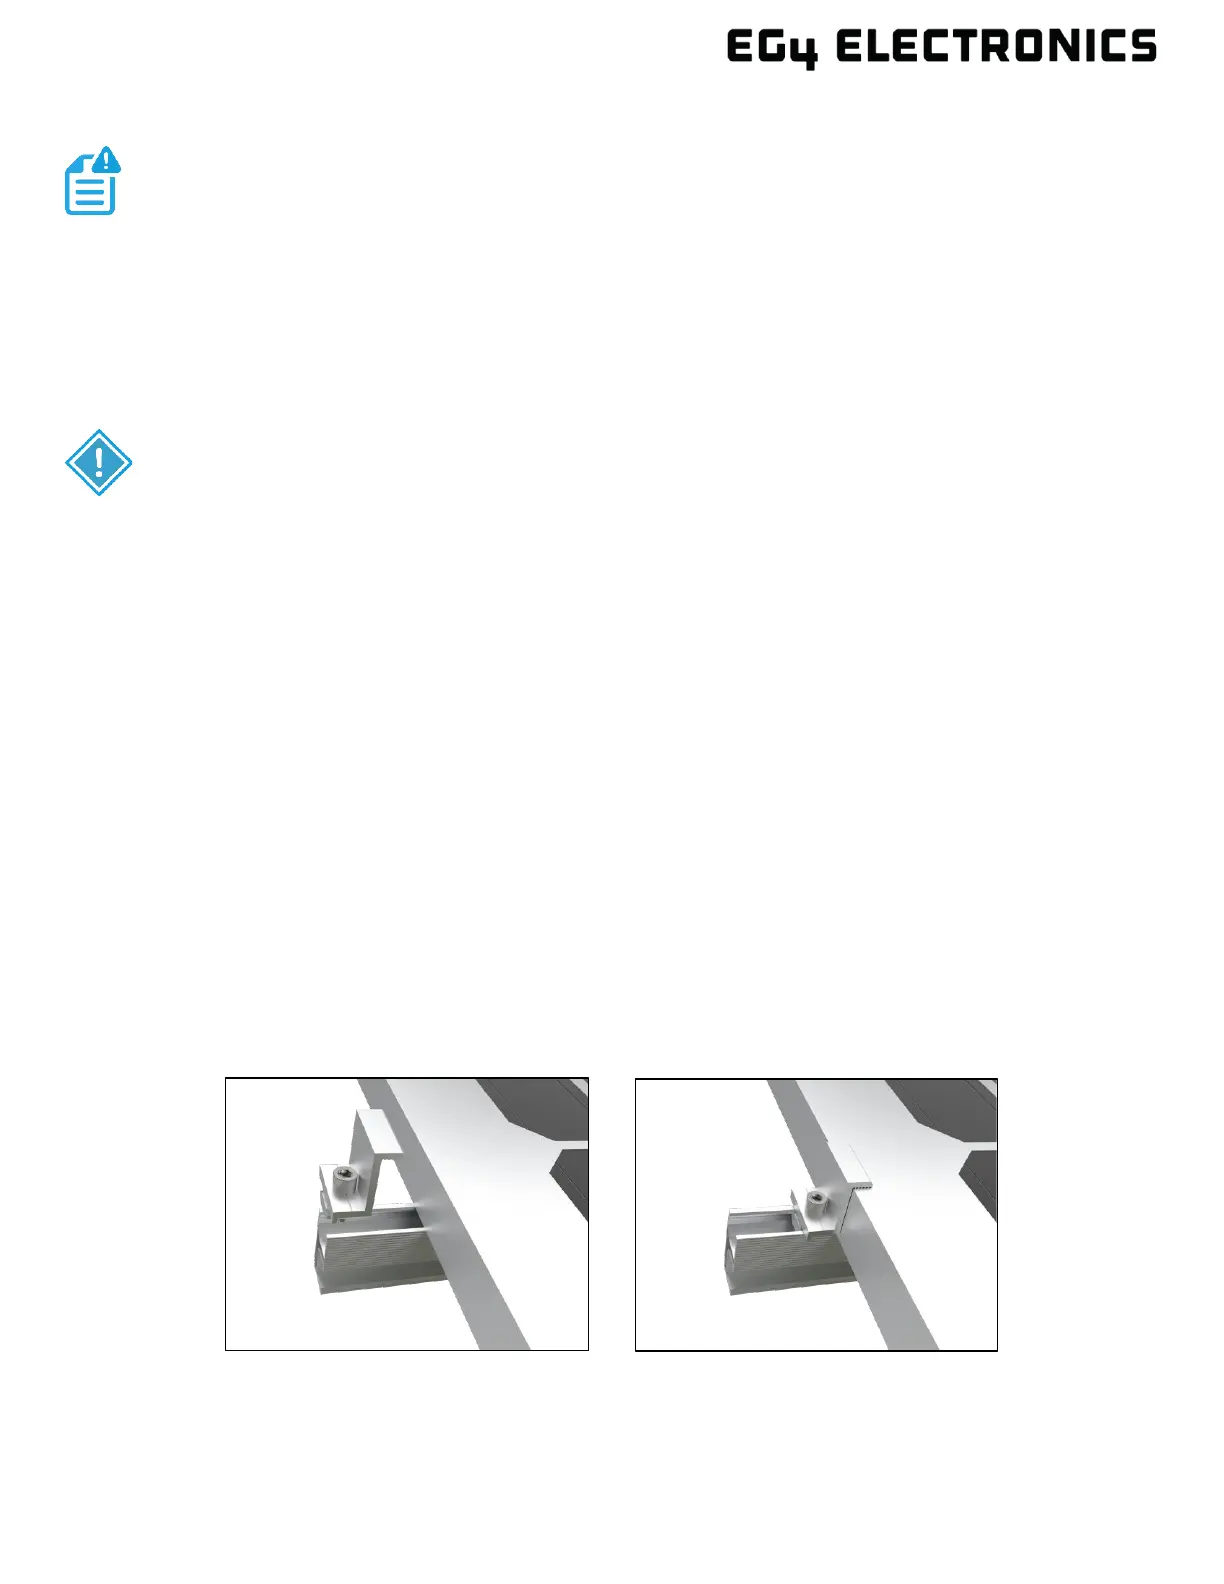
a) Referencing the following figure, insert the end clamps into the end of both rack rails.
b) Push the end clamp against the solar panel so that the top of the end clamp overlaps the top
of the solar panel, and the body of the clamp is flush against the side of the solar panel.
c) Tighten the end clamp fasteners, but do not apply torque until all clamps and panels are
installed.
NOTE:
The unit ships with four end clamps each of the following sizes to
accommodate varying panel thicknesses: 1.38 in. (35 mm), 1.18 in. (30 mm) and
1.57 in. (40 mm).
IMPORTANT:
• These instructions describe solar panel installation with panels in the “portrait”
orientation.
• There are three different sized end clamps: 1.18, 1.38, and 1.57 in. (30, 35, and 40 mm).
Ensure the end clamps used are properly sized for the solar panels being installed.
• Panels mounted on the ends of the EG4
®
BrightMount Adjustable Cat1 will require two
end clamps and two mid clamps.
• Panels mounted between other panels will require four mid clamps.
• Mid clamps are shared between adjacent panels and can be adjusted to accommodate
panel thicknesses of 1.18, 1.38. and 1.57 in. (30, 35, and 40 mm).
• Mid clamps require a grounding clip.
• End clamps do not require a grounding clip.