GRASS BAGGER KIT — ABK52008
8. Push the deck sideways and remove it from under the mower
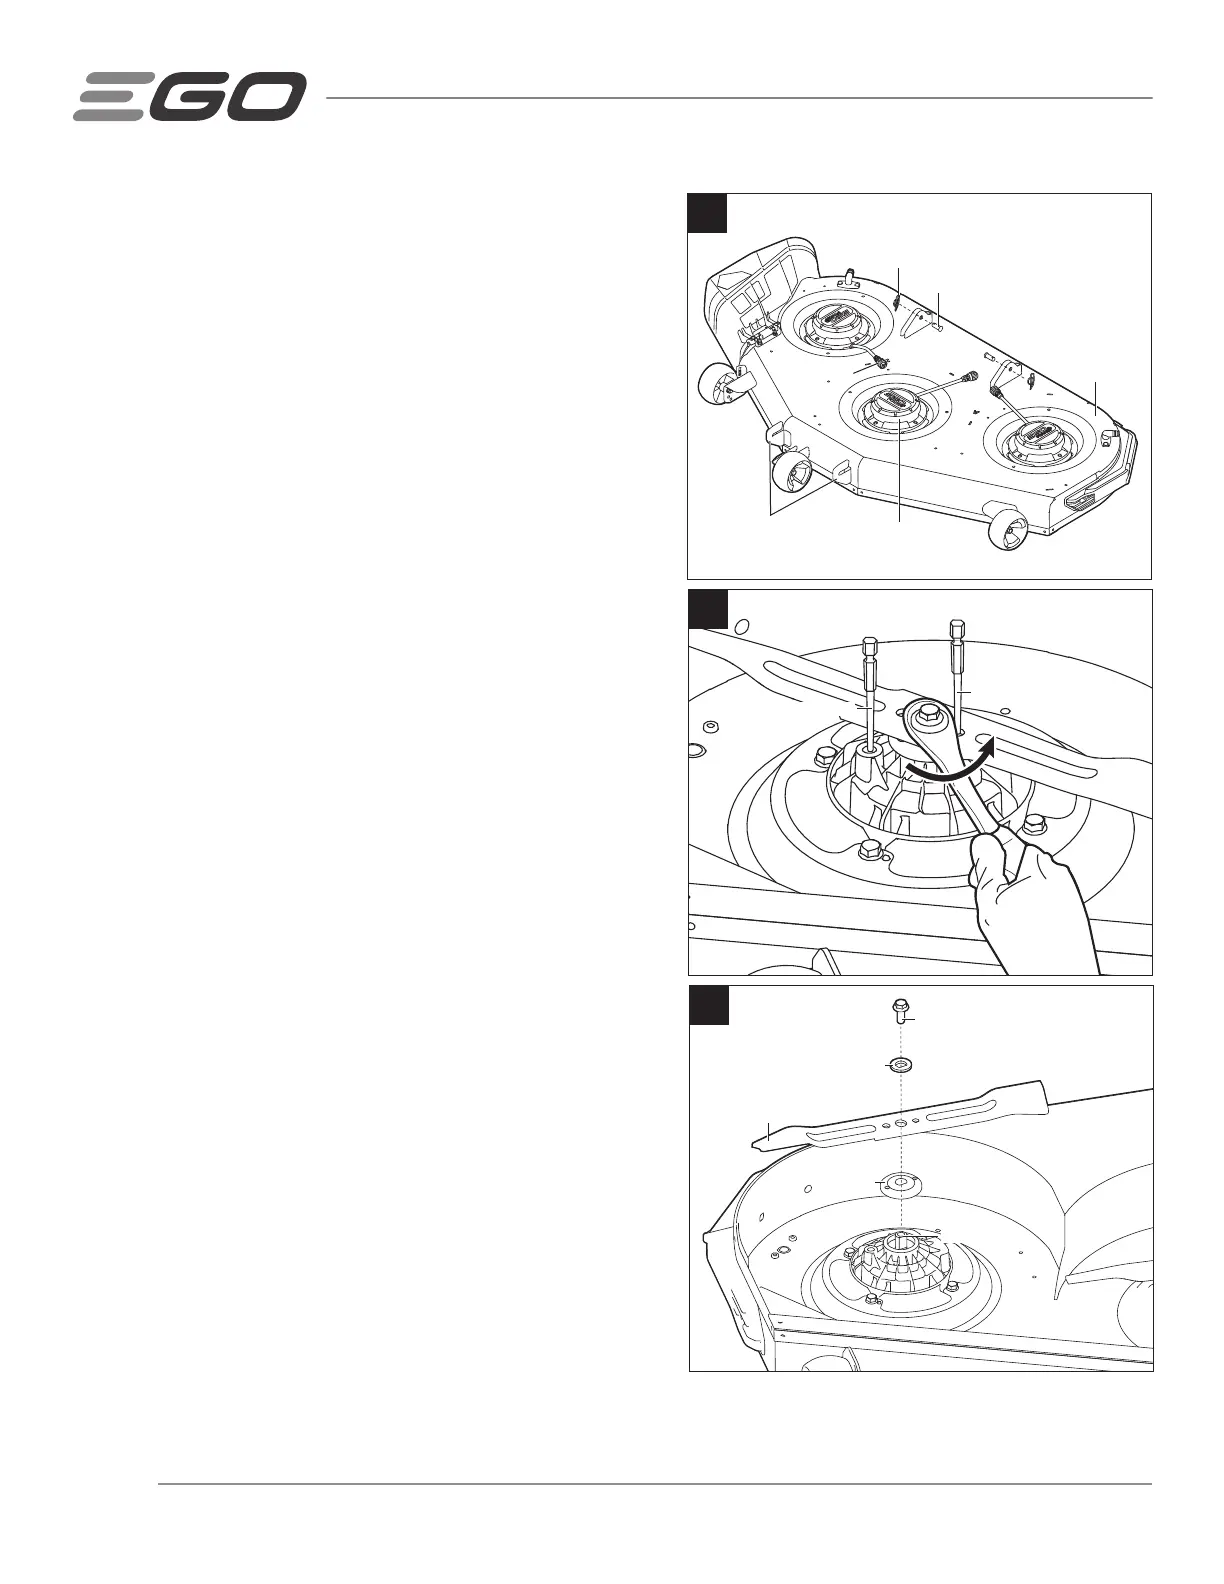
(Fig. 2).
9. Flip the deck on the ground so that the blades face upward.
10. While wearing protective gloves, place a screwdriver or metal
rod with diameter less than 5/16 in (8 mm) into the fixing
hole in the motor to act as a stabilizer. Place another metal
rod with diameter less than 1/4 in (6.35 mm) (e.g., a bit) into
the aligned hole in the blade and the flange to act as another
stabilizer (Fig. 3).
11. Use a 9/16 in (14mm) adjustable wrench or socket wrench (not
included) to turn the blade bolt counterclockwise to loosen it
(Fig. 3).
12. While wearing protective gloves, remove the bolt, washer and
the blade (Fig. 4). The flange can be left on the motor shaft.
13. Repeat the steps with the other two blades.
To Install the Bagging Blades
NOTE:
For best cutting performance we recommend the bagging
blades are used in conjunction with the grass bagger.
NOTICE:
To install the bagging blades, make sure that all parts are
replaced in the exact order in which they are removed (Fig. 4).
1. If the flange is removed during blade removal, align it with the
motor shaft first and then assemble it into place.
2
Deck
Deck Hook
Blade Motor
Motor Cable
Cotter Pin
Shaft Pin
3
Stabilizer 1
Stabilizer 2
Bolt
Washer
Flange
4
Motor Shaft
Blade
 Loading...