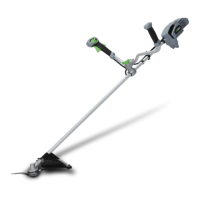
56 VOLT LITHIUM-ION COMMERCIAL BRUSHCUTTER — BCX4500
19
GENERAL MAINTENANCE
Avoid using solvents when cleaning plastic parts. Most
plastics are susceptible to damage from various types of
commercial solvents and may be damaged by their use.
Use a clean cloth to remove dirt, dust, oil, grease, etc.
WARNING: When cleaning the machine, DO NOT
immerse it in water or other liquids.
CLEANING
◾ Remove the battery pack.
◾ After each use, clean the debris, clogged soil, grass
on the blade or the guard, or the grass that may have
wrapped itself around the motor shaft or trimmer head
with a soft brush.
◾ Wipe the machine surface with a clean cloth moistened
with a mild soap solution.
◾ Use a small brush or a vacuum cleaner to clean the air
vents on the rear housing. Keep the air vents free of
obstructions.
◾ Do not use any strong detergents on the plastic
housing or the handle. They can be damaged by
certain aromatic oils, such as pine and lemon, and by
solvents such as kerosene. Moisture can also cause
an electric shock hazard. Wipe off any moisture with a
soft dry cloth.
When the blade becomes dull or both edges of the blade
are dull, please have it sharpened by a qualified service
technician or replace it with a new one if necessary.
REPLACING THE BLADE
WARNING: A worn, cracked, or damaged blade
can break and pieces of the damaged blade can become
dangerous projectiles. Thrown objects can cause serious
injury. Inspect the blade regularly and do not operate the
brushcutter with a worn or damaged blade.
Use proper eye protection while removing, sharpening,
and installing the blade.
To remove the blade
1. Remove the battery pack.
2. Rotate the outer flange to align the slot in the inner
flange with the shaft-locking hole in the gear case
and insert the included hex key into the aligned holes
to act as a stabilizer described in steps 2 and 3 in
“MOUNTING THE BLADE” section.
3. Position the gear case against a solid surface for
support. Use one hand to grasp the blade and the
other hand to loosen the nut in the direction of the
arrow marked on the outer flange, using the included
multi-function wrench. Remove the nut and the outer
flange and save them for reassembly (Fig.M).
4. Check and replace the inner flange and the flange
cover if they are worn.
5. Install the new blade onto the motor shaft in the
order shown in Fig. N. For instructions, follow steps
5 – 7 in “MOUNTING THE BLADE” section.
LUBRICATING THE DRIVE GEAR
For best operation and longer lifetime, lubricate the
brushcutter drive gear with a special grease as described
below after every 50 hours of operation.
There are two sealing screws: one on the gear case
(Fig. O1) and the other on the power head (Fig. O2).
Remove them with the provided hex key and follow the
steps below to apply up to 5 ml of grease into the oil hole
(Fig. O).
DO NOT FULLY FILL THE GEAR CASE WITH THE
GREASE.
1. Lay the brushcutter on its side so that the sealing
screw to be removed is facing upwards (Fig. O1 &
O2).
2. Use the included hex key to loosen and remove the
sealing screw.
3. Use a grease gun (not included) to inject some grease
into the oil hole; do not exceed 3/4 capacity.
4. Tighten the sealing screw(s) after injection.
The grease should meet the following requirements:
◾ NLGI Grade Penetration: NLGI-1
◾ Thickener Type: Ester
◾ Recommended Operating Temperature Range: -40°C
to 180°C
◾ Other than the above, the grease should also have
excellent low-temperature startup, EP, mechanical
shearing, abrasion resistance and oxidative stability
properties.
TRANSPORTING AND STORING
◾ If the 3-tooth blade is installed, always place its
sheath on the blade before storing or transporting the
machine. Use caution to avoid the sharp teeth of the
blade (Fig. P).
◾ Clean the machine thoroughly before storing it.
 Loading...