7. Carefully line up the Alarm on the base, gently
SUHVV KRPH WZLVW RQ ± VHH ILJXUH 7KLV
FRQQHFWVWKHEDWWHULHV7KH UHG DPEHUJUHHQ
lights will immediately flash in sequence to show
they are working. In addition, the icons on the LCD
display on the Display models will briefly light up.
3UHVV WKH 7HVW EXWWRQ DIWHU VHFRQGV WR
HQVXUHWKDWWKH$ODUPZRUNVVHHILJXUH
9. The Power light is not illuminated during
standby. This light will flash green when the test
button is pressed to indicate that power is present
and Alarm is functioning.
10. Install all the other Alarms similarly.
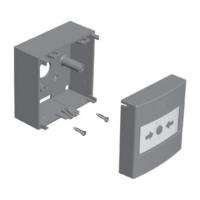
4.2 How to Tamperproof the Alarm
7KH$ODUPFDQEHPDGHUHVLVWDQWWRXQDXWKRULVHGUHPRYDO%UHDNRIIWKHVPDOOSLOODU
on the base as shown in figure 6a. To remove the Alarm from the ceiling it is now
QHFHVVDU\WRXVHD VPDOOVFUHZGULYHUVHHILJXUHE WR UHOHDVH WKHFDWFKSXVK
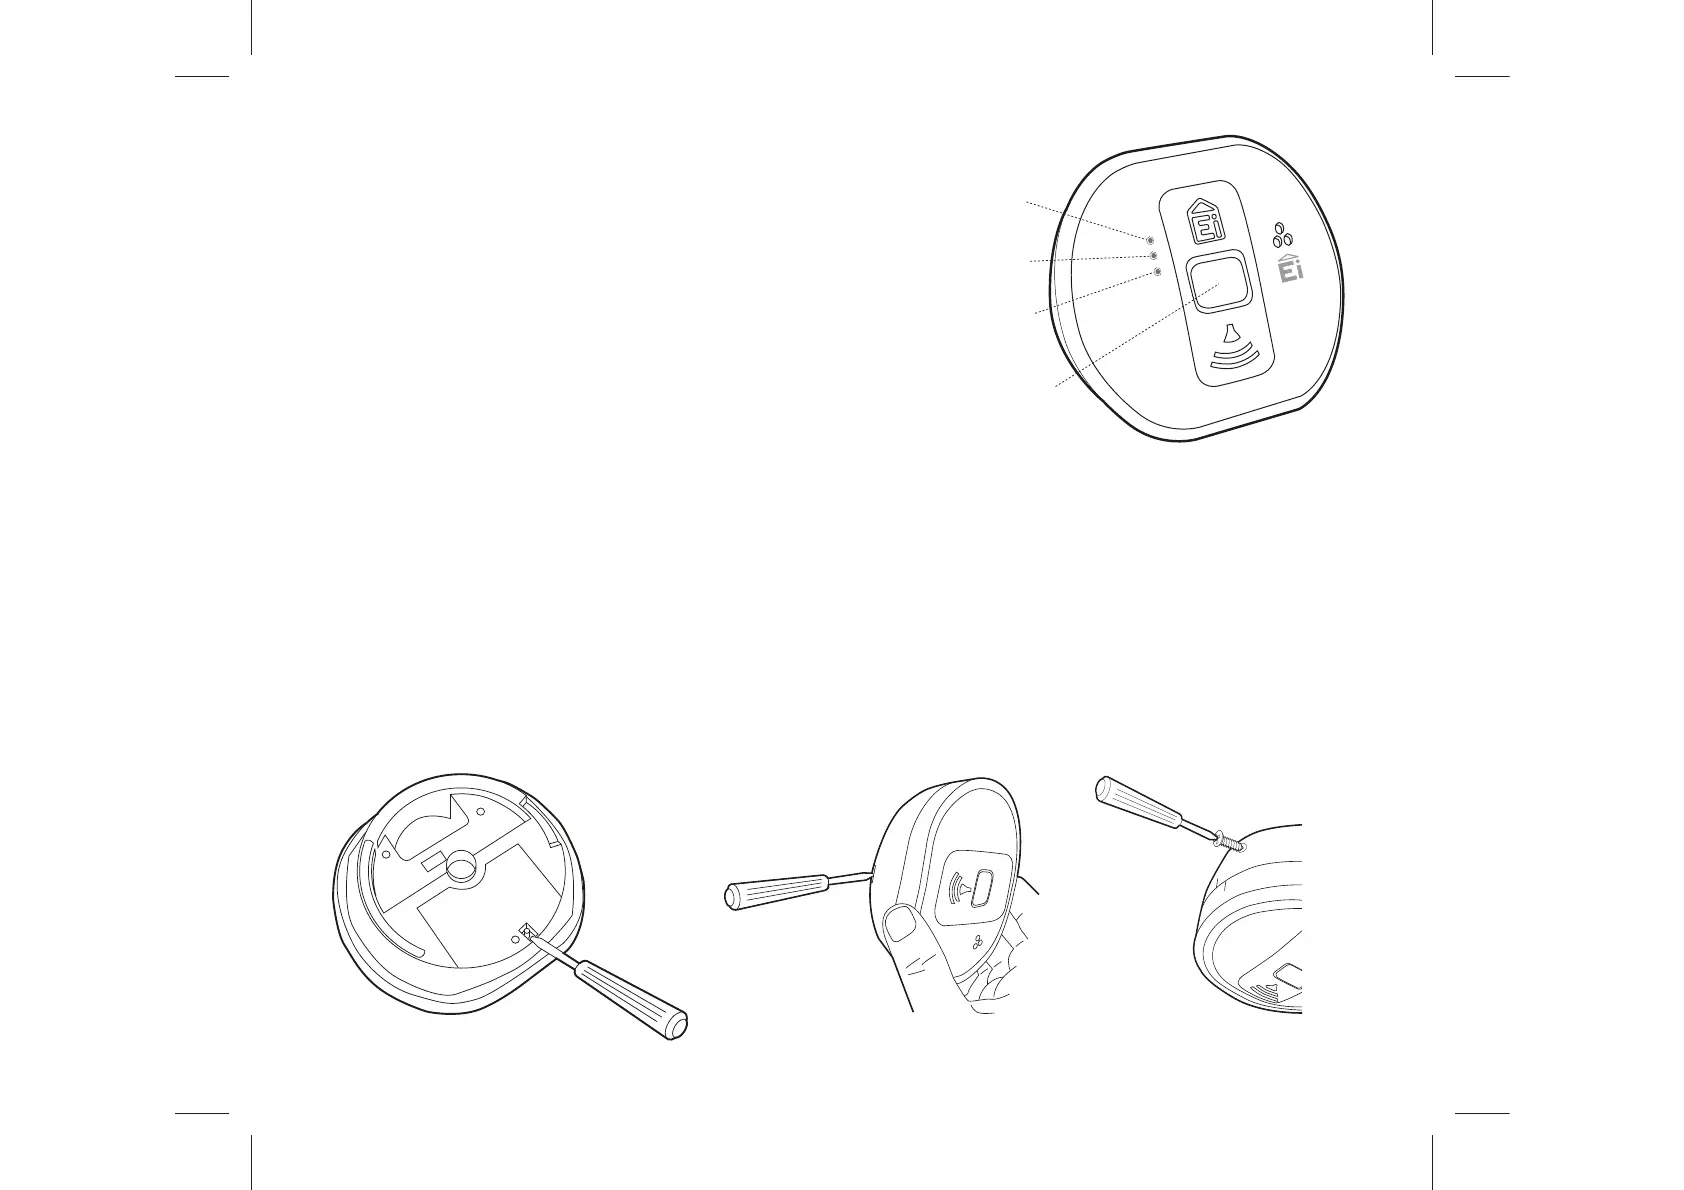
CARBON
MONOXID
E
ALARM
ALARM
FAULT
POWER
Red
Light
Amber
Light
Green
Light
Test
Button
Figure 5
Figure 6a Figure 6b Figure 7
17