24
Tamperproofing the Alarms
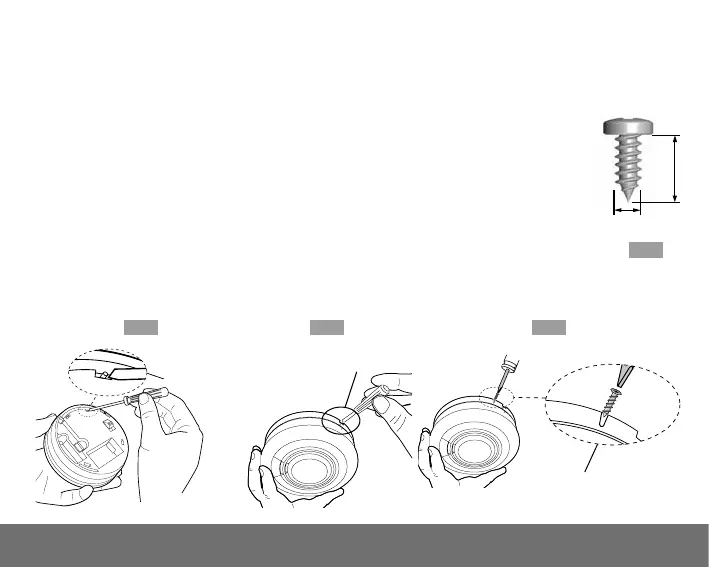
The Alarm can be made tamperproof to prevent unauthorised removal.
Break off the small pillar on the back of the Alarm as shown in figure 9a.
To remove the Alarm from the ceiling it is now necessary to use a small screwdriver. To
release the Alarm, push the catch towards the ceiling and then twist off (see figure 9b).
If necessary, it is possible to further secure the Alarm by using a No. 2 or No. 4 (2 to
3 mm diameter – not supplied) self tapping screw 6 to 8mm long (see figure 9d), to
firmly lock the Alarm and its mounting plate together (see figure 9c).
First, attach the Alarm to the mounting plate.
Line up the screw (not supplied) on the “U” shaped recessed area shown in figure 9c
and screw firmly home. To remove the Alarm from the ceiling, remove the screw first, and
then twist off anti-clockwise.
BREAK OFF
SMALL PILLAR
PUSH UP CATCH & TWIST
ALARM ANTI-CLOCKWISE TO REMOVE
TAMPERPROOF SCREW
6 to 8 mm
2 to 3 mm
SELF TAPPING
SCREW
Fig.9a Fig.9b Fig.9c
Fig.9d