GB
- 19 -
Caution!
It must be impossible for the cable and the coo-
ling water hose to get into the cutting area.
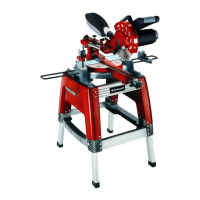
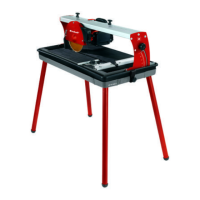
6. Operation
6.1 ON/OFF switch (Fig. 7)
•
To switch on, press the “I” on the ON/OFF
switch (16).
•
Before you begin cutting, wait until the cutting
wheel has reached maximum speed and the
cooling water pump (13) has started supply-
ing the cutting wheel with water.
•
To switch off, press the “0” on the switch (16).
6.2 90° Cutting (Fig. 8/9)
•
Loosen the star grip screw (27).
•
Set the angle stop (5) to 90° and retighten the
star grip screw (27).
•
Retighten the screws (28) to fasten the angle
stop (5).
•
Move the machine head (29) to the far end
with the handle (9).
•
Position the tile against the rail fence (6) on
the angle stop (5).
•
Switch on the tile cutting machine.
•
Caution: Always wait until the cooling water
has reached the cutting wheel (2) first.
•
Move the machine head (29) slowly and
smoothly forward through the tile with the
handle (9).
•
Switch off the tile cutting machine after com-
pletion of cutting.
6.3 45° Diagonal cut (Fig. 10)
•
Set the angle stop (5) to 45°.
•
Cut as described in 6.2.
6.4 45° Lengthwise cut, “jolly cut” (Fig.11)
•
Loosen the star grip screw (10).
•
Tilt the guide rail (7) to the left to 45° on the
angle scale (17).
•
Retighten the star grip screw (10).
•
Cut as described in 6.2.
6.5 Changing the diamond cutting wheel
(Fig. 12/13)
•
Pull out the power plug.
•
Unscrew the four screws (35) and remove the
safety hood (8) for the blade.
•
Using the wrench (34), loosen the flange nut
in the direction of rotation of the cutting wheel
(2). (Caution: Left-hand screw-thread.) To do
so, place the wrench (31) on the motor shaft
and apply counterpressure.
•
Remove the outer flange (36) and cutting
wheel (2).
•
Clean the mounting flange thoroughly before
fitting the new cutting wheel.
•
Fit the new cutting wheel by following the
above procedures in reverse and then tighten.
•
Caution: Pay attention to the direction of rota-
tion of the cutting wheel!
•
Mount the safety hood (8) for the blade again.
6.6 Operating the laser (Fig. 14-18)
6.6.1 Stationary operation (Fig. 14/15)
To switch on: Move the ON/OFF switch (46) to
the “I” position.
To switch off : Move the ON/OFF switch (46) to
the “0” position.
Switch on the laser (45). A laser line is projected
onto the material you wish to process, providing
an exact guide for the cut. You can additionally ad-
just the laser with the screw (47). To do so, undo
the screw (47) by a few turns. The laser (45) can
now be moved and adjusted vertically and hori-
zontally on the adapter (48). Tighten screw (47)
again when you are satisfi ed with the adjustment.
6.6.2 Use as a laser level unit (Fig. 14-17)
Remove the screw (47). The laser (45) can now
be taken off the adapter (48) and used as an ex-
ternal laser level unit. The laser (45) is equipped
with two spirit levels (49) and can therefore be
adjusted both horizontally and vertically. The base
plate (50) of the laser is magnetic, enabling it to
be secured on suitable surfaces.
See Figures 16 and 17 for two examples of use.
6.6.3 Replacing the battery
Unscrew the 4 screws (51) and remove the base
plate (50). Take out the old batteries and replace
with new ones. Then screw the base plate (50)
back on.
7. Replacing the power cable
If the power cable for this equipment is damaged,
it must be replaced by the manufacturer or its
after-sales service or similarly trained personnel
to avoid danger.
Anl_RT_TC_520_U_SPK1.indb 19Anl_RT_TC_520_U_SPK1.indb 19 30.08.12 12:5430.08.12 12:54