SMARTASH 10 D-044 Rev 008
www.elastec.com
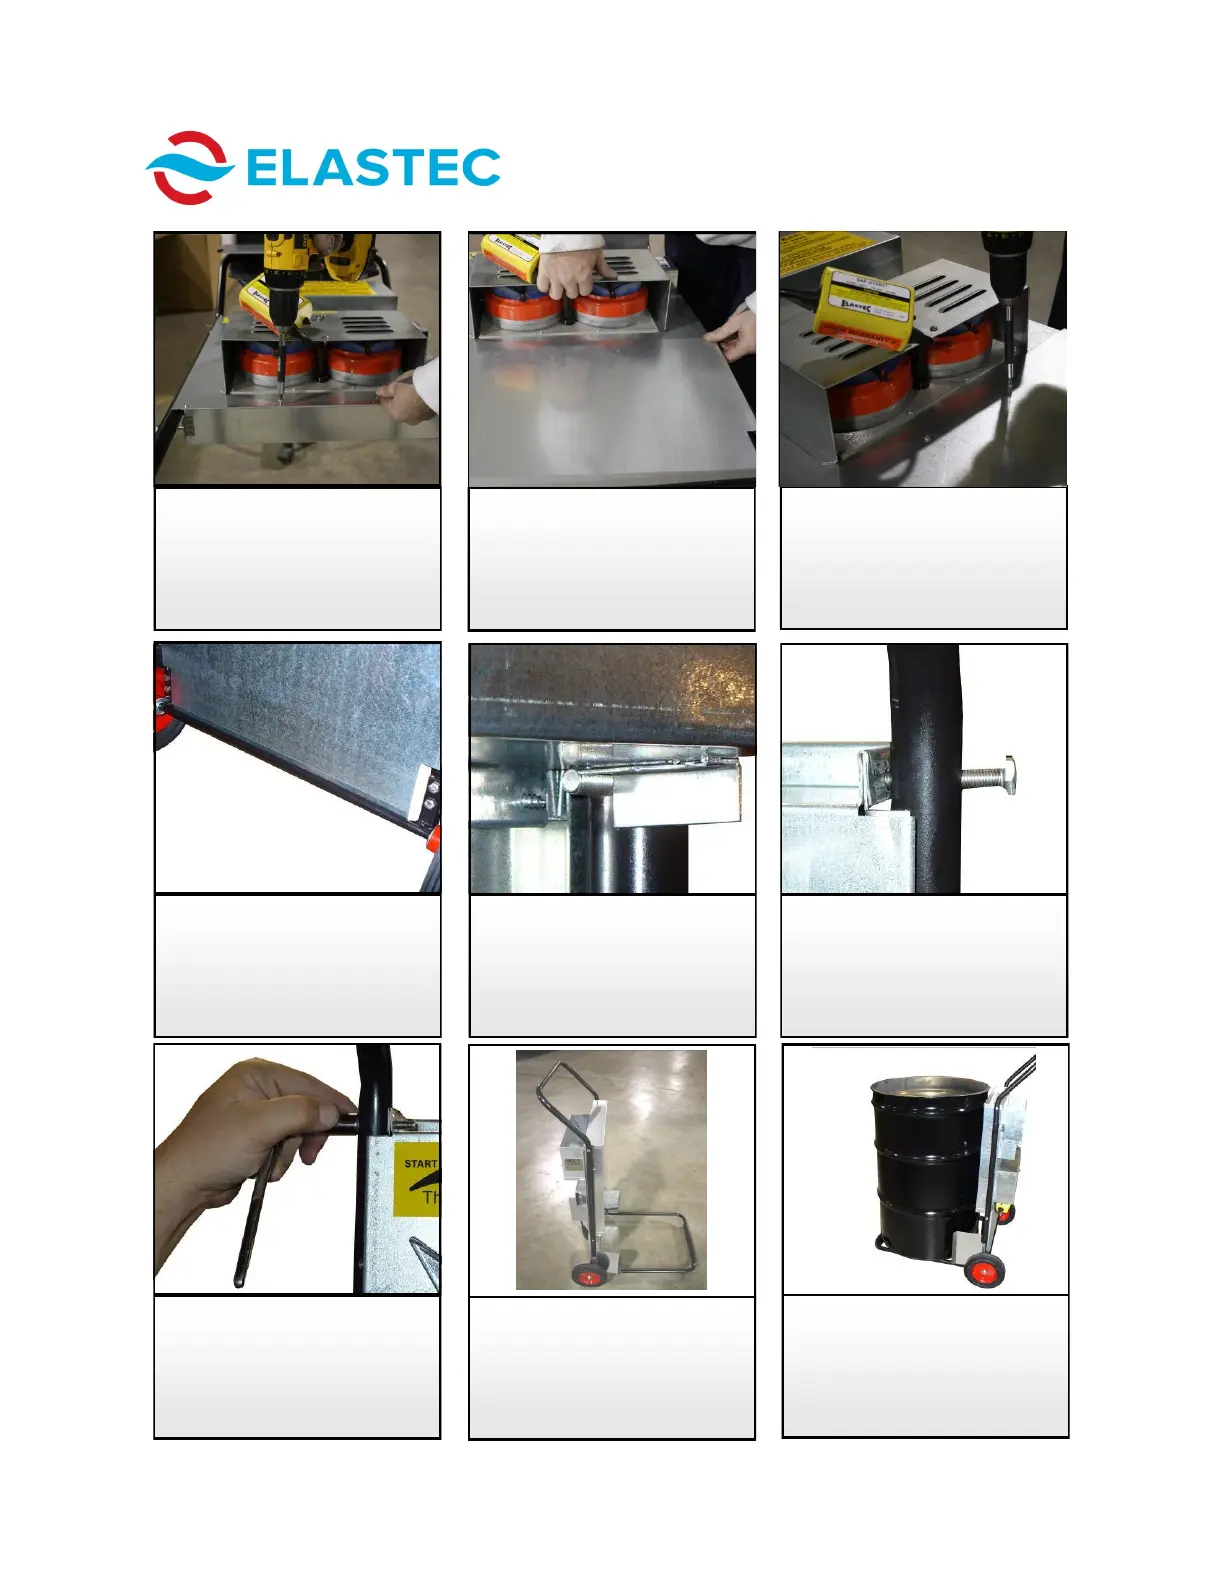
SmartAsh ASSEMBLY
23. Plenum should rest on
screws in lower side rails
as shown.
22. Ensure that bottom shield
is in front of axle.
24. Install 1/4” bolt into
upper-most portion in
each side rail. Ensure that
bolt goes through plenum
mounting hole. Tighten.
25. Repeat Steps 23 and 24
on other side.
27. Set open head drum onto
cart.
20. Lift plenum and align
bottom shield with two
holes in the plenum from
which the two screws
have just been removed.
21. Ensure that mounting
holes are lined up and
attach plenum to bottom
shield, using two new
screws.
19. Place plenum between
side rails. This is a tight
fit. Remove two screws at
bottom of plenum.
26. Assembly of cart is now
complete.