www.elcometer.com
en-15
R
7 PREPARING FOR TEST (continued)
7.3 CHECK THE CABLE CONNECTIONS
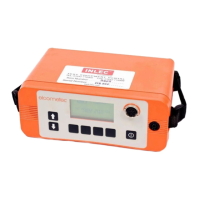
1 Press the On/Off button to switch the instrument on.
2 Reduce the voltage setting to the minimum value, see Section 9
‘Setting the Probe Handle Voltage’ on page en-17.
3 Reduce the current setting to the minimum value, see Section 10
‘Setting the Sensitivity’ on page en-19.
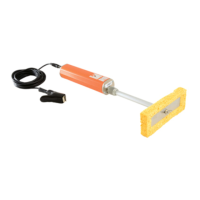
4 Hold the high voltage probe handle firmly with the probe in free
air and press the button on the handle to switch on.
5 Touch the probe against the bare substrate and check that the
instrument signals a flaw.
(a) If the instrument signals a flaw then the instrument is
operating correctly and is ready to use for testing.
(b) If the instrument does not signal a flaw check all connections
and try again. If you are still unable to get the instrument to
signal a flaw, contact Elcometer or your local Elcometer
supplier for advice.
6 When finished, press the button on the probe handle to switch off.
7.4 SET THE PROBE HANDLE VOLTAGE
See Section 9 ‘Setting the Probe Handle Voltage’ on page en-17.
7.5 SET THE SENSITIVITY
See Section 10 ‘Setting the Sensitivity’ on page en-19.
7.6 CHECK FOR CORRECT OPERATION
1 Either find or make a flaw in the coating.
2 Using the procedure outlined in Section 8 ‘Test Procedure’ on
page en-16, test that the flaw can be detected.
3 If the flaw is not detected, confirm that all the preceding steps
have been undertaken correctly and check again.
4 If the flaw is still not detected, contact Elcometer or your local
Elcometer supplier for advice.