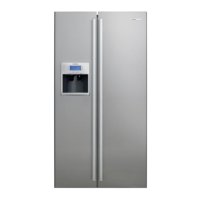
Page 33 RESI219
PARTS REMOVAL & REPLACEMENT (FOR INFORMATION ONLY, MOST INDIVIDUAL
PARTS NOT AVAILABLE)
First, disconnect the refrigerator service cord from the power supply. If the refrigerator is operating
and cold, allow the ice maker to warm up to room temperature before removing the front cover. This
prevents moisture from condensing on the metal components.
To Remove & Replace the Front Cover
1. Be sure the ice maker is at room temperature before removing the cover.
2. Remove the screw securing the front cover.
3. Hinge the cover from the top to disengage the lug at the centre bottom of the cover.
4. Replace in reverse order.
To Remove & Replace Fill Trough
1. Push the trough retaining tab back, towards the mould
2. Push the trough upwards.
3. Replace in the reverse order.
To Remove & Replace Ejector Blades
1. Remove the screw and washer that retain the timing gear. Remove the timing gear.
2. Turn the blades to the 12 o’clock position.
3. Remove the screw that secures the signal arm bracket and bearing.
4. Remove the bracket and bearing.
5. Force the blades back and up to disengage from the motor coupling.
6. Replace in reverse order, noting that the blades lock in the motor coupling at the 12 o’clock
position.
7. Lubricate bearing ends at the ejector with Silicone grease.
To Remove & Replace Ice Stripper
1. Remove the ice maker from the refrigerator.
2. Pull the ice stripper in the centre away from the mould until it disengages from the mould support
housing
3. Move the ice stripper backwards, to disengage it from the pin on the rear of the mould.
4. Replace in the reverse order.
To Remove & Replace Motor and Switch Mounting Plate
1. Remove the front cover.
2. Remove the three screws that attach the mounting plate to the support housing.
3. Carefully remove the mounting plate.
4. Transfer the motor, switches, cam, gear and the water fill adjusting spring and arm to the
replacement mounting plate
5. Attach the new mounting plate to the support housing. Be sure the wiring harness is properly
positioned.
6. Check the water fill cycle and adjust as required.